7 Set Up Sensor
To be able to use the sensor for your measurement, you must set up the
system completely according to the sensor configuration. This also
includes the application software supplied by GOM.
Steps required for the complete setup of the sensor:
•
Equip the cameras with the respective camera lenses which are
required for the measuring volume.
•
Adjust the measuring distance between the measuring object and the
sensor. Switch on the laser pointer.
•
Adjust the slider distance between the cameras symmetrically to the
center of the camera support. If your measuring system is equipped
with a laser pointer, the laser pointer is located in the middle between
the cameras.
•
Adjust the camera tilt angle using the live views.
•
Remove the polarizing filters (if available) from the camera lenses.
•
Adjust the focus of the camera lenses.
•
Adjust the aperture of the camera lenses.
•
Attach the polarizing filters on the respective camera lenses (optional).
•
Adjust the polarizing filters of the cameras and the illumination, if
available.
Info
To be able to use the sensor for your measurement, the camera angle is
preadjusted to 25°. If the camera angle is unchanged, step 7.5 Adjust the
Camera Angle is omitted.
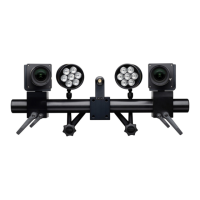
Info
All cameras shown in the following illustrations are exemplary. Your sys‐
tem configuration may comprise dierent cameras. The settings of the
individual parameters for the sensor configurations are the same for all
camera types.
Info
The cameras are preassembled to the camera mount. The screw tighten‐
ing torque is 1.1 Nm.
7.1 Set Up Sensor with Software
Start the GOM software.
Set up the ARAMIS sensor in workspace Set Up.
0000001503_002_EN_02-12-2019
Page 21 (56)