Requirements:
•
After having adjusted the focus and aperture of the camera lenses
without polarizing filters, you have to mount the polarizing filters on
the camera lenses.
•
Use setup sheet C for an optimal adjustment of the polarizing filters.
Position setup sheet C centrally in front of the ARAMIS Adjustable sen‐
sor within the measuring distance.
Procedure:
1. Switch on the LED specimen lighting.
2. Do not change the polarizing filter of the left camera.
3. Deactivate the LED lamp . Turn the LED lamp to the side or switch o
the power supply.
4. Set the polarizing filter to the minimum intensity of shining points in
the left image of the live view.
5. Activate the LED lamp . The LED lamp has to remain switched on.
6. Set the polarizing filter to the minimum intensity of shining points in
the left image of the live view.
7. Set the polarizing filter to minimum intensity of shiny points in the
right image of the live view.
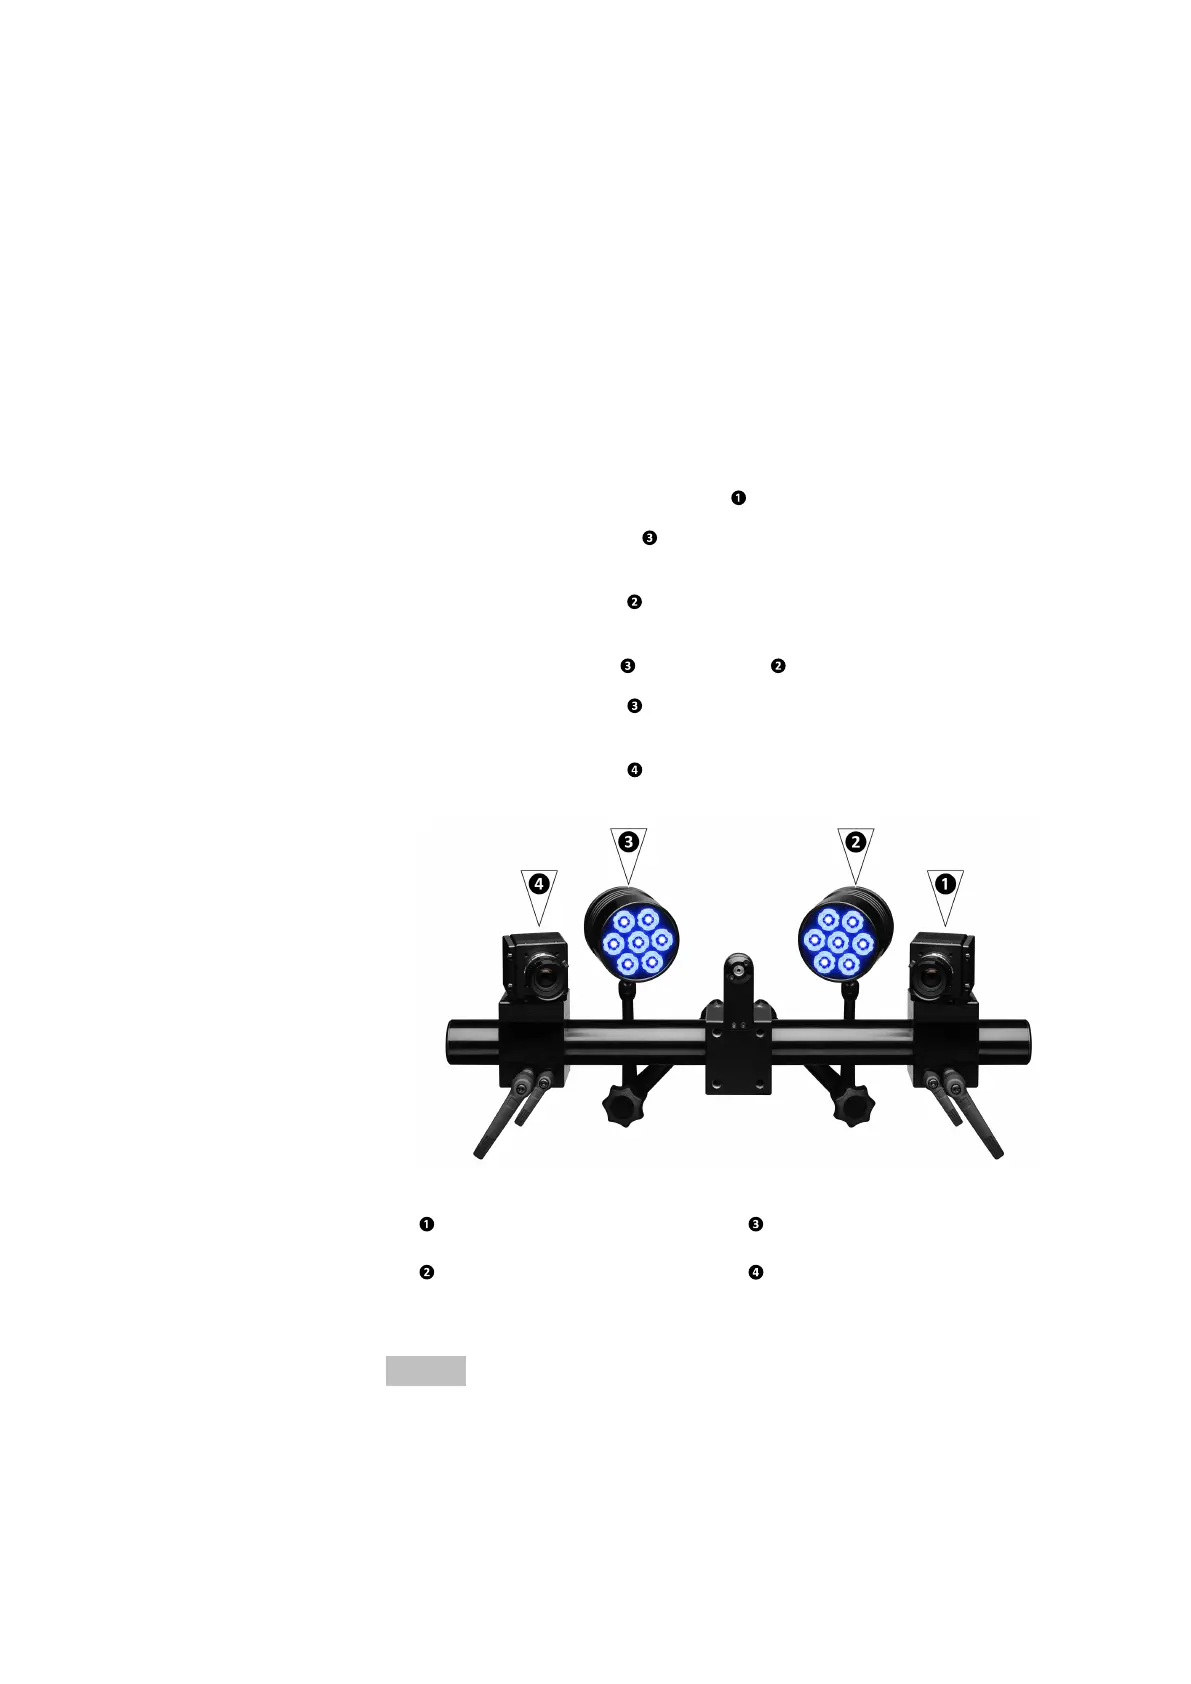
Fig. 19: ARAMIS Adjustable with LED specimen lighting
Polarizing filter of the left
camera
Polarizing filter of the left
LED lamp
Polarizing filter of the
right LED lamp
Polarizing filter of the
right camera
The polarizing filters are adjusted to each other.
Info
If you change the position of the camera or LED lamp, you have to readjust
the polarizing filters.
Specimen Lighting (Option)
0000001503_002_EN_02-12-2019 Page 32 (56)