Electrical Tests
Electrical Tests
Use the follow
ing procedures to test the condition
of the power su
pply and gun body, and electrical
continuity be
tween components.
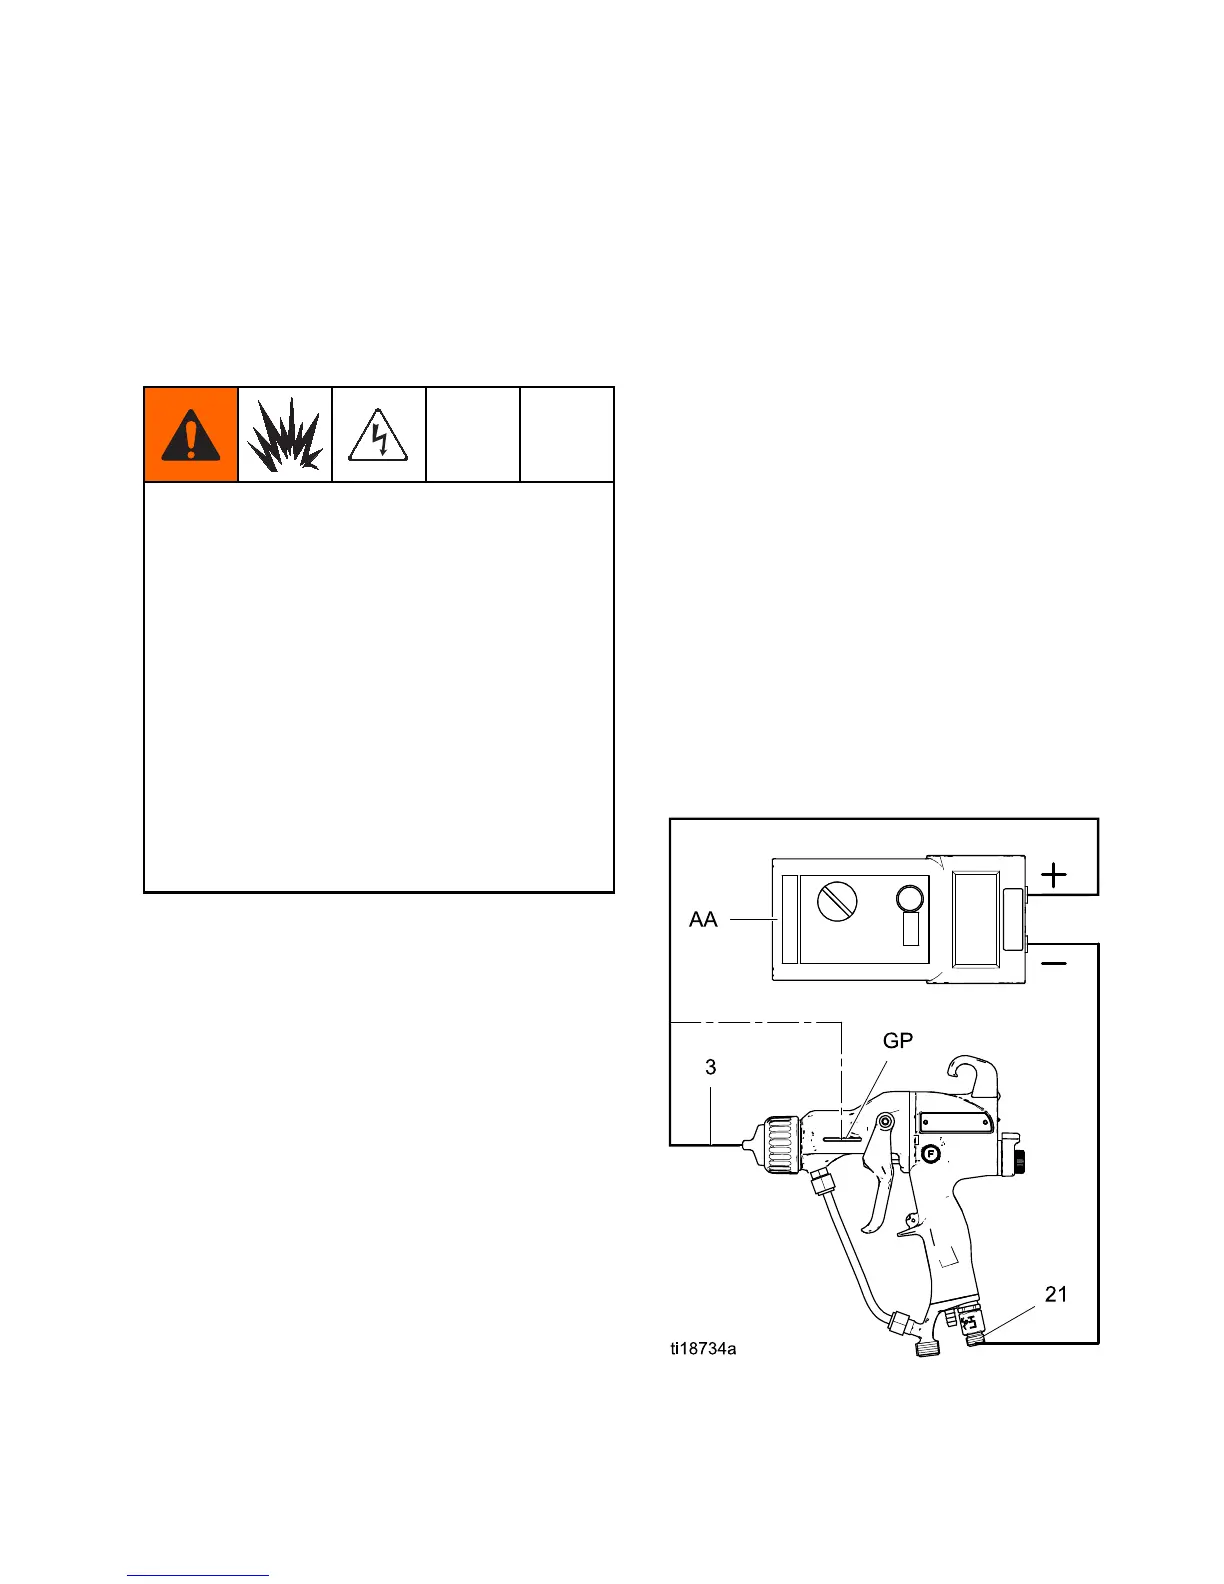
Use megohmmeter Part No. 241079 (AA) and an
applied voltage of 500 V. Connect the leads as
shown.
Megohmmeter Part No. 241079 (AA-see Fig.
17) is not approved for use in a hazardous area.
To reduce the risk of sparking, do not use the
megohmmeter to check electrical grounding
unless:
• The gun has been removed from the hazardous
area;
• Or all spraying devices in the hazardous area
are turned off, ventilation fans in the hazardous
area are operating, and there are no flammable
vapors in the area (such as open solvent
containers or fumes from spraying).
Failure
to follow this warning could cause fire,
explos
ion, and electric shock and result in serious
injury
and property damage.
Test Gun Resis
tance
1. Flush and dry the fluid passage.
2. For Model L40T14 and L40T15 guns only: Test
the barrel continuity to verify that the metal pin
in the barrel is properly grounded. Measure
resistance between the metal pin (GP) and the
air swivel (21). The resistance should be less
than 100 ohms. If the resistance is 100 ohms or
more, replace the gun body.
3. For all guns: Trigger the gun and measure
resistance between the electrode needle tip (3)
and the air swivel (21). The resistance should be:
• 75–120 meg
ohms for 40kV guns
• 104–148 m
egohms for 60kV guns
• 148–193 m
egohms for 85kV guns
If outside this range, test the gun
untriggered. If still outside this range, go to
Test Power Supply Resistance, page 32. If in range,
see Electrical Troubleshooting, page 35 for other
possible causes of poor performance.
Fi
gure 17 Test Gun Resistance
3A2494E 31