Repair
Electrode Replacement
1. See Prepare th
e Gun for Service, page 37.
2. Remove the air
cap and nozzle. See
Air Cap and Noz
zle Replacement, page 38.
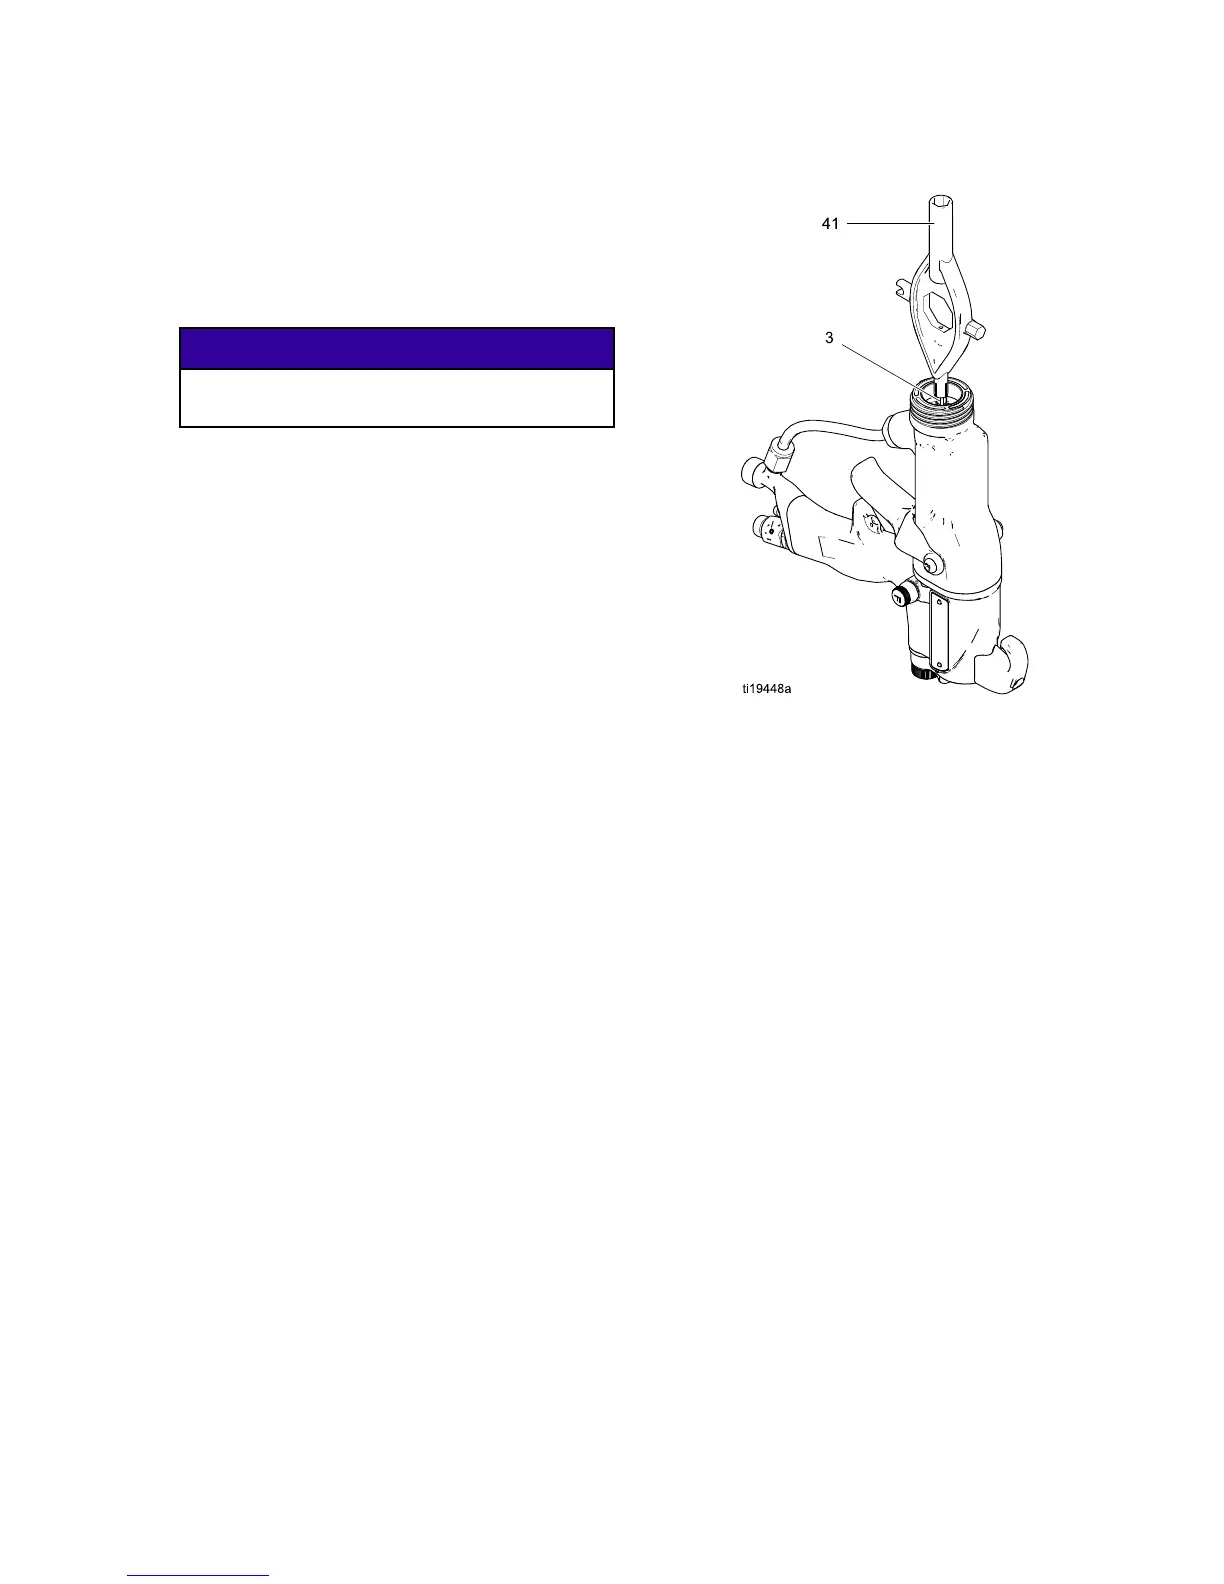
3. Unscrew the e
lectrode (3) with the multi-tool (41).
NOTICE
To avoid dama
ging the plastic threads, be very
careful whe
n installing the electrode.
4. Apply low-strength (purple) Loctite® or equivalent
thread sealant to the electrode and packing rod
threads. Install the electrode finger-tight. Do not
overtighten.
5. Install the fluid nozzle and air cap. See
Air Cap and Nozzle Replacement, page 38.
6. See Test Gun Resistance, page 31.
Figure 21
Electrode Replacement
3A2494E 39