Repair
Atomizing Air Restrictor Valve Repair
1. See Prepare th
e Gun for Service, page 37.
2. Place a wrench
on the flats of the valve housing
(29a) and unsc
rew the valve from the handle
(16).
NOTE: You may
replace the valve as an
assembly (go
to step 9) or replace only the o-ring
(steps 3–9).
3. Unscrew the
valve stem (29e). Remove the
retaining r
ing (29d).
4. Turn the val
ve body (29b) counterclockwise until
it comes fre
e from the valve housing (29a).
5. Inspect th
e o-ring (29c). Remove if damaged.
6. Clean all p
arts and inspect for wear or damage.
NOTE: Use n
on-silicone grease, Part No.
111265. D
o not over-lubricate.
7. When reas
sembling the atomizing air restrictor
valve (29
), lightly lubricate the o-ring (29c) and
push the v
alve body (29b) fully into the housing
(29a) un
til bottomed.
8. Reassem
ble the retaining ring (29d). Thread the
valve st
em (29e) halfway into the valve body
(29b).
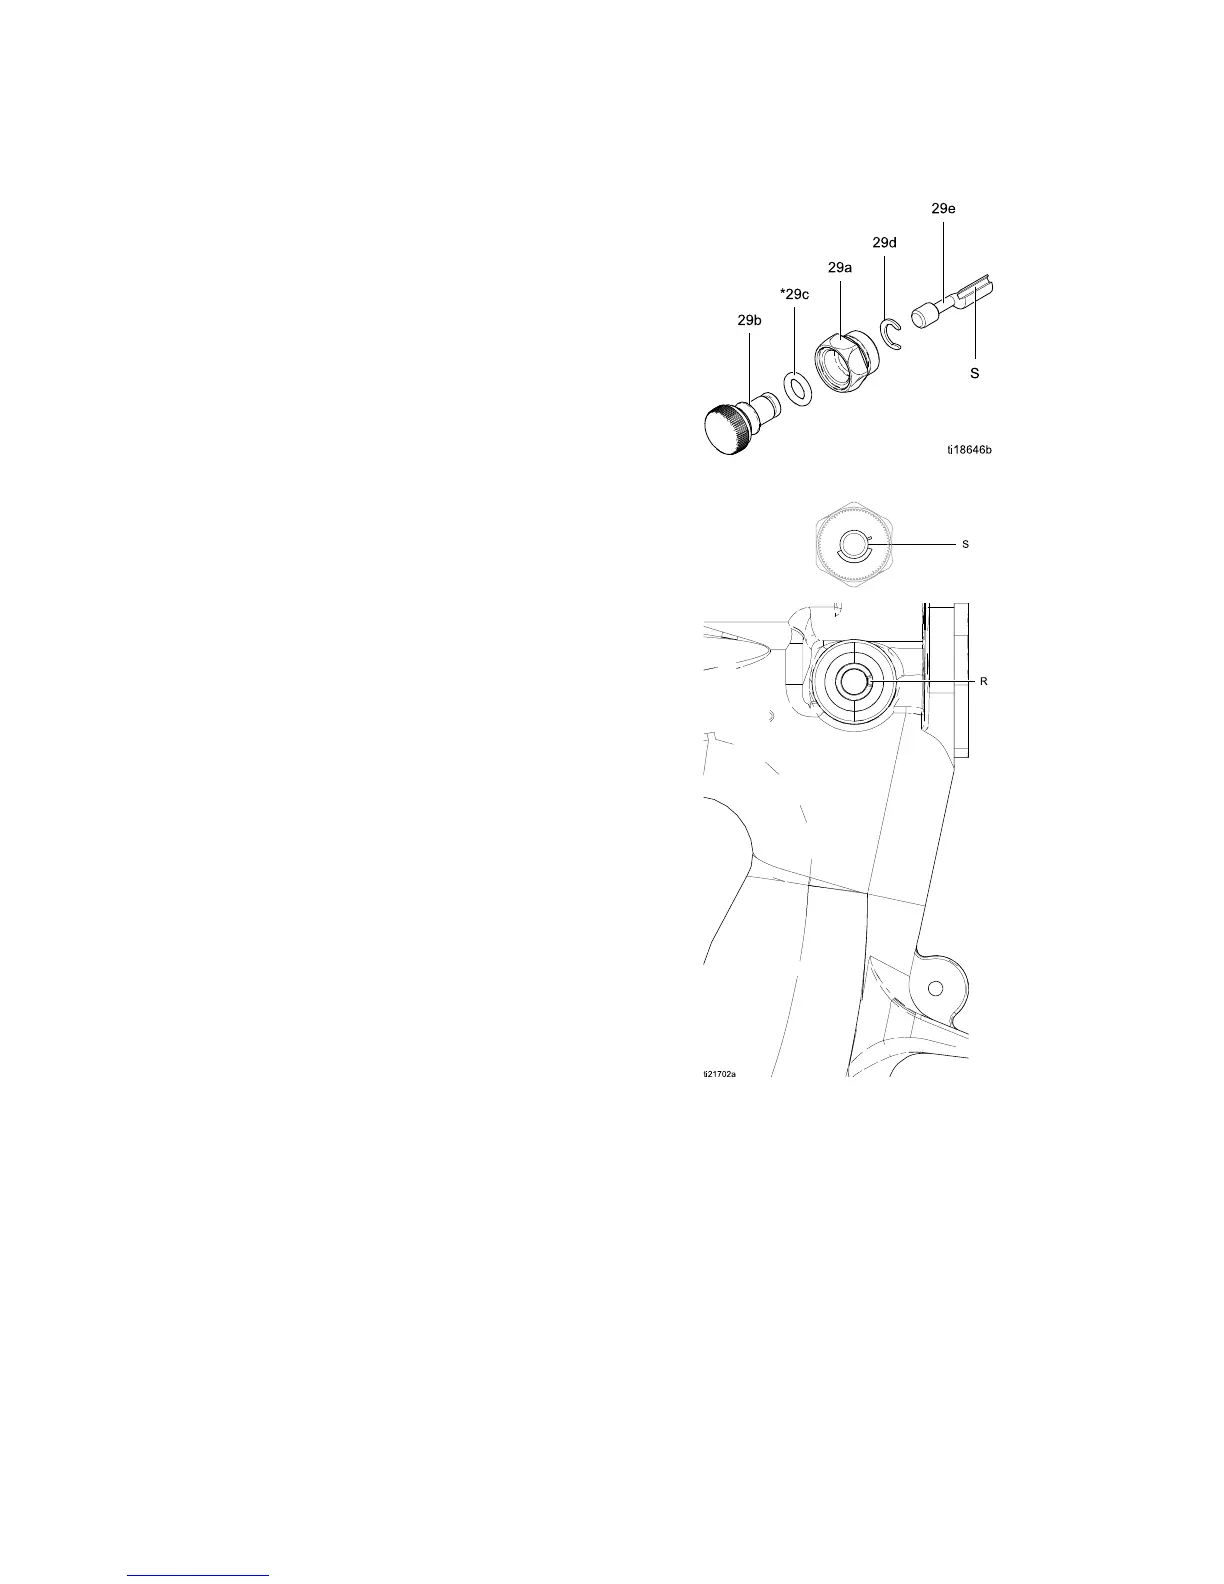
9. Align t
heslot(S)inthevalvestemwiththerib(R)
in the g
un handle. Screw the valve assembly (29)
into th
e gun handle (16), using a wrench on the
flats of
thehousing.Torqueto15in-lb(1.7N•m).
NOTE:
If the atomizing air restrictor valve is not
desir
ed, install the supplied plug (42).
Figure 33 At
omizing Air Restrictor Valve
Figu
re 34 Align Valve Stem
48 3A2494E