Repair
Air Valve Repair
1. See Prepare th
e Gun for Service, page 37.
2. See Barrel Rem
oval, page 42.
3. Remove the scr
ews (13) and trigger (12).
4. Remove the ES
On-Off Valve. See ES On-Off
and Fluid Adj
ustment Valve Repair, page 49.
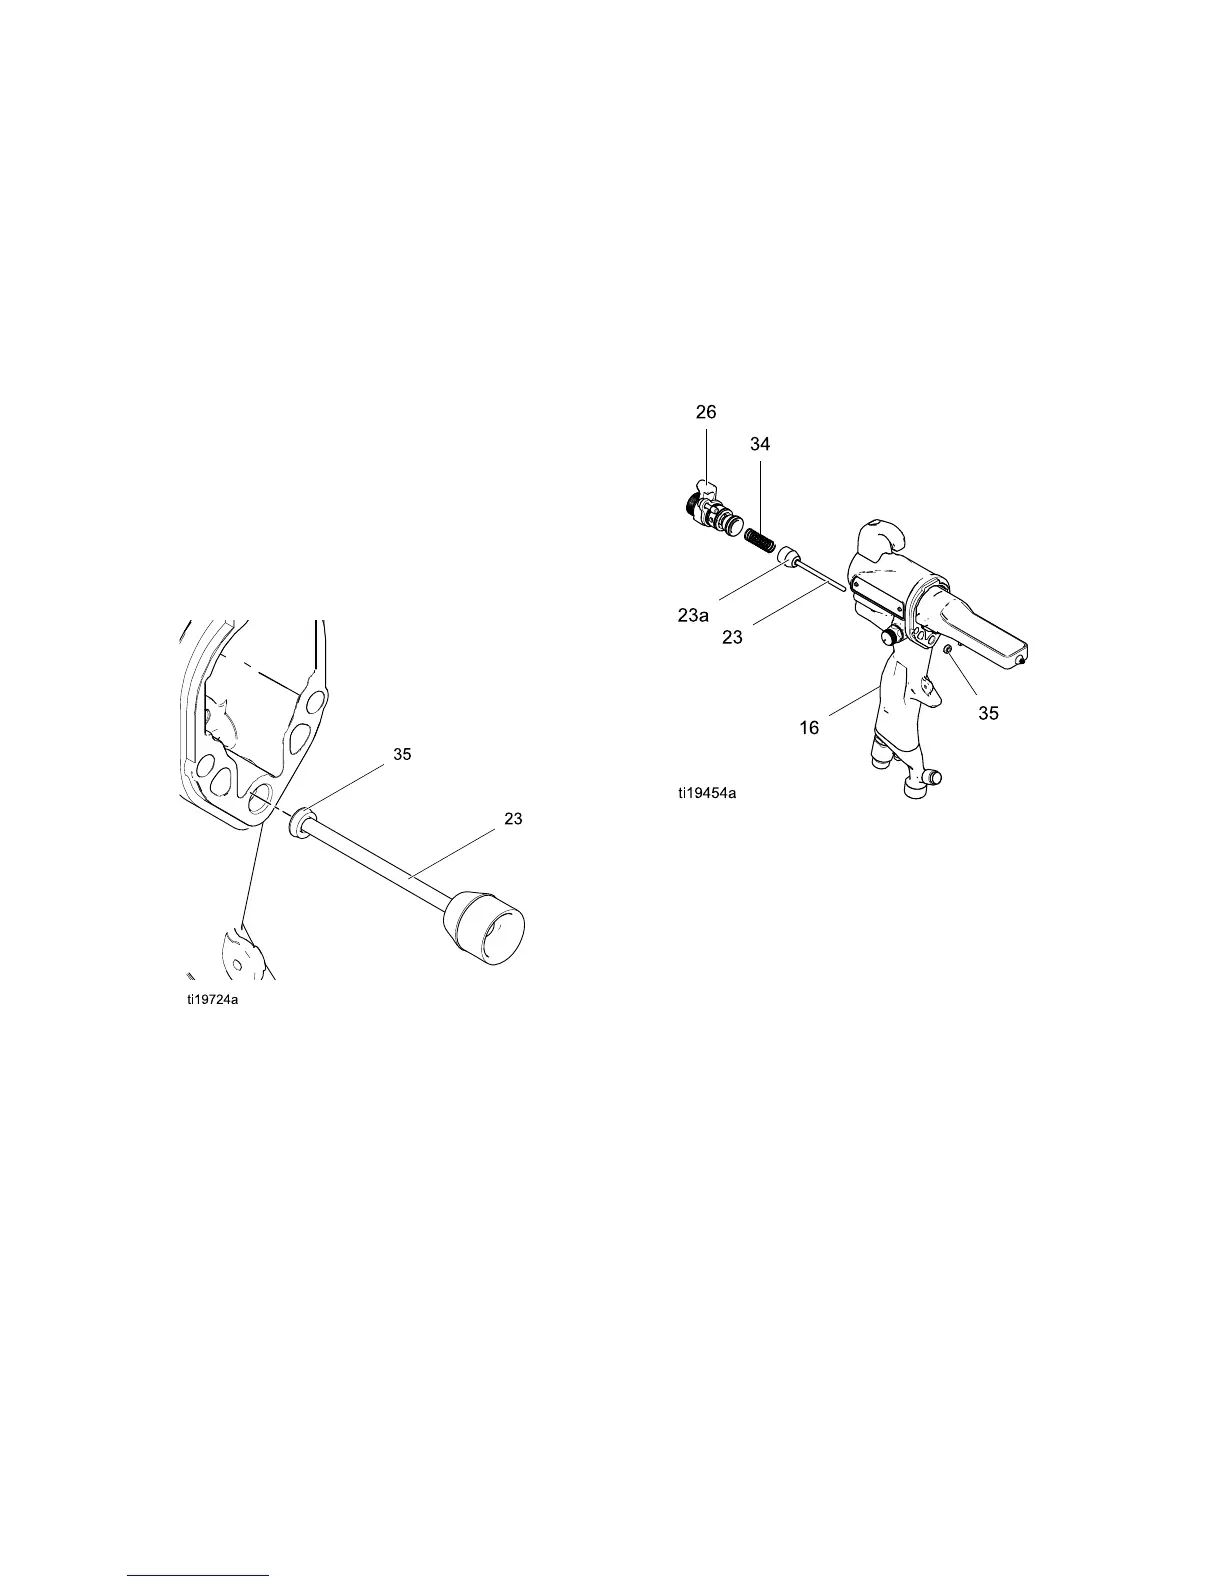
5. Remove the sp
ring (34).
6. Push on the f
ront of the air valve shaft to force it
out the back
of the handle. Inspect the rubber
seal (23a*)
and replace if damaged.
7. Inspect the
u-cup (35). Do not remove the u-cup
unless dam
aged. If removed, install the new one
with its li
ps facing into the gun handle (16). Place
the u-cup o
n the shaft of the air valve to help seat
it in the gu
n handle.
Figure 36 Install U-Cup
8. Install the ai
r valve (23) and spring (34) into the
gun handle (16
).
9. Install the ES
On-Off Valve. See ES On-Off and
Fluid Adjustm
ent Valve Repair, page 49.
10. Install the t
rigger (12) and screws (13).
11. See Barrel In
stallation, page 42.
Figure
37 Air Valve
50 3A2494E