Repair
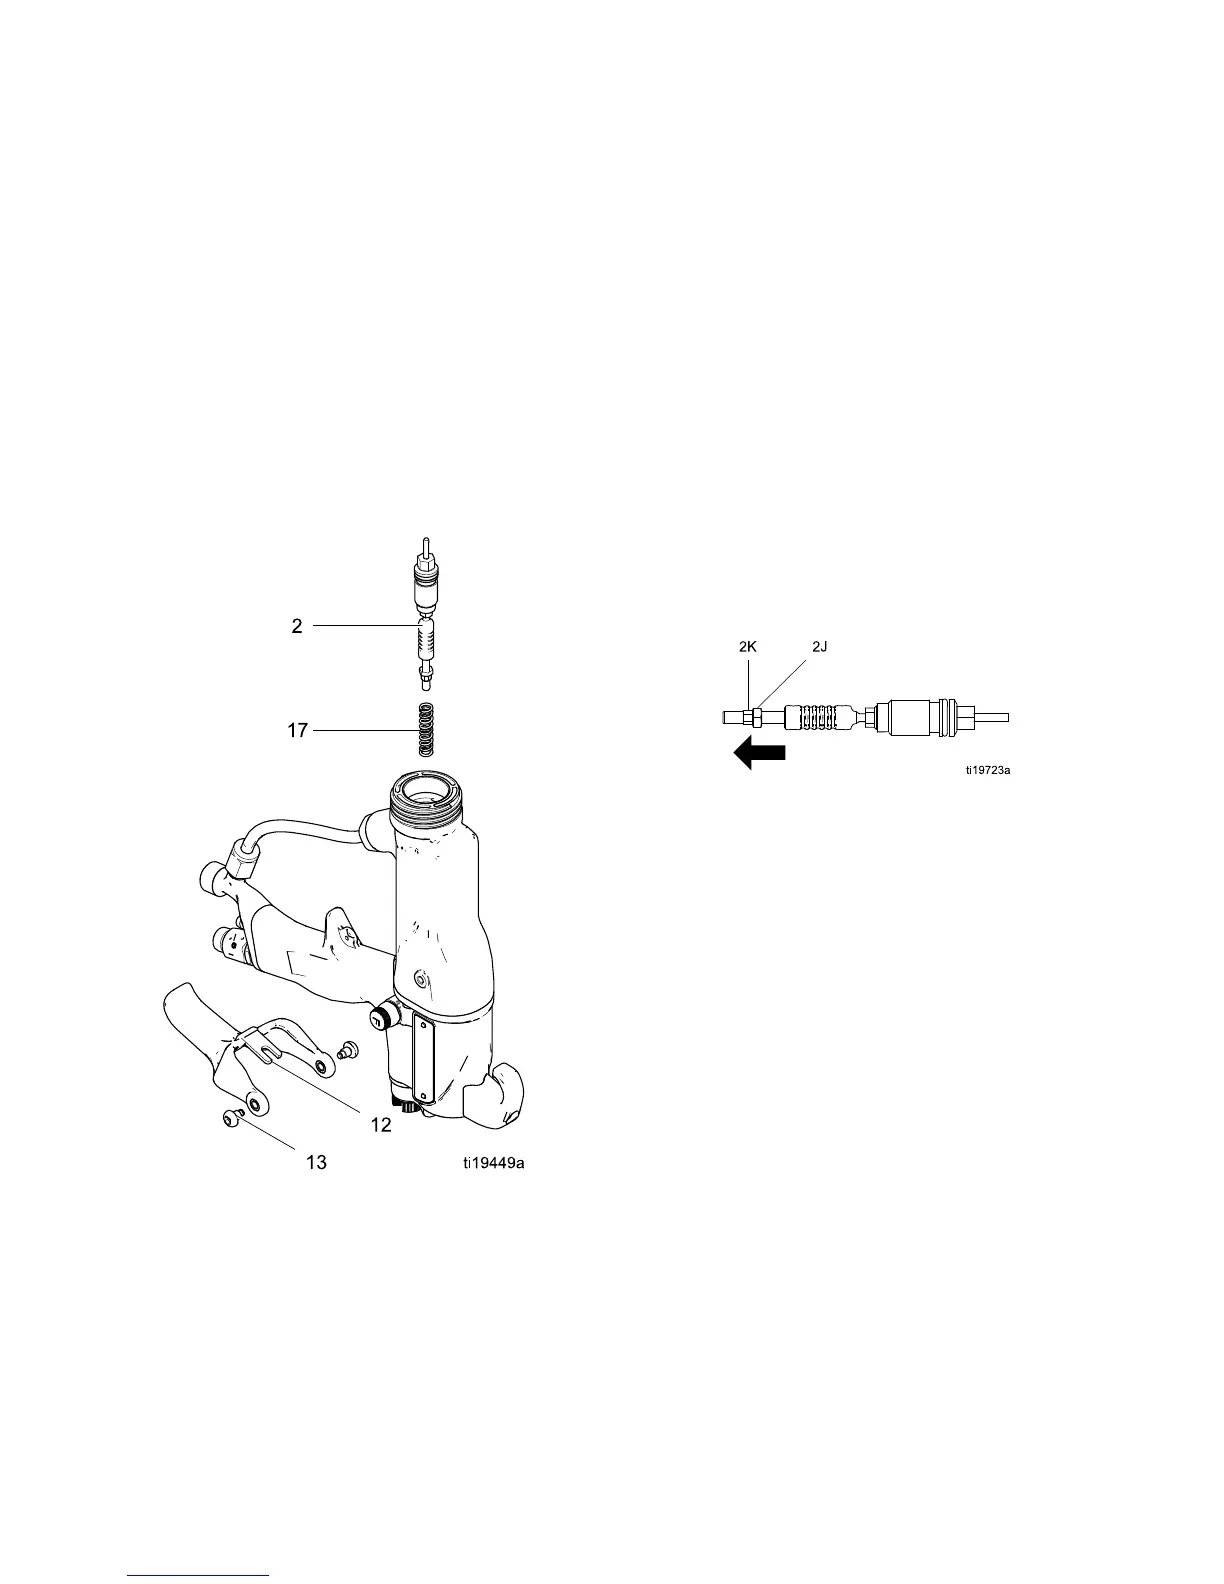
Fluid Packing Rod Removal
1. See Prepare th
e Gun for Service, page 37.
2. Remove the air
cap and fluid nozzle. See
Air Cap and Noz
zle Replacement, page 38.
3. Remove the el
ectrode. See
Electrode Re
placement, page 39.
4. Loosen the tr
igger screws (13) and remove the
trigger (12)
.
5. Remove the p
acking rod (2), using the multi-tool
(41). Remov
e the spring (17).
6. Check all pa
rts for wear or damage and replace
if necessa
ry.
Figure 22 Fluid Packing Rod Removal
Packing Rod Repair
NOTE: You may r
eplace the packing rod as individual
partsorasana
ssembly.
Adjust the Air
Flow Lead and Lag
NOTE: The gun
begins emitting air before the fluid
is discharge
d and the fluid stops before the air flow
stops. The pa
cking rod assembly is pre-adjusted at
the factory
for proper air lead and lag. Adjust only
if necessar
y, as follows.
1. Remove the spring (17) from the nut (2k).
2. Use a hex wrench to hold the end of the packing
rod. Turn both adjustment nuts (2j, 2k) out to
increase the lead/lag time for the air flow. The
recommended adjustment is one half turn and
not more than one full turn.
3. Tighten the nuts together to fix them in the new
position.
40 3A2494E