Repair
Fan Air Adjustment Valve Repair
1. See Prepare th
e Gun for Service, page 37.
2. Place a wrench
on the flats of the valve housing
(30a) and unsc
rew the valve from the handle
(16).
NOTE: You may
replace the valve as an
assembly (go
to step 9) or replace only the o-ring
(steps 3–9).
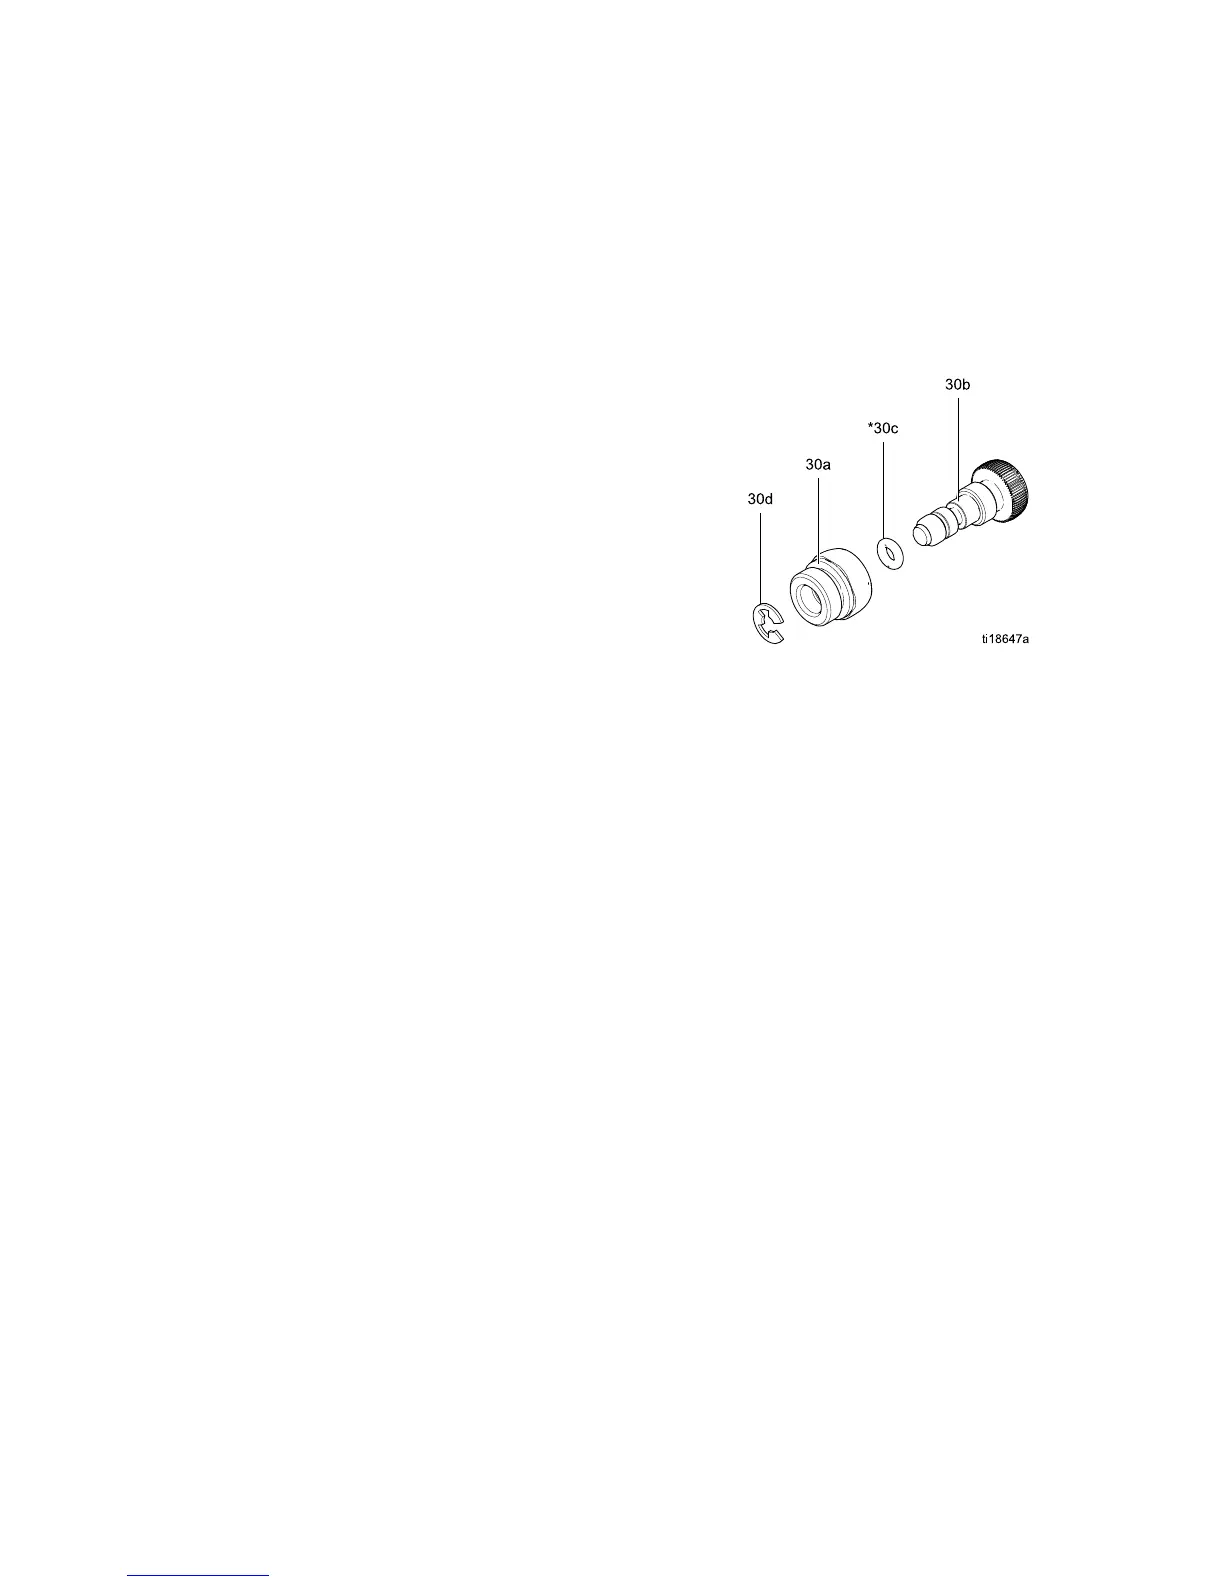
3. Remove the r
etaining ring (30d).
4. Turn the val
ve shaft (30b) counterclockwise until
it comes fre
e from the valve housing (30a).
5. Inspect th
e o-ring (30c). Remove if damaged.
6. Clean all p
arts and inspect for wear or damage.
NOTE: Use n
on-silicone grease, Part No.
111265. Do
not over-lubricate.
7. When reas
sembling the fan air valve (30), lightly
lubricat
e the valve threads and screw the shaft
(30b) ful
ly into the housing (30a) until bottomed.
Install t
he o-ring (30c*), lubricate, and unscrew
the valv
e stem until the o-ring enters the housing.
8. Reassemble th
e retaining ring (30d). Unscrew
the valve stem
from the housing until it is stopped
by the retaini
ng ring.
9. Screw the valv
e assembly (30) into the gun
handle (16),
using a wrench on the flats of the
housing. Tor
que to 15 in-lb (1.7 N•m).
Figure 32 Fan Air Adjustment Valve
3A2494E
47