Repair
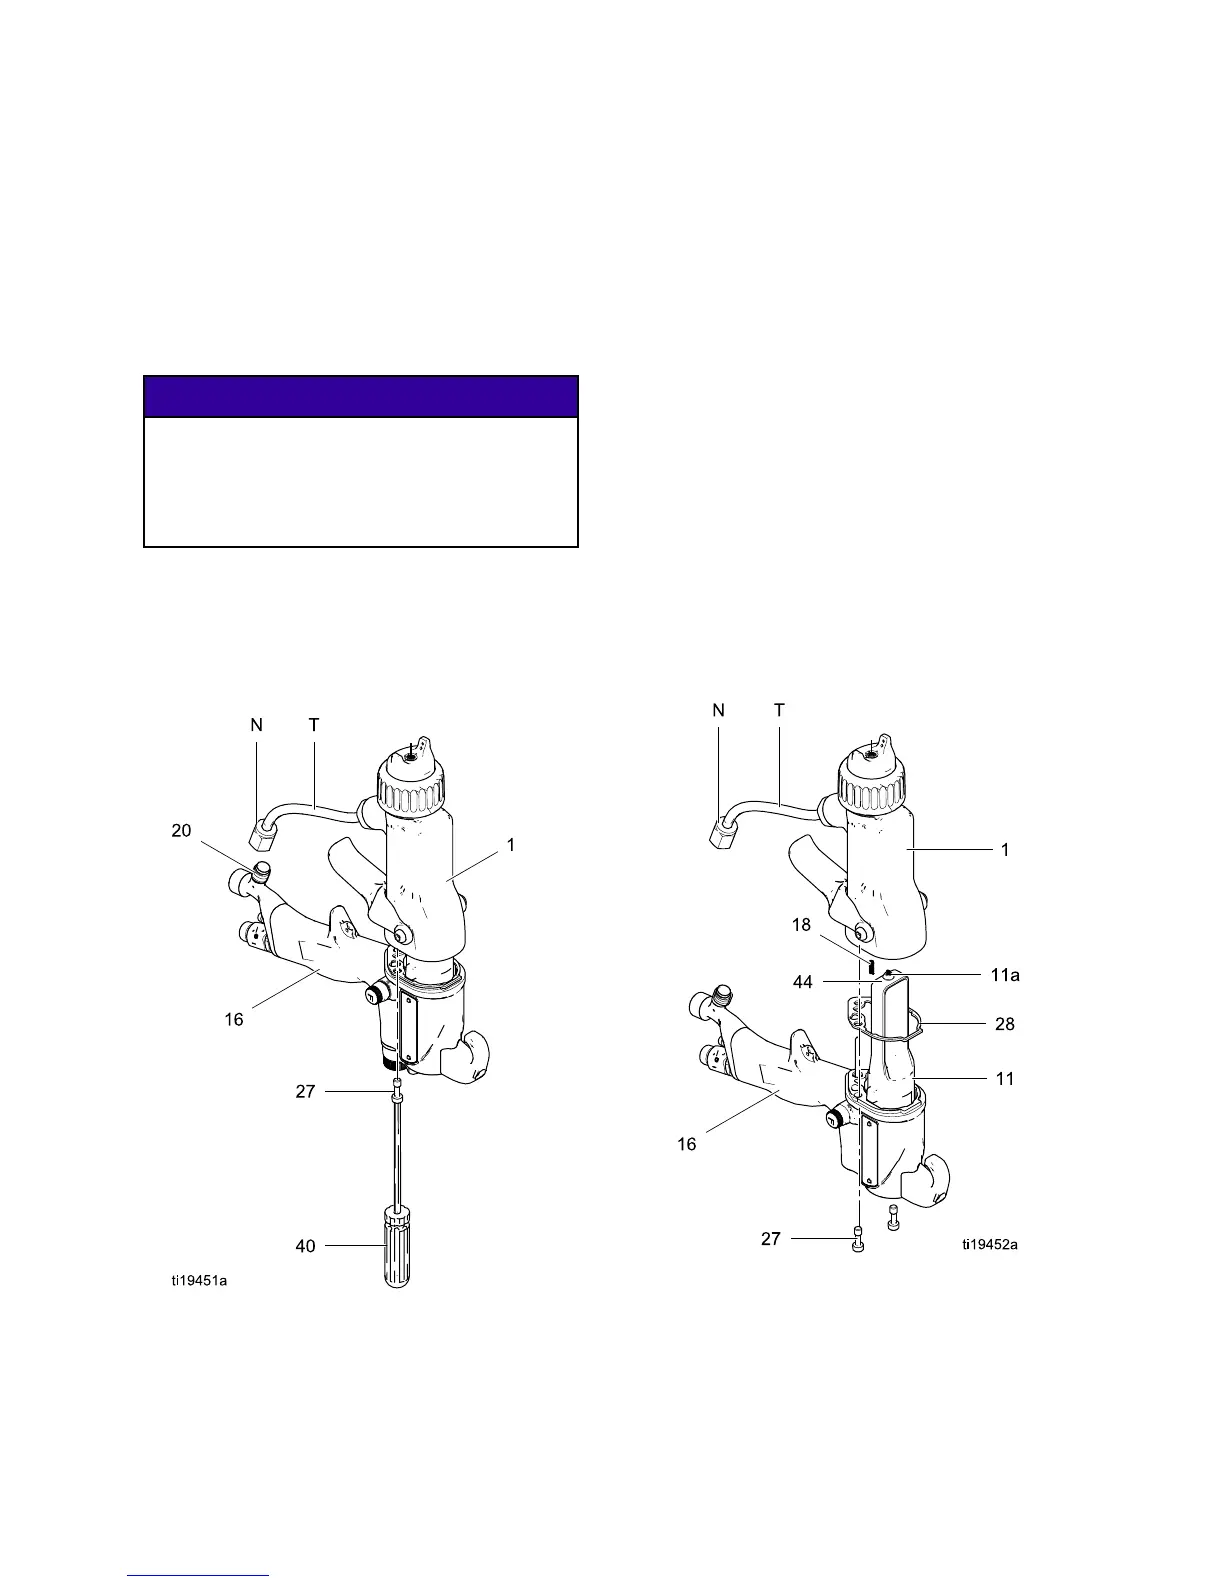
Barrel Removal
1. See Prepare th
e Gun for Service, page 37.
2. Carefully loo
sen the nut (N) from the bracket fluid
fitting (20). P
ull the tube (T) out of the fitting.
Make sure both
ferrules (7, 8) and the nut stay
with the tube
.
3. Loosen the tw
oscrews(27).
NOTICE
To avoid damaging the power supply (11), pull
the gun barrel (1) straight away from the gun
handle (16). If necessary, gently move the gun
barrel from side to side to free it from the gun
handle.
4. Hold the gu
n handle (16) with one hand and pull
the barre
l (1) straight off the handle.
NOTE: If the power supply remains in the barrel,
remove the alternator/power supply assembly from
the barrel.
Figure 24 Barrel Removal
Barrel Installation
1. Be sure the gas
ket (28*) and grounding spring
(18)areinpla
ce. Make sure the gasket air
holes are alig
ned properly. Replace the gasket if
damaged.
2. Make sure the
spring (11a) is in place on the tip of
the power sup
ply (11). Liberally apply dielectric
grease (44) t
o the tip of the power supply. Place
the barrel (1
)overthepowersupplyandontothe
gun handle (
16).
3. Tighten the
two screws (27) oppositely and
evenly (abo
ut a half turn past snug or 15–25 in-lb,
1.7–2.8 N•m
). Do not over-tighten the screws
(27).
4. Assemble t
he fluid tube (T) into the bracket fitting
(20). Ensu
re that the ferrules (7, 8) are in place.
Tighten th
e nut (N) securely onto the fitting.
Make sure
the top fitting remains tight.
5. See Test G
un Resistance, page 31.
Figure 25 Barrel Installation
4
2
3A2494E