99
GB
Assembly
Before initial operation of the equipment,
the two-part shaft tube must be assem-
bled, the handle tted, the cutting device
with protective cover installed, the carry-
ing strap tted, fuel lled and the equip-
ment checked.
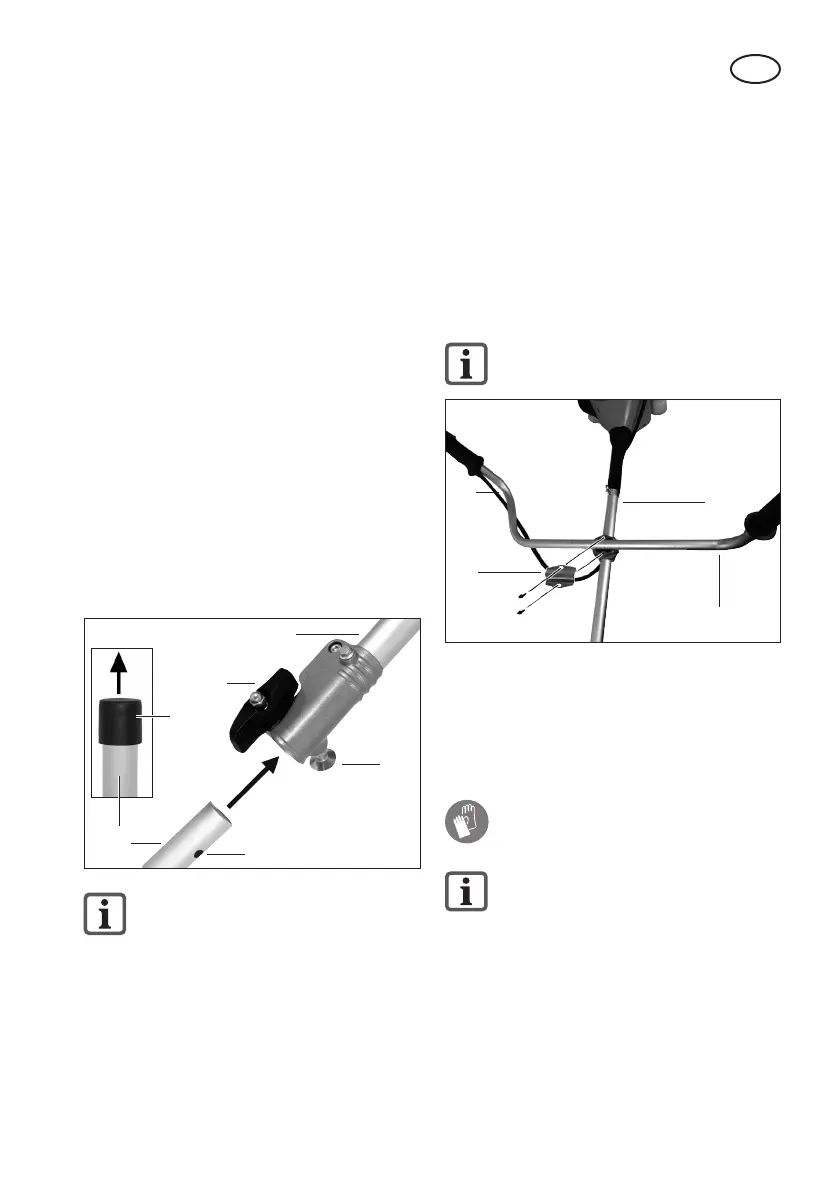
Fitting the Two-Part Tube
(Pic. 3)
1. Remove the protective transport cap
(29) from the bottom shaft tube (13).
2. Loosen the tube xing screw (12) on
the top shaft tube (10).
3. Pull the safety button (30) and insert
both shaft tubes (11 + 13) into one
another. After releasing the safety but-
ton, this must snap into place in the
notch (30a) in the lower shaft tube.
4. Retighten the tube xing screws (12).
pic 3
12
11
13
30
30a
29
Ensure that the bottom shaft tube
is sitting rmly and safely before
starting the equipment.
5. Dismantling:
Loosen the tube xing screw (12). Pull
the safety button (30) and pull the
shaft tubes (11 + 13) apart.
Fitting the Handle (Pic. 4)
1. Loosen the 2 Allen screws (31) on the
top shaft tube (11) and take o the
handle holder (32).
2. Place the multifunction handle (10) in
the handle slot on the top shaft tube
(11) and x it using the handle holder
and the 4 screws.
Ensure that the accelerator cable
(8) is not twisted or kinked.
11
32
10
31
pic 4
8
Installing/Removing the Metal
Cutting Blade
The mounting and dismantling is the
same for all metal cutting blades.
Wear protective gloves when han-
dling the metal cutting blade.
Dismantling the reel capsule is
described in the section on “Install-
ing/Removing the Reel Capsule”.
Installing the protective cover / metal
cutting blade (pic. 5):
1. If applicable, unscrew the top (33b)
and bottom (33a) anges mounted on
the cutting head holder (19).
2. Screw the protective cover (20) onto
the cutting head holder (19) using the
3 screws (34) enclosed.

 Loading...