EasyManua.ls Logo

Hawk Sultan - User Manual

Hawk Sultan
56 pages
Print Icon
To Next Page IconTo Next Page
Loading...
Sultan Sonar Manual Rev 1.0
A Higher Level of Performance
www.hawkmeasure.com
For more information, please visit >
Sultan
Acoustic Wave Series
Level, Flow, Positioning, Collision Protection
Manual

Table of Contents

Questions and Answers

  • J
    Jack RuizAug 9, 2025
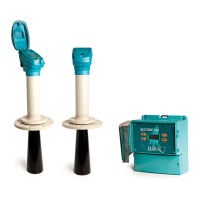
    Why is my Hawk Sultan unit measuring incorrect depth or height?
    • S
      stephenjacksonAug 9, 2025
      If your Hawk Sonar unit is measuring incorrect depth or height, it could be due to several reasons. First, confirm that the display mode is correct; depth is measured from the sensor face to the target, while height is measured from the low level to the target. Also, confirm that the High Level and Low Level settings match your application requirements. You might also need to adjust the selected 'Density'. A higher density value programs the unit to look for a more dense layer deeper. High volumes of poorly settling or suspended material can cause the unit to read higher by tracking suspended material if process conditions in the tank fail.
  • G
    Gary RamirezAug 14, 2025
    How to troubleshoot Hawk Sultan amplifier when it cannot communicate with the transducer?
    • E
      Erik OwensAug 14, 2025
      If your Hawk Sonar amplifier or transmitter cannot communicate with the transducer, consider the following troubleshooting steps: * Check the terminals for a loose or incorrect wiring connection, including the junction box and cable extensions. * Inspect the cables for any signs of damage. * Ensure that any customer-supplied cable meets Hawk specifications. If you're using a junction box extension, trace the 8-10VDC from the red/black amplifier terminals to the transducer to ensure the wires are correctly connected. Also, if using a junction box, ensure you follow Hawk specifications for extending the cable.
  • R
    Rebecca SantiagoAug 18, 2025
    What to do if Hawk Sonar shows voltage error?
    • K
      Kelly IbarraAug 19, 2025
      If your Hawk Sonar shows a voltage error, and you are using AC power, check the power supply for faults by reading the DC +/- terminals; they should show a stable 16VDC. If the value is lower or inconsistent, there may be a problem with the internal power supply. If the unit detects voltage below 9VDC, performance will be affected. If ‘V in chk’ is on, the unit will trigger its failsafe routine; if ‘V in chk’ is off, the unit will display ‘V fail’ on the LCD. This can be caused by the unit detecting voltage below 9VDC.
  • B
    Brandy CordovaAug 25, 2025
    What causes 'Transducer no. 2 communication error' on Hawk Sonar?
    • R
      Roger BrennanAug 25, 2025
      A 'Transducer no. 2 communication error' on your Hawk Sonar can be caused by wiring issues or a problem with the transducer itself. If any circuits are open, check the wiring connections. Transducer problems may cause the amplifier to protect itself against high current draw. Measure the resistance across the transducer: Red and DC:+ terminals on the amplifier while the transducer is disconnected and then connected. If the resistance increases dramatically, there is potentially a wiring or transducer problem.
  • J
    jcampbellAug 29, 2025
    What to do if Hawk Measuring Instruments display higher distance than actual level?
    • C
      Carl MendozaAug 29, 2025
      If your Hawk Measuring Instruments display a distance higher than the actual level, begin by checking the mounting conditions within the vessel and inspecting the distance of any false echoes. Also, consider extending the ‘Blanking’ distance in the TX Setup to eliminate the echo entirely.
  • D
    David Becker Jr.Nov 3, 2025
    What to do if PLC indication does not match measurement on Hawk Sultan?
    • P
      pporterNov 3, 2025
      If the PLC indication doesn't match the measurement on your Hawk Sonar, take these steps: * Disconnect the analogue wires from the amplifier and use a multimeter on the 4-20mA terminals labeled IS and + to read the direct mA from the unit. Reconnect the analogue wires and compare this value with the reading from the control system. * Confirm that the High Level and Low Level settings are the same in both the amplifier and the control system. Also, ensure your wiring is correct, paying special attention to the screen (earth). Use a quality shielded instrument cable. If a specific comms mode is selected (e.g., Profibus, FF) but the comms module isn't connected or responding, check your unit's part number to ensure it has the correct comms. If you don't have additional comms (part numbe...

Summary

System Components

Remote Amplifier

Description of the Sultan series remote amplifier unit.

Panel Mount Remote Amplifier

Description of the Sultan series panel mount remote amplifier.

50 kHz SMART Unit

Description of the Sultan series 50kHz SMART unit.

30 kHz Integral Unit

Description of the Sultan series 30kHz integral unit.

Flange and Cone Assembly

AWR234 Remote Amplifier Assembly

Step-by-step guide for assembling the AWR234 remote amplifier with flange and cone.

Wiring The Unit

Sultan Remote Units Wiring

Wiring instructions for Sultan remote amplifier units, including 234 and 2 wire versions.

Sultan Integral Units Wiring

Wiring instructions for Sultan integral units, covering 234 and 2 wire versions.

Sultan Panel Mount Units Wiring

Wiring information for Sultan panel mount units, including 234 and 2 wire versions.

Sultan SMART Units Wiring

Wiring instructions for Sultan SMART units, detailing AWSTA, AWSTC, and AWSTD versions.

Wiring 4-20 mA Output

Sourcing Type Output

Explanation of sourcing type 4-20mA output configuration.

Sinking Type Output

Explanation of sinking type 4-20mA output configuration (2 wire loop powered).

Junction Box; Transducer Cable Extension

Wiring diagram and explanation for extending transducer cables via a junction box.

Wiring Transducer for Anti Crosstalk

Wiring for Anti Crosstalk

Procedure for wiring multiple units to prevent signal interference (crosstalk).

Digital Output Pulse Sequencing

PLC;DCS Control of Pulse Rates

Using a PLC/DCS with digital outputs to control or sequence pulse rates.

Incorrect Mounting

Mounting Prohibitions

Examples of incorrect mountings that prevent proper unit operation.

Correct Mounting

Recommended Mounting Practices

Illustrations of correct transducer and unit mounting within vessels.

Installation Guide

Amplifier Installation

Guidance on selecting a suitable mounting position for the amplifier.

Transducer Mounting

Critical steps for selecting transducer position for optimal measurement.

Panel Mount Installation

Instructions for installing the Sultan amplifier through a panel.

Installation Guide Details

Minimum Insertion Requirements

Specifies the minimum insertion depth for transducer face or cone into the vessel.

Blanking Distance

Explanation of blanking distance and its impact on measurement.

Installation Examples

Mounting Configurations

Examples of transducer mounting for different materials and vessel types.

Setting Your System

QuickSet Menu

Accessing and configuring Quickset settings for system operation.

Output Adjustment Menu

Configuring output settings, including fill rate, empty rate, and relay points.

Dimensions and Tables

Integral and Remote Unit Dimensions

Physical dimensions for Sultan integral and remote units.

Cone; Transducer Dimensions

Table of dimensions for various cones and transducers.

Flange Dimensions

Standard Flange Specifications

Dimensions and types for standard ANSI/DN/JIS flanges.

Minimum Measurement Range

Transducer Frequency Ranges

Table detailing blanking distance and minimum measurement range by transducer frequency.

Wiring Diagrams

AWR Remote Transmitter Wiring

Wiring diagrams for AWR234 remote transmitter.

AWI Integral Transmitter Wiring

Wiring diagrams for AWI234 and AWI2 integral transmitters.

Diagnostics and Software Overview

Unit Diagnostics

Explanation of diagnostic parameters like Echo, Size, Gain, Noise, and Temperature.

Quickset Flow Chart

Navigating Quickset Parameters

Flowchart detailing the sequence for setting Quickset parameters.

Quickset Parameters Explained

Unit Settings

Configuration options for units of measurement and display.

Level Settings

Setting Low Level and High Level distances from the transducer face.

Fail-Safe Configuration

Setting the 4-20mA output behavior during fail-safe conditions.

Application Types

Process Speed Settings

Overview of application types and manual adjustment of fill/empty speeds.

Display Mode Options

Non-standard Display Modes

Explanation of AvgMatri, Diff O/P, and Flow display modes.

Average Level Measurement

Average Material Calculation

How average level is calculated using two transducers.

Differential Level Measurement

Differential Calculation

Formula and process for calculating the difference between two material levels.

Advanced Setup Menu

Transducer Sensing Adjustments

Advanced settings for transducer gain, distance, echo size, and blanking.

Advanced Parameters Explained

Gain and Distance Steps

Detailed explanation of Gain4, Gain Step 3, and Distance Step 3 parameters.

Echo Size and Blanking

Understanding EchoSize, Threshold, Blanking, and Empty Distance settings.

Output Adjustment Setup

Fill and Empty Damping

Adjusting fill and empty damping for smoother output.

Relay Mode Settings

Configuring relay modes (EN, DEN, FS, OFF) and set points.

Output Adjustment Parameters

Analog Output Configuration

Setting the analog output to 4-20mA or 20-4mA.

Simulation Mode

Using simulation mode to test outputs and connected equipment.

Relay Switch Actions

Relay Mode Behavior

Details on how relays switch based on Energise, DeEnergise, FailSafe, and OFF modes.

Communication Setup

Modbus Configuration

Setup and parameters for Modbus communication.

DeviceNet Configuration

Setup and parameters for DeviceNet communication.

Profibus Configuration

Setup and parameters for Profibus DP communication.

Modbus Protocol Details

Modbus Setup and Registers

Modbus setup, spans, and diagnostic registers for Sultan Series instruments.

DeviceNet Setup and Wiring

Baud Rate and DeviceNet Address

Setting Baud Rate and DeviceNet Address for the unit.

DeviceNet Output Data

Description of data transmitted via DeviceNet, including status flags.

Profibus Setup and Parameters

Profibus DP Address Configuration

Setting the Profibus DP address and understanding output data.

PC Communication Software

GosHawkII Software Usage

Introduction to GosHawkII software for setup, testing, and monitoring.

Converting 234 Wire to 2 Wire Loop

SMART Card Orientation

Procedure for switching Sultan234 units to 2 wire loop mode using the SMART card.

Troubleshooting Common Issues

Error Codes 01 - 04

Troubleshooting guide for specific error codes related to communication and software.

Display Issues Troubleshooting

Distance Display Problems

Addressing issues where distance displays higher than actual level or unit locks on high level.

Output Performance Issues

Output Mismatch During Filling;Emptying

Troubleshooting when output does not match level during filling or emptying.

Erratic or Inconsistent Output

Resolving issues with erratic or inconsistent output readings.

Unit Voltage Specifications and Checks

Voltage Specifications

Operating voltage ranges and checks for Sultan 234 and Sultan 2 units.

Transducer Checks

Checking transducer power draw and wire resistances.

Technical Support Information

Contacting Hawk Support

Information needed when contacting Hawk for assistance.

Part Numbering System

Sultan Remote Transmitter Part Numbers

Part numbering details for Sultan Remote Transmitter models.

Sultan Remote Transducer Part Numbers

Part numbering details for Sultan Remote Transducer 3"/3.5" and 2" versions.

Sultan Integral Part Numbers

Part numbering details for Sultan Integral 3"/3.5" and 2" models.

Flange and Cone Selection

Guides for selecting appropriate flanges and cones for transducers.

Transducer;Cone;Flange Combinations

Table showing valid combinations of transducers, cones, and flanges.

Product Specifications

Frequencies and Operating Voltage

Specifications for operating frequencies, voltage, and power consumption.

Analog Output and Communications

Details on analog output, communication protocols, and relay output.

Range, Resolution, and Accuracy

Specifications for maximum range, resolution, and sensor accuracy.

Approvals and Certifications

Safety Approvals and Standards

List of safety approvals and certifications for the Sultan series.

Hawk Sultan Specifications

General IconGeneral
BrandHawk
ModelSultan
CategorySonar
LanguageEnglish

Related product manuals