Operating Instructions • AT2000 CPK • 07-2019 • v03 • 106-29004
Settings in the display menu
13
f Use the Select button 2 to select the desired setting in
the display menu.
f Press the Enter button
1 .
f Press the Enter button
1 several times to return to the
start screen.
f Check the LED status indicator
3 , à"Troubleshooting"
on page29.
A printed short guide is included with the AT2000 CPK which
schematically explains how to configure the functions.
7.1 Accessing the settings
000Access code
Settings
1
2
f Press the Select button 2 .
; The access code settings are displayed, à"Settings
menu" on page15.
; Access to the Settings menu is protected by a three-digit
access code that can be changed in the HT Data
Management software, à"Changing the access code in
the AT2000 CPK" on page20.
The default access code is 000.
When configuring settings in the display menu, the start
screen will be displayed after 10 seconds of inactivity.
7.2 Accessing the parameter set
The preset parameter sets can be accessed or transferred
to the AT2000 CPK when the HTDM is connected. The
parameter sets comprise settings which are gathered
into groups. They are managed in the HTDM,
à"Parameter set menu" on page17.
AT 2000 CPK
001
1
2
3
f Access the settings, à"Accessing the settings" on
page13.
f Press the Select button
2 .
f The parameter set
3 is indicated with a blue border.
f Press the Enter button
1 until the desired parameter set
3 is displayed.
; The settings of the selected parameter set are displayed.
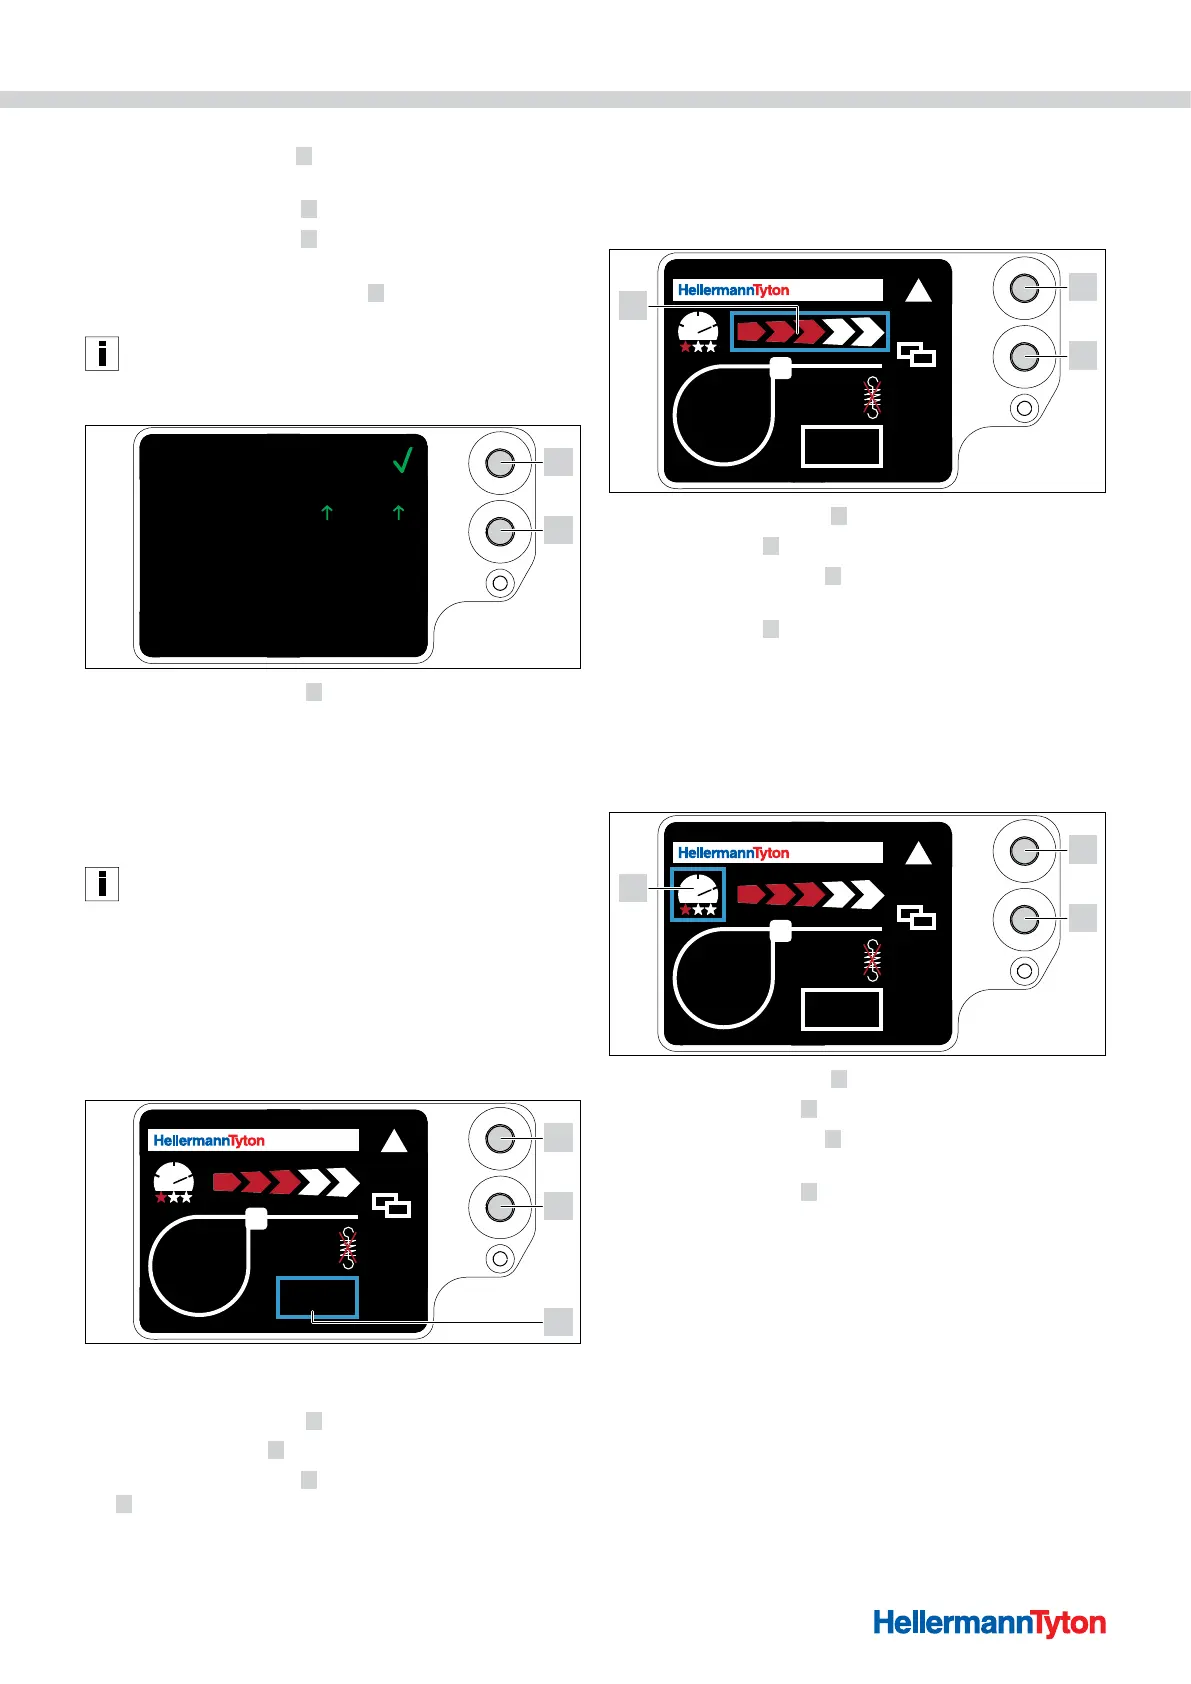
7.3 Setting the force level
The setting corresponds to the force applied by the
AT2000 CPK when binding, and it can be set from
Level1 (lowest force) to Level 5 (highest force).
AT 2000 CPK
001
1
2
3
f Press the Select button 2 .
f The force level
3 is indicated with a blue border.
f Press the Enter button
1 until the desired force level is
reached.
; The force level
3 is indicated by the number of red
arrows.
7.4 Setting the binding quality
The setting corresponds to the quality of binding and it
can be set from Level1 (lowest quality) to Level 3
(highest quality). The higher the level the longer the
cycle time, so the bundle has more time to settle.
AT 2000 CPK
001
1
2
3
f Press the Select button 2 .
f The binding quality
3 is indicated with a blue border.
f Press the Enter button
1 until the desired binding quality
is reached.
; The binding quality
3 is indicated by the number of red
stars.
; The binding speed is indicated by the “speedometer
needle” position.