Operating Instructions • AT2000 CPK • 07-2019 • v03 • 106-29004
Maintenance
36
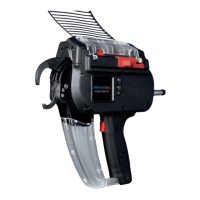
11.5.3 Checking front cap and position of cutter
f Switch the power pack OFF.
1 2
4
3
f Remove the screws 3 .
f Loosen the screws
1 .
CAUTION
Cut hazard. The cutter is extremely sharp.
f Never touch the cutting edge with your fingers.
f Carefully remove front cap 4 with the lower jaw.
f Remove the tail cutter
2 .
f If necessary, replace tail cutter
2 .
f Remove cable-tie residues.
f Use compressed air to blow the tension gear and the
waste channel clean.
f Insert the tail cutter
2 into the recess with the cutting
edge facing in.
f Insert front cap
5 with the lower jaw.
f Tighten the screws
1 .
f Insert the screws
3 and tighten.
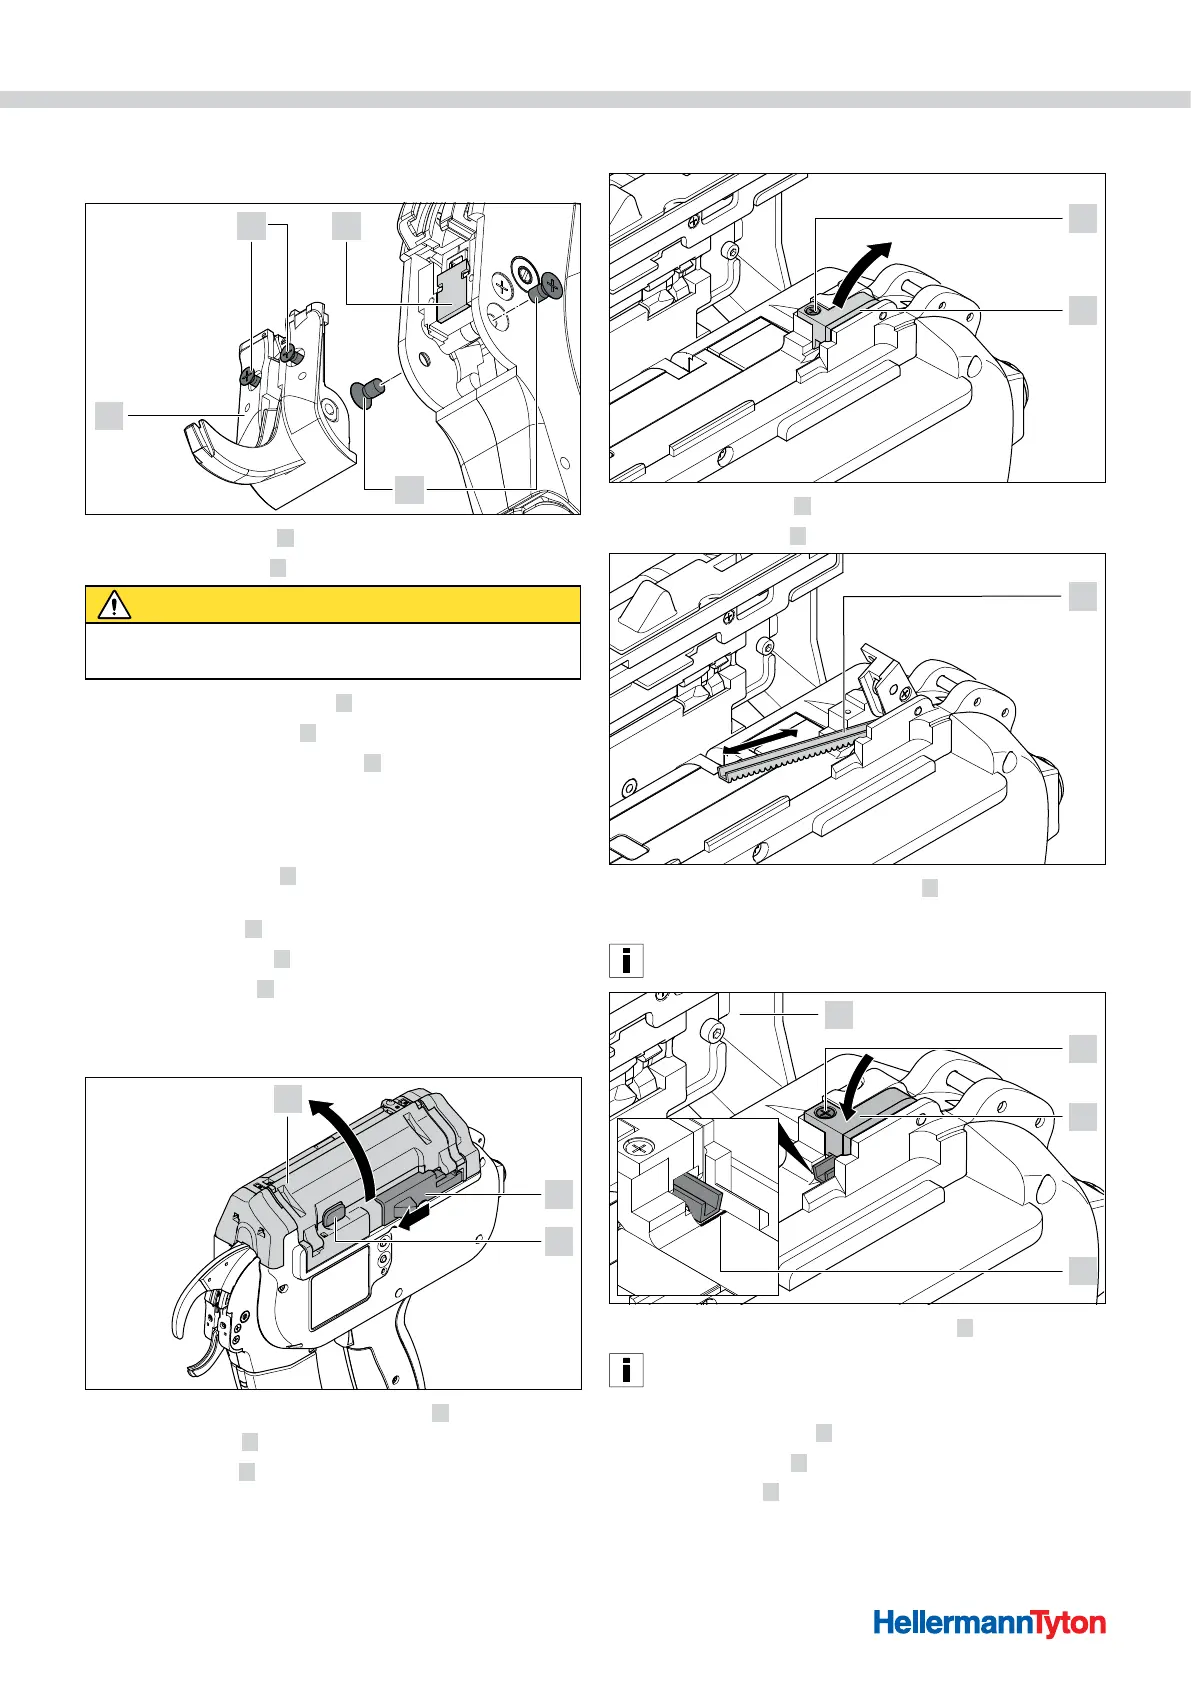
11.5.4 Checking tie advancer
f Switch the power pack OFF.
1
2
3
f Push the actuator for bandoleer cutter 2 to the left.
f Press the catch
3 .
f Open the gate
1 .
11.5.5 Replacing tie advancer
5
4
f Remove the screw 4 .
f Swing roller block
5 up.
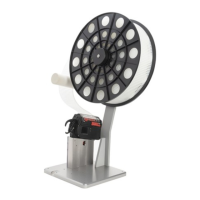
6
f Replace the defective tie advancer 6 .
; The teeth of the tie advancer face down.
The tie advancer can be inserted in both directions.
5
6
1
4
f Push in the tie advancer as far as mark 6 .
A Position of tie advancer message appears
ifpositioning is not correct, à"Display messages" on
page30.
f Close the roller block 5 .
f Tighten the screw
4 .
f Close the gate
1 .