Operating Instructions • AT2000 CPK • 07-2019 • v03 • 106-29004
Settings in the main menu
16
Settings
Interruption front sensor
Date / time
Check of binding
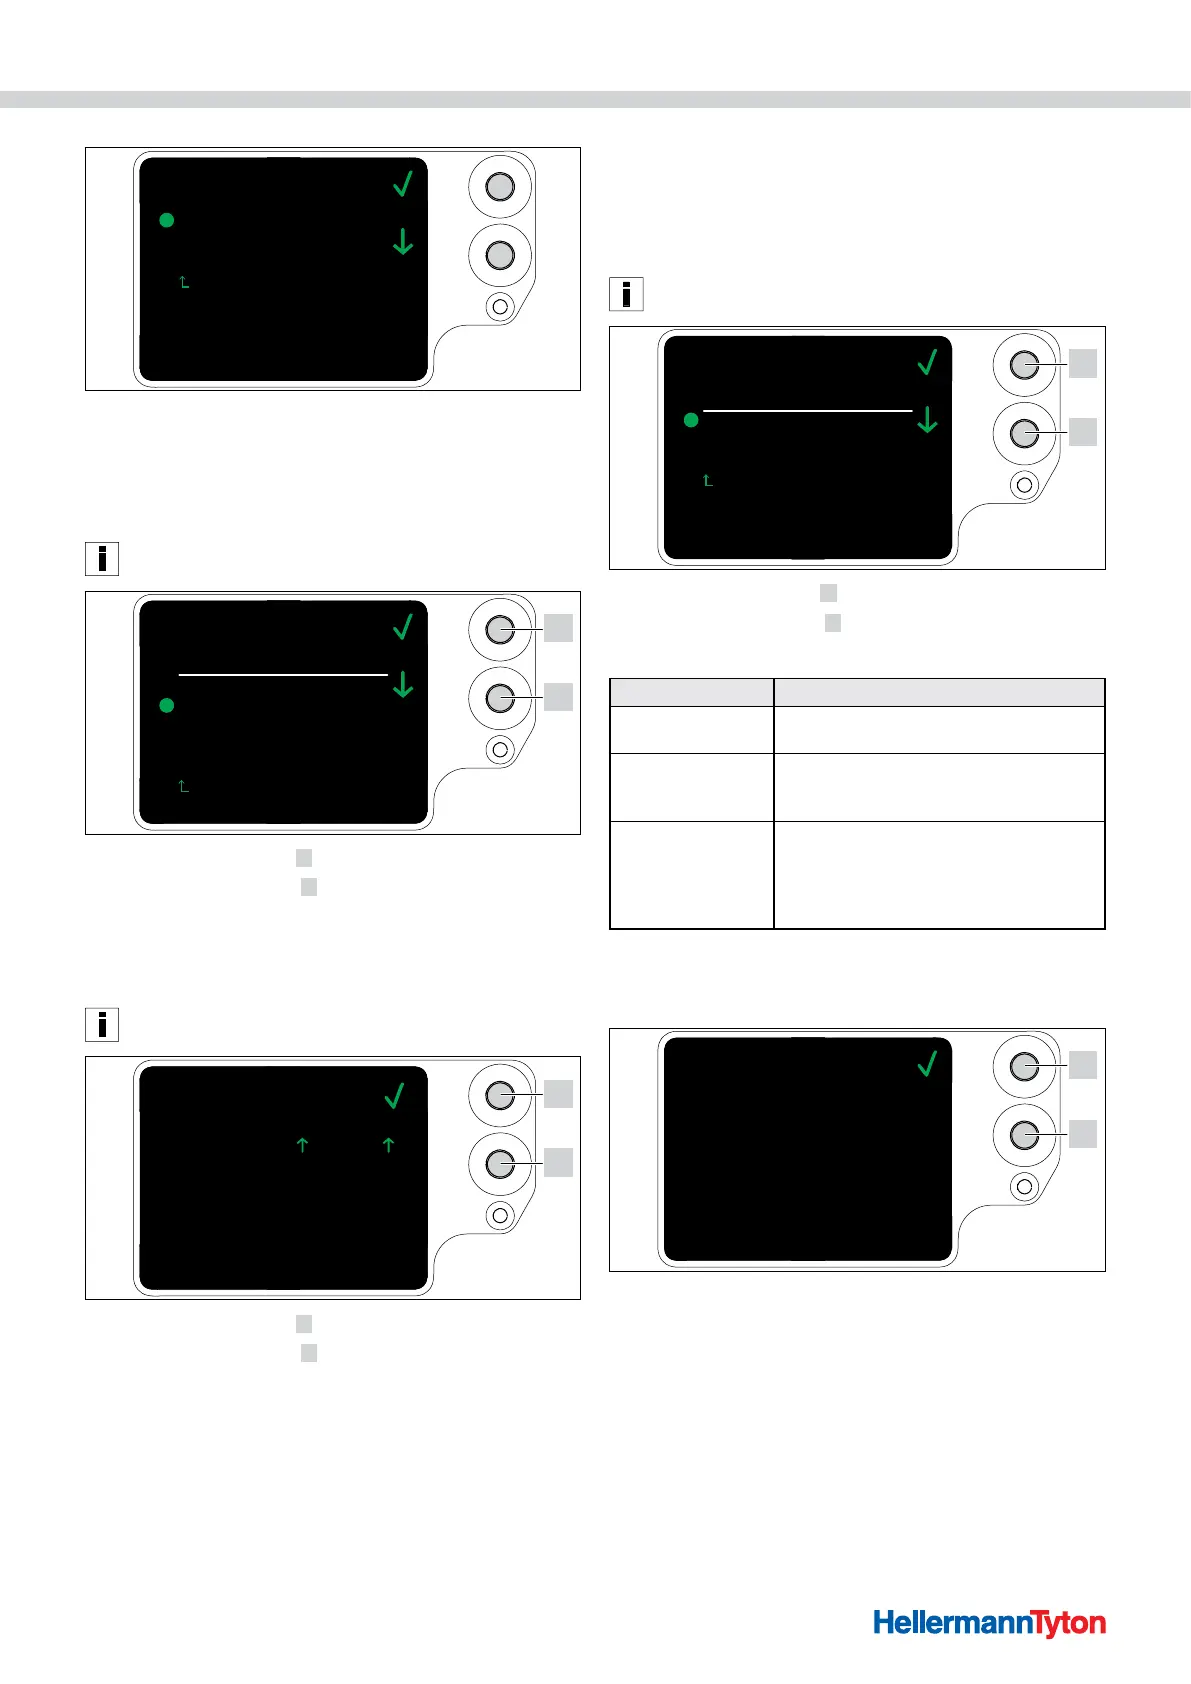
8.3.1 Interruption front sensor
The Interruption front sensor setting enables you to
decide how long the level sensor can remain busy
without the Error, front cap message appearing on the
display.
This function is intended for use with the device integrated
into an automatic system.
0.0 sec.
0.3 sec.
0.5 sec.
0.7 sec.
0.9 sec.
Settings
Interruption front sensor
Level 1
Level 2
Level 3
Level 4
Level 5
1
2
f Use the Select button 2 to select the level.
f Press the Enter button
1 .
; The setting changes to the level you selected.
8.3.2 Date / time
You can set the Date / time for process documentation.
Date and time can also be synchronised with the HTDM,
à"Synchronising time and date" on page19.
20.03.19
10:23
Settings
Date
Clock time
1
2
f Use the Select button 2 to change the date and time.
f Press the Enter button
1 to confirm each digit.
; The setting changes to the option you selected.
8.3.3 Check of binding
The Check of binding setting enables you to decide
whether or not the Error, binding force
message appears on the display,
à"Display messages" on
page30
.
The binding check can also be set with the HTDM,
à"Setting the binding check" on page19.
Check of binding
OFF
Error notification
Acknowledgement
Settings
1
2
f Use the Select button 2 to select the desired setting.
f Press the Enter button
1 .
; The setting changes to the option you selected.
Setting Meaning
OFF The Error, binding force message does
not appear on the display.
Error notification The Error, binding force message
appears when applicable but does not require
confirmation.
Acknowledgement The Error, binding force message
appears when applicable and requires
confirmation. The next binding is not possible
until the trigger has been pulled to confirm the
message.
8.4 Contact menu
The Contact menu shows you the current website of
the manufacturer.
www.HellermannTyton.com
Contact
1
2