Operating Instructions • AT2000 CPK • 07-2019 • v03 • 106-29004
Troubleshooting
29
f Activate the option Long hold time as well.
; The hold time before cutting is increased. This gives the
binding more time to release tension.
If only the Tension-free cutting option is activated, the hold
time is 100ms, whereas the additional option Long hold
time increases the hold time to 200ms.
f In mode 2 Loop, use the Diameter 4 slider to set the
diameter of the bundle.
; The set diameter is shown on the display of the
AT2000CPK.
f In cutting mode
3 Cut with projecting cable-tie end,
use the projecting cable-tie end slider to set the length of
the projecting cable ties.
; The set projecting cable-tie end is shown on the display
of the AT2000 CPK.
f For cut-free binding, select the cutting mode
3
Nocutting.
f Click on Accept
6 to save the settings.
; The overview of the parameter sets is displayed,
à"Parameter set menu" on page27.
f Synchronisation the settings with the AT2000 CPK,
à"Synchronise parameter sets" on page27.
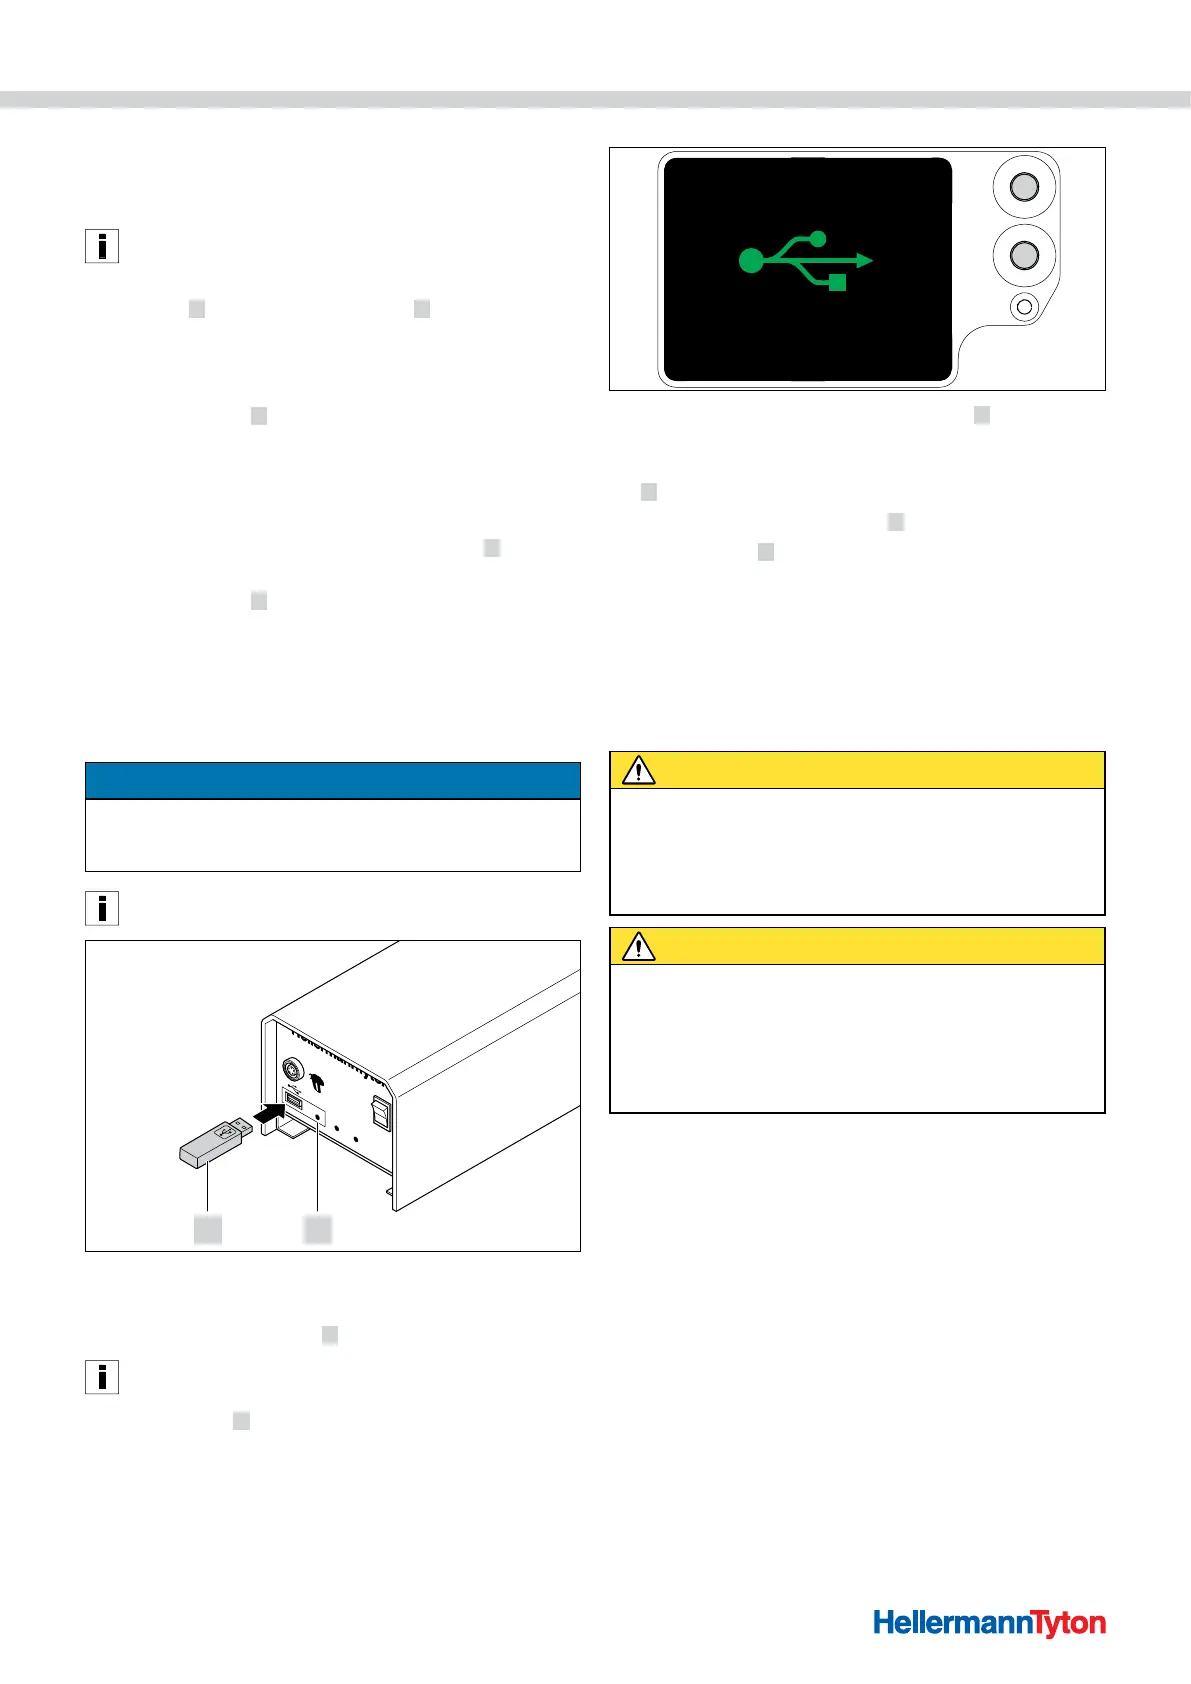
9.9 Export process data from the power packCPK
NOTE
The power packCPK must be restarted before the
transmission, as otherwise the CSV file will be written
incorrectly and it will not be possible to convert it.
Bindings cannot be triggered while a data transfer is in
progress.
Data Signal Power
Power pack CPK
2 1
f Switch the power packCPK off and on again.
f Disconnect the power packCPK from the PC.
f Plug a USB memory stick
2 into the power packCPK.
The USB memory stack must be FAT32-formatted.
; The DataLED 1 lights up green as soon as the device
recognises the USB memory stick.
; The data are exported to the USB memory stick.
; The display shows the message that the AT2000 CPK
should not be switched off.
USB active
Do not switch off
; During the saving process, the DataLED 1 will light up
red/blue.
; As soon as the data transfer is complete, the DataLED
1 lights up green.
f Unplug the USB memory stick
2 .
; The DataLED
1 goes out and the AT2000 CPK is ready
for use.
f Switch the power packCPK off and on again.
f Connect the power packCPK to the PC.
10 Troubleshooting
10.1 Important notes
CAUTION
Crush hazard when jaws close.
f Do not insert fingers between upper and lower jaws and
do not keep your finger on the trigger.
f Always keep the power pack switched OFF when
clearing a blockage.
CAUTION
Crush hazard due to moving/rotating parts when
service flaps are open.
f Do not insert fingers underneath the drum and do not
keep your finger on the trigger.
f Always keep the power pack switched OFF when
clearing a blockage.