RF-CO (Carbon Monoxide Detector)
Default Eng. Code - 4567 Default User Code - 1111 (Irl) 1234 (UK)
34
• >4 Years Battery Life. Note: Detector Head has own sealed-in battery good for the life of the
product.
• >200m Line-of-sight Radio Range
• Detector Head has own Siren
• Fix the mounting plate as per the recommendations in the instruction booklet for carbon monoxide (CO)
detector.
2 Devices Menu
2 Wired Devices Menu
1 Add&Id:RF Zones
2 Add&Id:RF Keyfob
3 Add&Id:RF Echo
1 RF Devices Menu
1 Add & ID RF Devices
Scanning RF Devs
1 Add & ID RF Devices
2 Locate RF Devices
2 Locate RF Devices
3 Remove RF Devices
3 Remove RF Devices
1 Service Menu
3 Zone Menu
• To put an RF-CO on to a Quantum 70 system go into engineer mode.
•
• If you have a number of RF-CO detectors you can open them too at this stage and remove their isolators.
• Select the Devices Menu. Then RF Devs Menu. Next select the Add & Id RF Devs option.
• Next, add and identify the RF-CO as a zone.
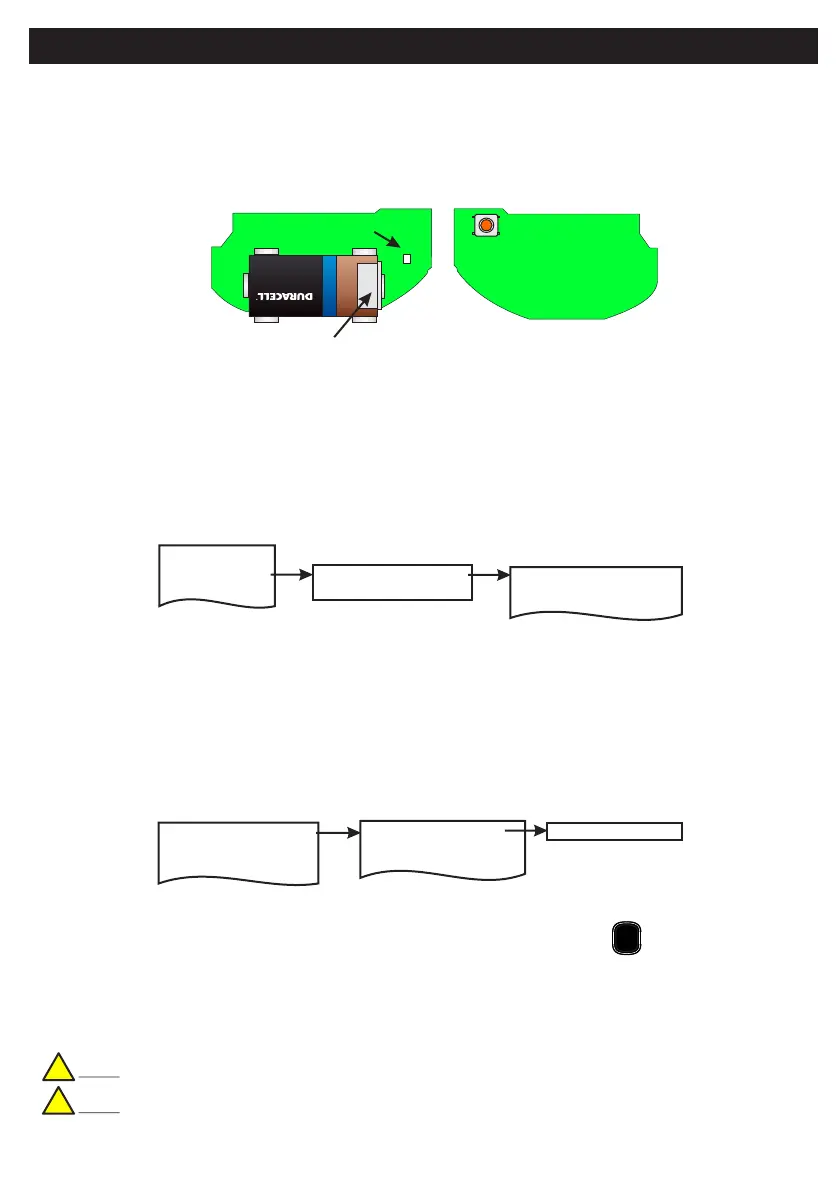
Plug out the SecureWave board to access the battery isolator; remove the isolator. The SecureWave board
is now powered-up. Plug it back into the main body of the detector
• The system displays Devs Found - 000 when it starts scanning and as it finds its first device the display will
change to Devs Found - 001. When the system has found all its devices, press
• Select the zone number to be added & Id’ed.
• Next, press the push-button switch for about a second.
• As you press the devices’ switches in sequence. You will hear an audible indication as each device is
identified into the system
Note: The RF-Echo can have a delayed reaction.
Note: Please refer to the RF-CO Installation Manual for further safety advice
PLAY
QUIT
Add & ID on to the System
!
!
Pushbutton
switch
SecureWave board
Battery isolator
Status LED
+
ULTRA LITHIUM