RF-Keyfob
Note: See User Manual for operating instructions
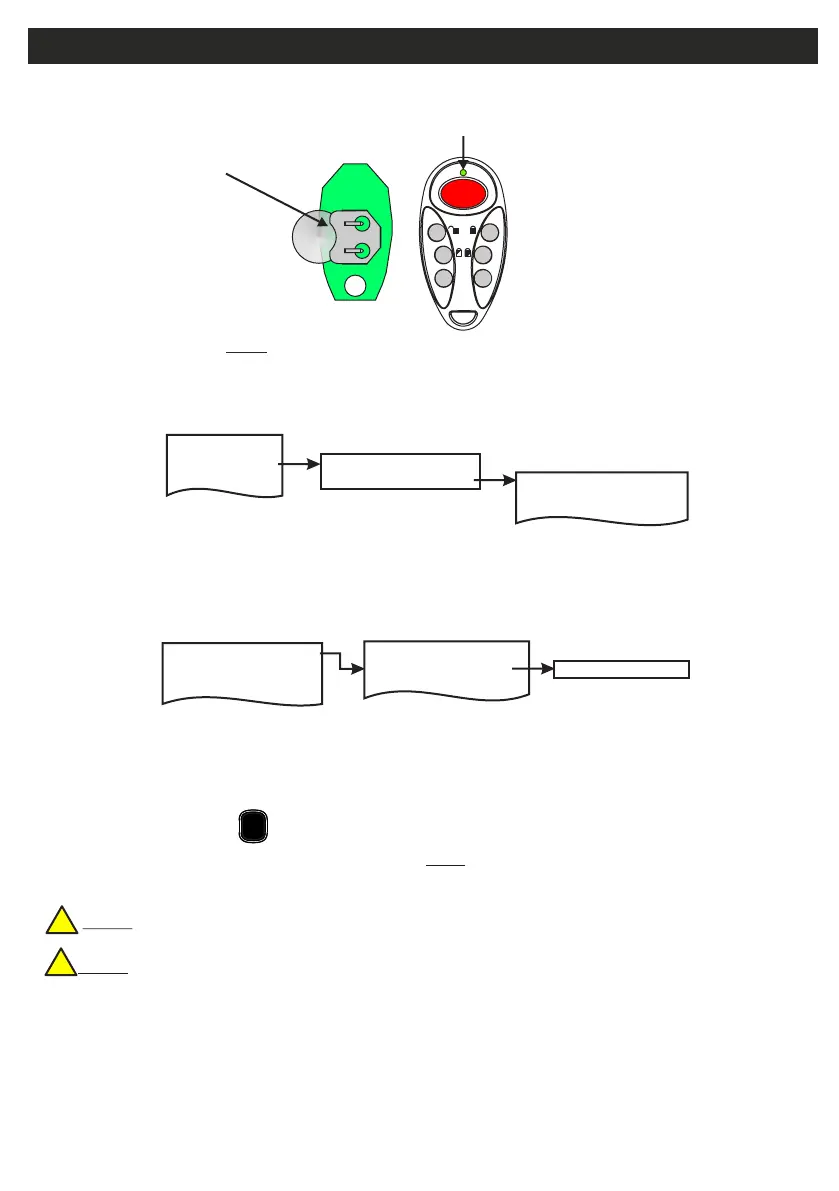
The battery is pre-fitted but to
replace: Slide a CR2032 into
the holder as shown
1/2
5/6
9
7/8
Green: Transmission OK
Red: Transmission not OK
Orange: Out of Range
+
+
Then reassemble the unit
PCB
assembly
0
3/4
2 Devices Menu
2 Wired Devices Menu
1 Add&Id:RF Zones
2 Add&Id:RF Keyfob
3 Add&Id:RF Echo
1 RF Devices Menu
1 Add & ID RF Devices
Scanning RF Devs
1 Add & ID RF Devices
2 Locate RF Devices
2 Locate RF Devices
3 Remove RF Devices
3 Remove RF Devices
1 Service Menu
3 Zone Menu
• To put an RF-Keyfob on to a Quantum 70 system go into engineer mode.
• Select the Devices Menu. Then RF Devs Menu. Next select the Add & Id RF Devs option.
• Next, add and identify the device(s) as an RF Keyfob.
• The system displays Devs Found - 000 when it starts scanning.
• Press any button on the RF-Keyfob to wake it up. This action does not ID it in to the system.
• If you have a number of RF-Keyfobs you can wake them up at this stage too.
• As the system finds its first device the display will change to Devs Found - 001. When the system has
found all its devices, press
• You will have to press any button on the RF-Keyfob again in order to add and ID it into the system.
• , U02 Keyfob 2
As the RF-Keyfob(s) are added to the system, you will hear an audible indication
Note1: The RF-Echo can have a delayed reaction.
Note2: Only 1 RF-Keyfob per User.
At this stage you can associate a key-fob with a particular end user i.e. U01 Keyfob 1 etc.
• It is assumed that only a user possesses an RF-Keyfob, therefore a physical key is considered as Access
Level 2.
PLAY
QUIT
Add & ID on to the System
!
!
Default Eng. Code - 4567 Default User Code - 1111 (Irl) 1234 (UK)
22