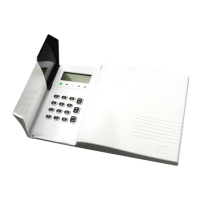
Default Eng. Code - 4567 Default User Code - 1111 (Irl) 1234 (UK)
RF-PIRCAM
Mounting
Holes*
Custom
Fresnel
Lens
Camera Lens
Light Sensor
Flash
LED Difuser
Release
Tag for
Circuit
Assembly
+
-
+
ULTRA LITHIUM
+
-
+
ULTRA LITHIUM
Battery
Antenna
LED
Camera
Assembly
Tamper
Switch
Pyro
Sensor
Battery
• 15m Pyro Detection
• High Quality Colour Camera with white LED for low light
• Very Low Current Consumption
• Long Battery Life (typically up to 3 years)
• >400m Line-of-sight Radio Range
• Close-in Detection
• Adjustable Sensitivity
• Noise Immunity
• Temperature Compensation
2 Devices Menu
1 Add & ID RF Devices
2 Locate RF Devices
3 Remove RF Devices
1 Service Menu
3 Zone Menu
• To put an RF-PIRCAM on to a SecureWave system go into engineer mode. Select the Devices Menu, then
RF Devs Menu. Next, select the Add & Id RF Devs option.
• Now you have a choice to add and identify the RF-PIRCAM and map it onto either a zone or point location.
Tip: To conserve zones it would be best to add and ID your RF-PIRCAMs onto Points (of which there are 40)
first before you assign them to Zones.
• The system displays Devs Found - 000 when it starts scanning and as it finds its first device the display will
change to Devs Found - 001. When the system has found all its devices you will be prompted to close the
devices’ tamper switches.
Note: A full scan will take about a minute and
•Close the devices’ tamper switches in sequence. You will hear an audible indication as each device is
identified into the system
Note: The RF-Echo can have a delayed reaction.
may be halted at any time by pressing
PLAY
QUIT
2 Wired Devices Menu
1 RF Devices Menu
!
RF-PIRCAM does not connect to RF-Repeater
Add & ID on to the System
1 Add&Id:RF Zones
2 Add&Id:RF Points
1 Add & ID RF Devices
Scanning RF Devs
Scanning RF Devs
2 Locate RF Devices
3 Remove RF Devices
16

 Loading...