EasyManuals Logo

Honeywell FUSION User Manual

Honeywell FUSION
168 pages
To Next Page IconTo Next Page
To Previous Page IconTo Previous Page
Page #64 background imageLoading...
Page #64 background image
FUSION DVR Digital Recording and Transmission System
5–20
5.6 RECORDING SCHEDULE, CONTINUED
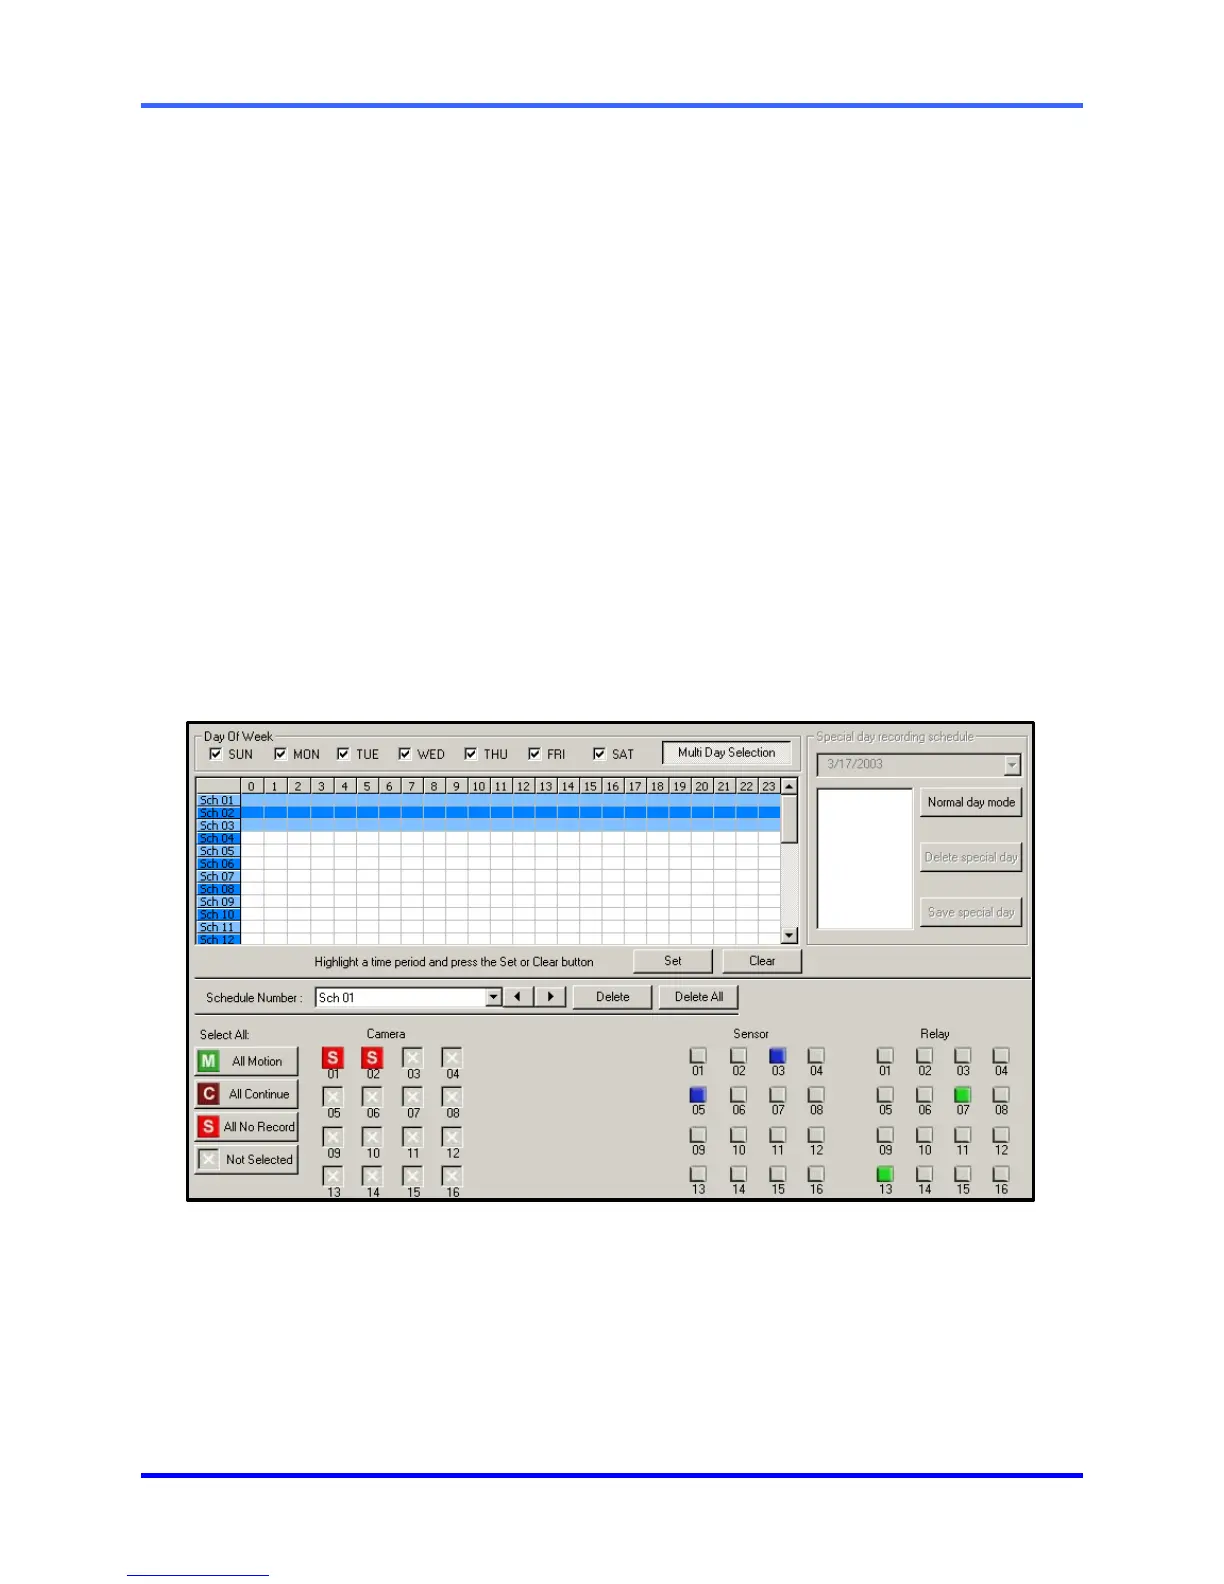
Steps 1-8: Schedule cameras 1 and 2 to be activated on Sensor # 3 and/or
Sensor #5 which will then activate Relay Output #7 and #13.
1. Select Sch01 from the Schedule Number drop down list.
(This should already be selected by default.)
2. Select the Single Day Selection button, then select Yes.
3. Place a check in the boxes for SUN, MON, TUE, WED, THU, FRI, and SAT days
of the week.
4. On the Sch01 line (time selector grid), highlight the hours 00-23 and press Set.
5. Press Camera buttons #1 and #2 until the Red Sensor buttons are selected.
6. Press Sensor buttons #3 and #5.
7. Press Relay buttons #7 and #13.
8. Press Apply to save.

Table of Contents

Questions and Answers:

Question and Answer IconNeed help?

Do you have a question about the Honeywell FUSION and is the answer not in the manual?

Honeywell FUSION Specifications

General IconGeneral
Recording ResolutionUp to 1080p
Operating SystemEmbedded Linux
CompressionH.264
Video Inputs4, 8, 16
Video OutputHDMI, VGA
Network Interface10/100 Mbps
Channels4, 8, 16
Remote ViewingYes
Alarm Inputs4
Operating Temperature0°C to 40°C (32°F to 104°F)
Audio Inputs/Outputs1/1 (RCA)

Related product manuals