Removal and replacement procedures 31
PCI riser cage
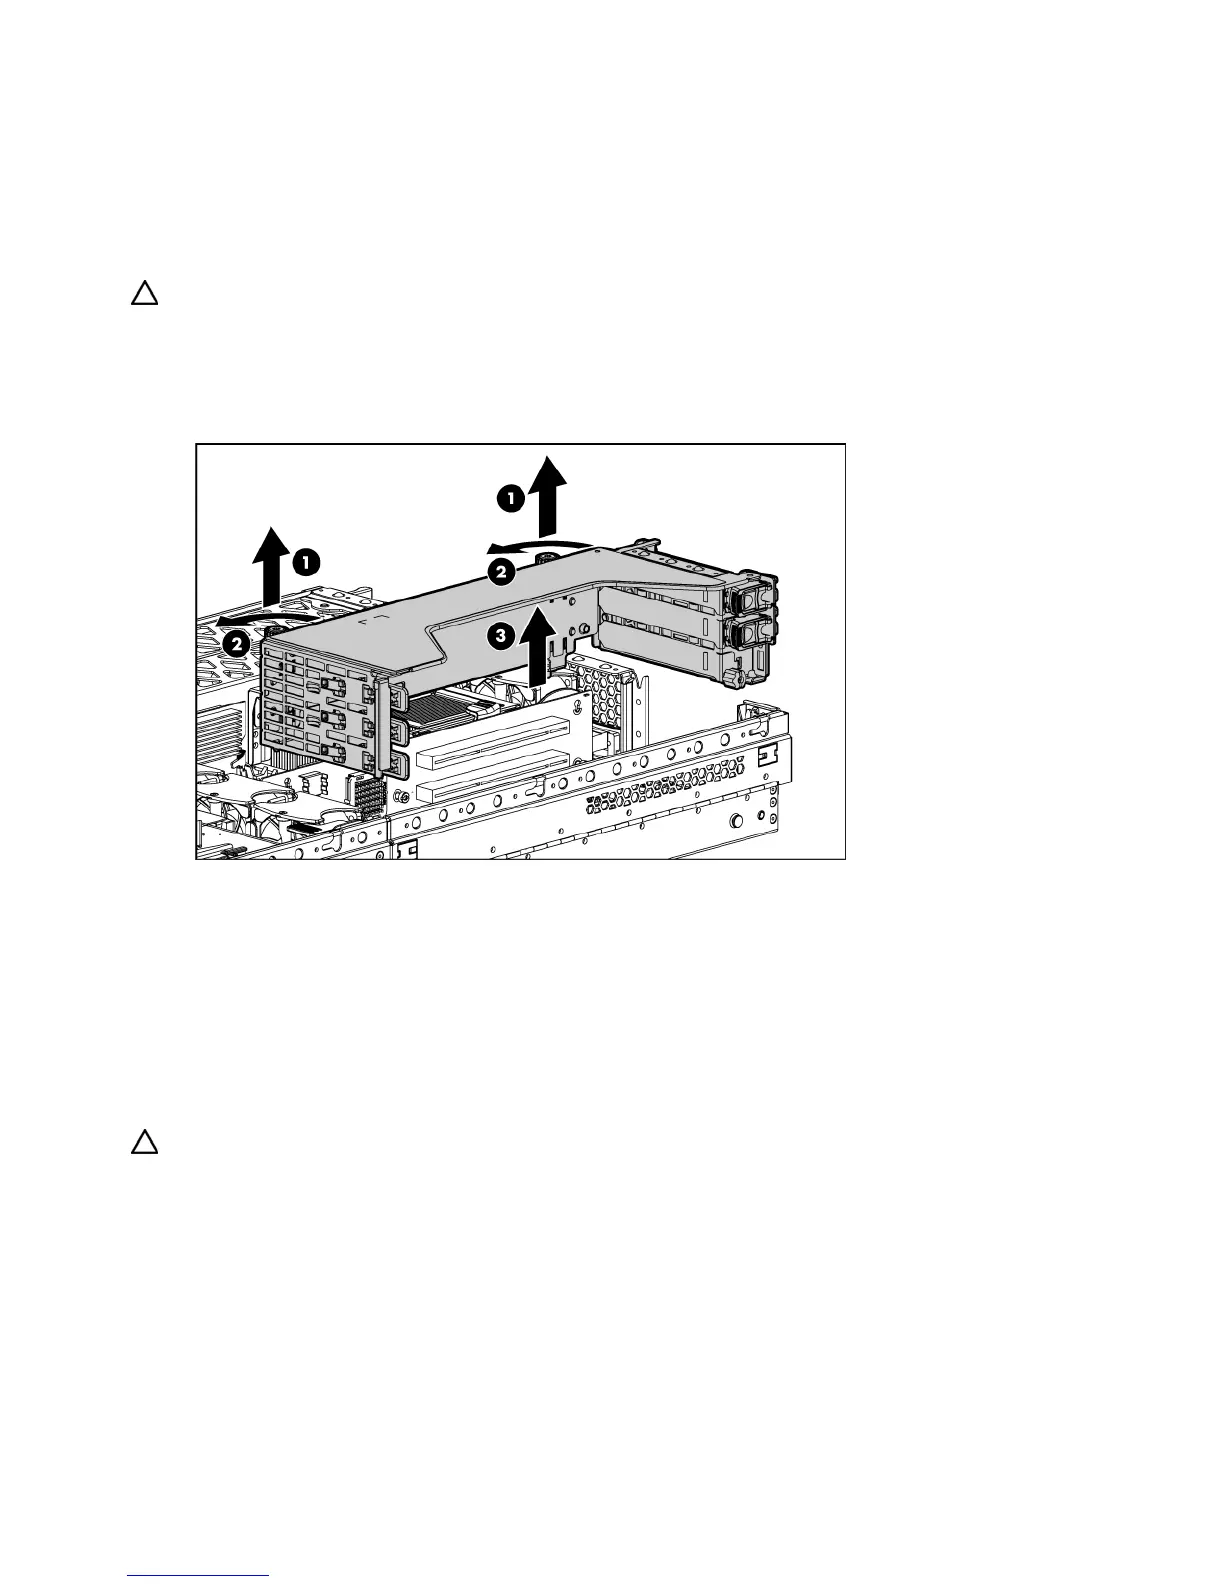
To remove the component:
1. Power down the server (on page 20).
2. Extend the server from the rack, if applicable ("Extend the server from the rack" on page 19).
3. Remove the access panel ("Access panel" on page 22).
CAUTION: To prevent damage to the server or expansion boards, power down the server and remove all
AC power cords before removing or installing the PCI riser cage.
4. Disconnect any internal or external cables connected to any existing expansion boards.
5. Lift the PCI riser cage thumbscrews and turn them counter-clockwise.
6. Remove the PCI riser cage.
To replace the component, reverse the removal procedure.
Expansion board
To remove the component:
1. Power down the server (on page 20).
2. Extend or remove the server from the rack ("Extend the server from the rack" on page 19, "Remove
the server from the rack" on page 20).
3. Remove the access panel ("Access panel" on page 22).
CAUTION: To prevent damage to the server or expansion boards, power down the server and remove all
AC power cords before removing or installing the PCI riser cage.
4. Disconnect any cables connecting the expansion board to the PCI riser cage.
5. Remove the PCI riser cage.
 Loading...