Removal and replacement procedures 43
12.
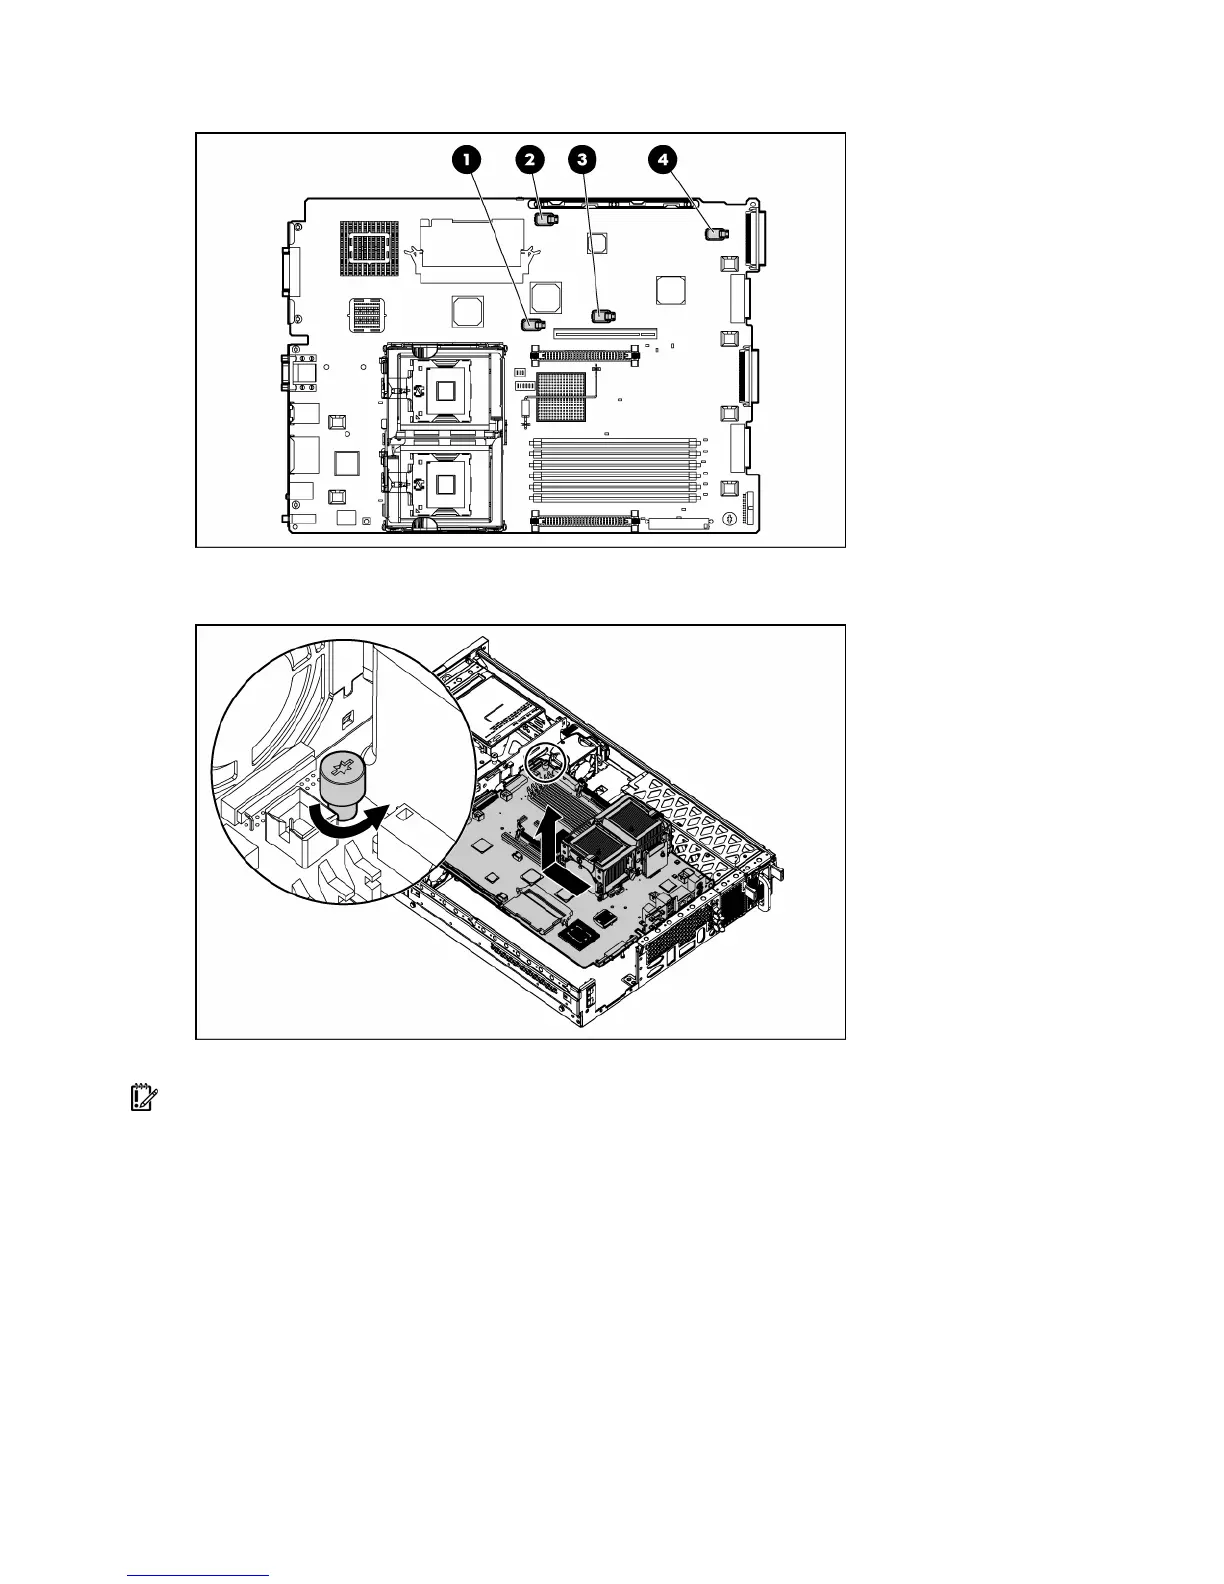
Identify the alignment keys and keyhole locations, 1 through 4.
13. Loosen the system board thumbscrew.
14. Remove the system board.
15. Remove the rear fan bracket.
IMPORTANT: If replacing the system board or clearing NVRAM, you must re-enter the server serial number
through RBSU ("Re-entering the server serial number and product ID" on page 43).
To replace the component, reverse the removal procedure.
Re-entering the server serial number and product ID
After you replace the system board, you must re-enter the server serial number and the product ID.
1. During the server startup sequence, press the F9 key to access RBSU.
2. Select the System Options menu.
3. Select Serial Number. The following warning is displayed:
WARNING! WARNING! WARNING! The serial number is loaded into the system
during the manufacturing process and should NOT be modified. This option
 Loading...