EasyManuals Logo

HP Integrity rx1620 Maintenance Guide

HP Integrity rx1620
73 pages
To Next Page IconTo Next Page
To Previous Page IconTo Previous Page
Page #13 background imageLoading...
Page #13 background image
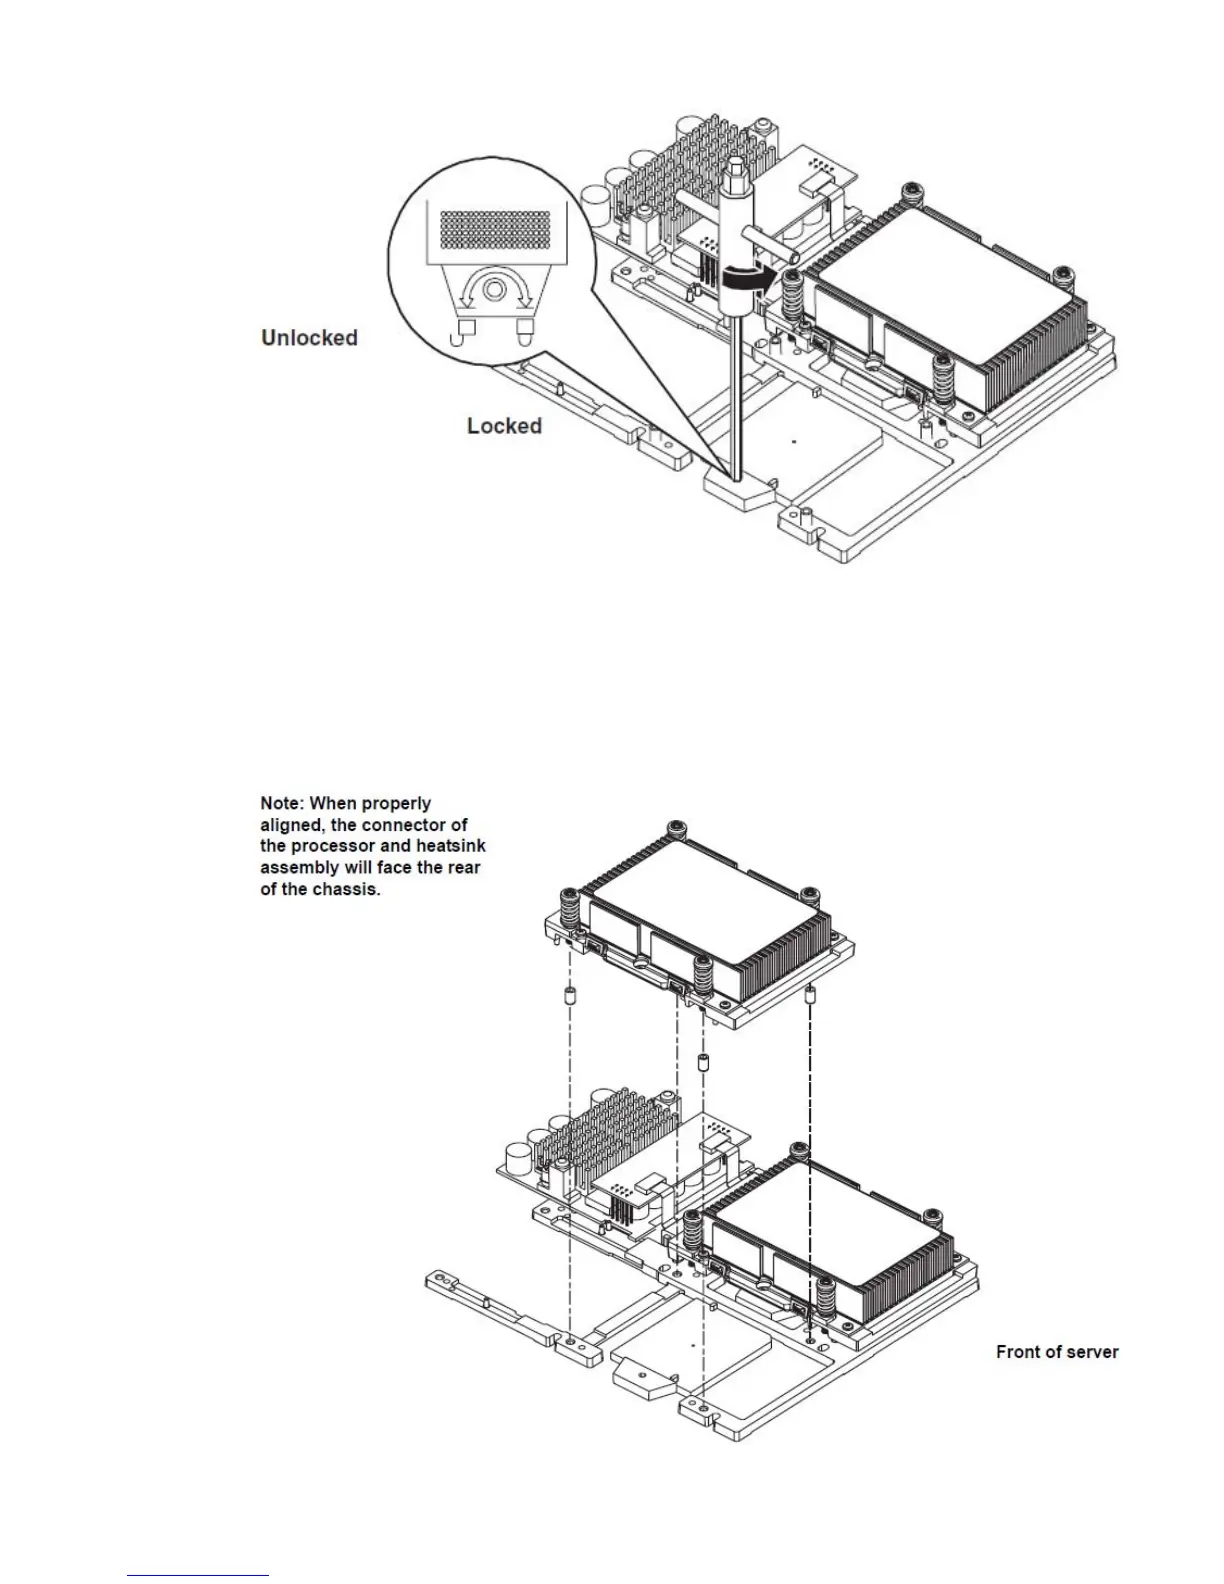
Figure 6 Unlocking the Processor Locking Mechanism
6. Remove the pin cover and protective caps for the captive screws on the processor.
7. Place the processor and heatsink assembly over the processor socket. Use the four locator
posts on the assembly to align with the locator holes on the system board. Make certain that
the connector that will mate with the processor power pod is pointing toward the back of the
chassis.
Figure 7 Aligning the Processor Assembly
Installing Processors and Memory 13

Table of Contents

Other manuals for HP Integrity rx1620

Questions and Answers:

Question and Answer IconNeed help?

Do you have a question about the HP Integrity rx1620 and is the answer not in the manual?

HP Integrity rx1620 Specifications

General IconGeneral
BrandHP
ModelIntegrity rx1620
CategoryServer
LanguageEnglish

Related product manuals