EasyManuals Logo

HP Notebook Series User Manual

HP Notebook Series
190 pages
To Next Page IconTo Next Page
To Previous Page IconTo Previous Page
Page #141 background imageLoading...
Page #141 background image
Drives
Hardware and Software Guide 7–11
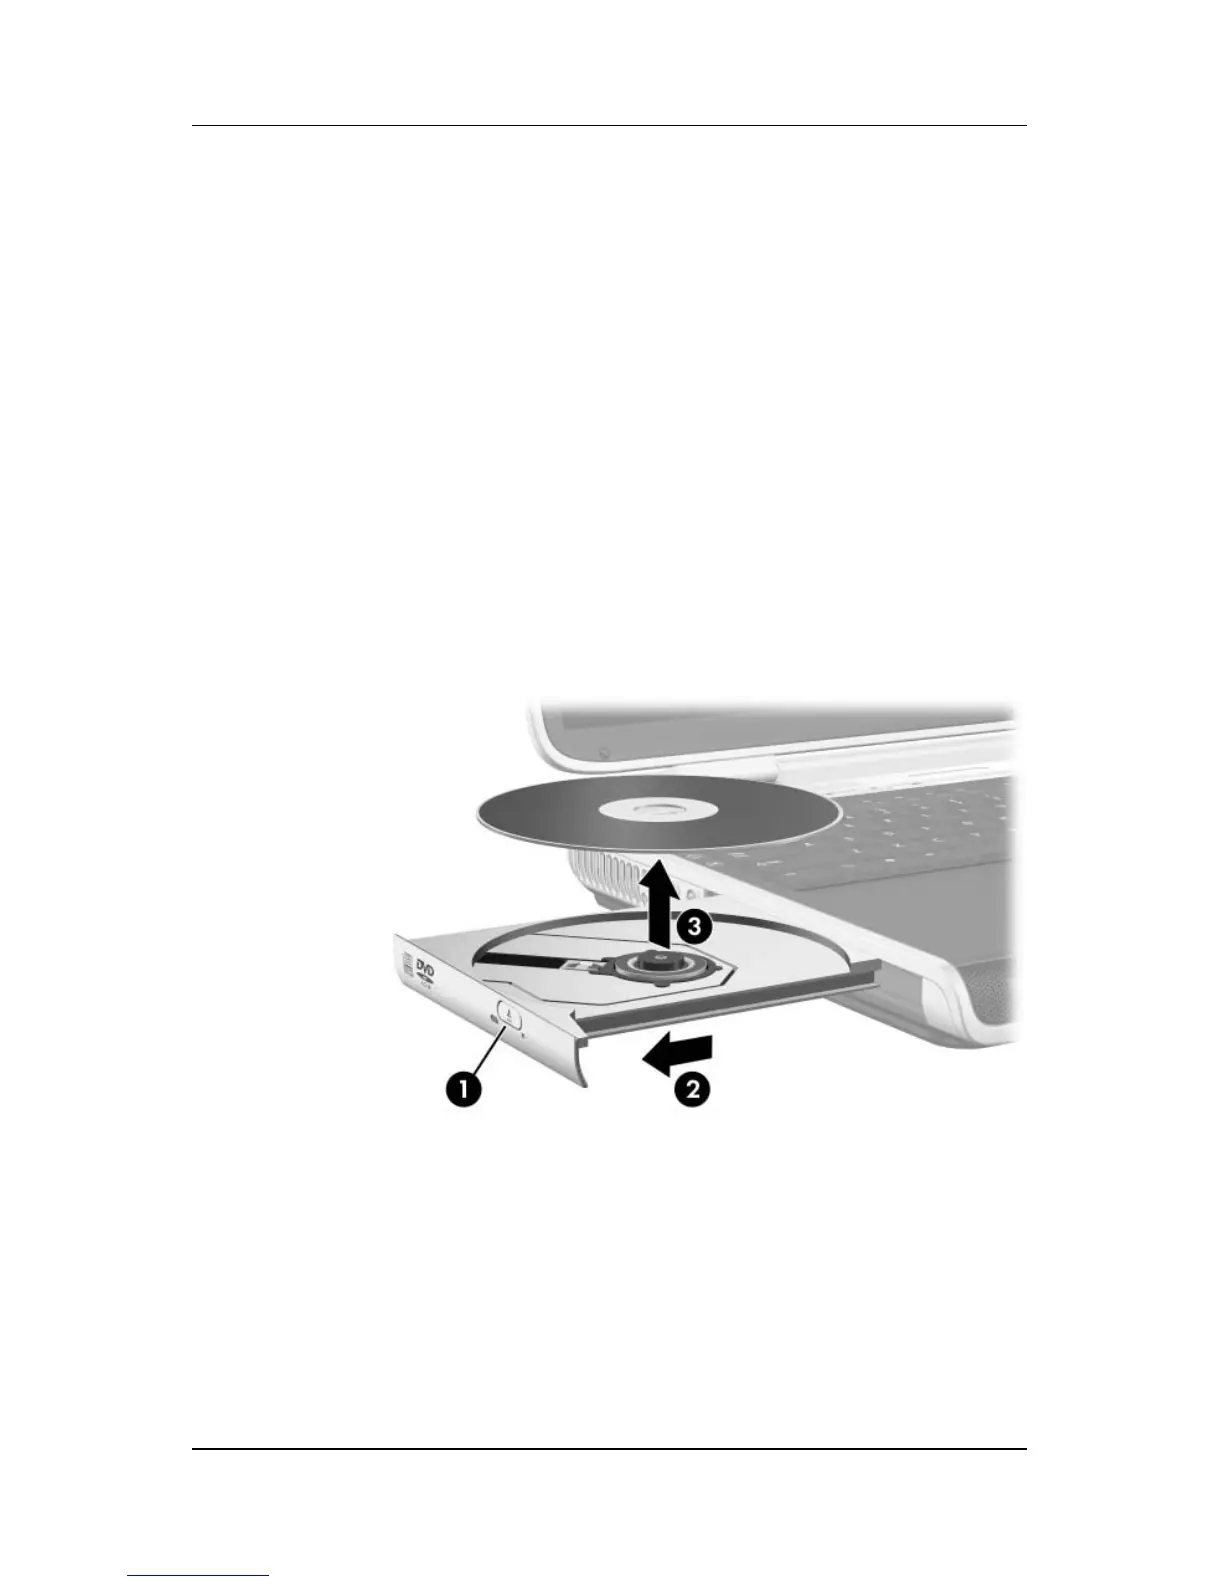
Removing an Optical Disc (With Power)
1. Turn on the notebook.
2. Press the release button 1 on the drive bezel to release the
media tray, and then pull the tray outward until it is fully
extended
2.
3. Remove the disc from the tray by gently pushing down on
the
spindle while pulling up on the outer edges of the disc 3.
Handle the disc by the edges, not the flat surfaces. (If the
media tray is not fully extended, tilt the disc as you
remove
it.)
4. Close the media tray.
5. Place the disc in a protective case.

Table of Contents

Other manuals for HP Notebook Series

Questions and Answers:

Question and Answer IconNeed help?

Do you have a question about the HP Notebook Series and is the answer not in the manual?

HP Notebook Series Specifications

General IconGeneral
CategoryLaptop
SeriesNotebook Series
ProcessorVaries by model (e.g., Intel Core i3/i5/i7, AMD Ryzen)
RAMVaries by model (e.g., 4GB, 8GB, 16GB)
StorageVaries by model (e.g., 256GB SSD, 1TB HDD)
Display14-inch to 17.3-inch HD or FHD (varies by model)
Operating SystemWindows 10 or Windows 11 (varies by model)
GraphicsIntegrated Intel or AMD Graphics or Discrete NVIDIA or AMD Graphics (varies by model)
BatteryVaries by model
WeightVaries by model

Related product manuals