Contents
HP ProLiant ML370 Generation 3 Server Setup and Installation Guide xi
HP CONFIDENTIAL
Writer: Jennifer Hayward File Name: a-frnt.doc
Codename: DizzyDevil Part Number: 281992-002 Last Saved On: 12/3/02 2:08 PM
3-59 Installing a hot-plug power supply ......................................................................... 3-69
3-60 Using a management clip to secure the power cord................................................ 3-70
3-61 PCI-X expansion slots (tower server) ..................................................................... 3-71
3-62 Removing an expansion slot cover ......................................................................... 3-74
3-63 Releasing the PCI-X guide clip............................................................................... 3-75
3-64 Installing an expansion board ................................................................................. 3-76
3-65 Securing the PCI-X guide clip ................................................................................ 3-77
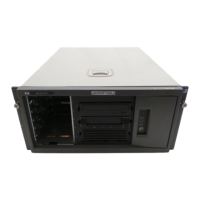
4-1 Server installed in the rack........................................................................................ 4-2
4-2 Measuring with the template on the front of the rack ............................................... 4-4
4-3 Inserting cage nuts .................................................................................................... 4-6
4-4 Attaching a server rail to the chassis......................................................................... 4-7
4-5 Inserting the spring-load rails into the front of the rack............................................ 4-8
4-6 Inserting the spring-load rails into the rear of the rack ............................................. 4-9
4-7 Lifting with the server handles ............................................................................... 4-10
4-8 Aligning the server rails with the rack rails and inserting the server...................... 4-11
4-9 Initializing the rail locks ......................................................................................... 4-12
4-10 Tightening the thumbscrews ................................................................................... 4-12
4-11 Securing the cable management arm to the server.................................................. 4-13
4-12 Securing the cable management arm to the rack..................................................... 4-14
4-13 Releasing the power cord retaining clip.................................................................. 4-15
4-14 Securing the power cord in the retaining clip ......................................................... 4-16
4-15 Server cables secured to the cable management arm.............................................. 4-17
4-16 Pressing the Power On/Standby button................................................................... 4-18
4-17 Inserting the CD into the rack server ...................................................................... 4-20
4-18 Extending the server from the rack......................................................................... 4-23
4-19 Unlocking the cable management arm.................................................................... 4-24
4-20 Cable management arm fully open ......................................................................... 4-25
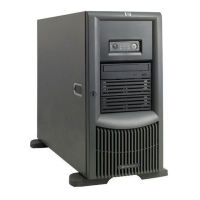
5-1 Tower server ............................................................................................................. 5-2
5-2 Pressing the Power On/Standby button..................................................................... 5-4
5-3 Inserting the CD into the tower server...................................................................... 5-6
6-1 Cabling the SCSI hard drive cage to SCSI port 1
(center wall and PPMs removed for clarity) ............................................................. 6-2
6-2 Cabling the diskette drive to the system board ......................................................... 6-3
6-3 Cabling the CD-ROM drive to the system board (rack server) ................................ 6-4
6-4 Cabling an internal tape drive to SCSI port 2 ........................................................... 6-5
6-5 Disconnecting the primary SCSI cable ..................................................................... 6-6
6-6 Connecting the SCSI cable to the SCSI controller option ........................................ 6-7
6-7 Cabling an optional internal two-bay hot-plug SCSI drive cage .............................. 6-8
6-8 Cabling hot-plug fans to the fan connector on the system board.............................. 6-9
 Loading...