MAX200 Instruction Manual 5-9
MAINTENANCE
Increase or Decrease Torch Lead Length
In order to increase or decrease the torch lead length between 50 and 150 ft at 25-foot increments, look at the
torch lead part numbers on pg. 6-25 to determine the leads that you need. The center section leads (029593) and
the torch-to-extension-box leads (029866) come with the male adapters (015036, 015049, and 015208) necessary
to mate leads to the next section – see Figure 5-3 on pg. 5-11. After ordering the correct leads, follow the general
procedures below and refer to Figure 5-2 on pg. 5-10.
Note: If you have the PAC200T/E 25-foot leads (029865) that come with the 25-foot MAX200
system and you want to lengthen the leads, you cannot use these 25-foot leads with any of
the extended leads sets. You must use the 029866 25-foot leads. See pg. 6-25.
1. Remove the eight (8) screws from the extension box halves and separate.
2. Slide the three lead insulators away from the pilot/shield lead and the two coolant hose connections.
3. Loosen connections using 1/2" wrenches on the coolant hose fittings, and 7/16" wrenches on all other fittings.
4. Add or remove lead sections as required. Match color-coded leads when connecting. Note that the red plasma
gas leads are all left-hand threaded.
5. After making the connections, slide the lead insulators over the connection joints.
6. Using tyraps, secure the two coolant hoses together. Also secure the other leads and torch switch leads
together. Do this on both sides of the connections.
7. Position the coolant hoses and other leads into one of the box halves. The two coolant hoses go to the narrow
side of the divider. The other leads go to the wider side.
8. Position each boot into the box half, so that the top rib fits over the lip just above the screw holes.
9. Align both halves of the box, press together, and secure with the eight (8) screws.
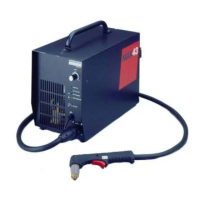
10. Route the torch leads prior to connecting the torch and power supply.
11. Connect extension leads to power supply. See page 3-14.
12. Connect leads to torch. See page 5-6.
(continued on page 5-11)