3-11
Load Clinical Software and Configure System
032-0330-EN Rev K
Scenario 1 - i-CAT FLX Installation
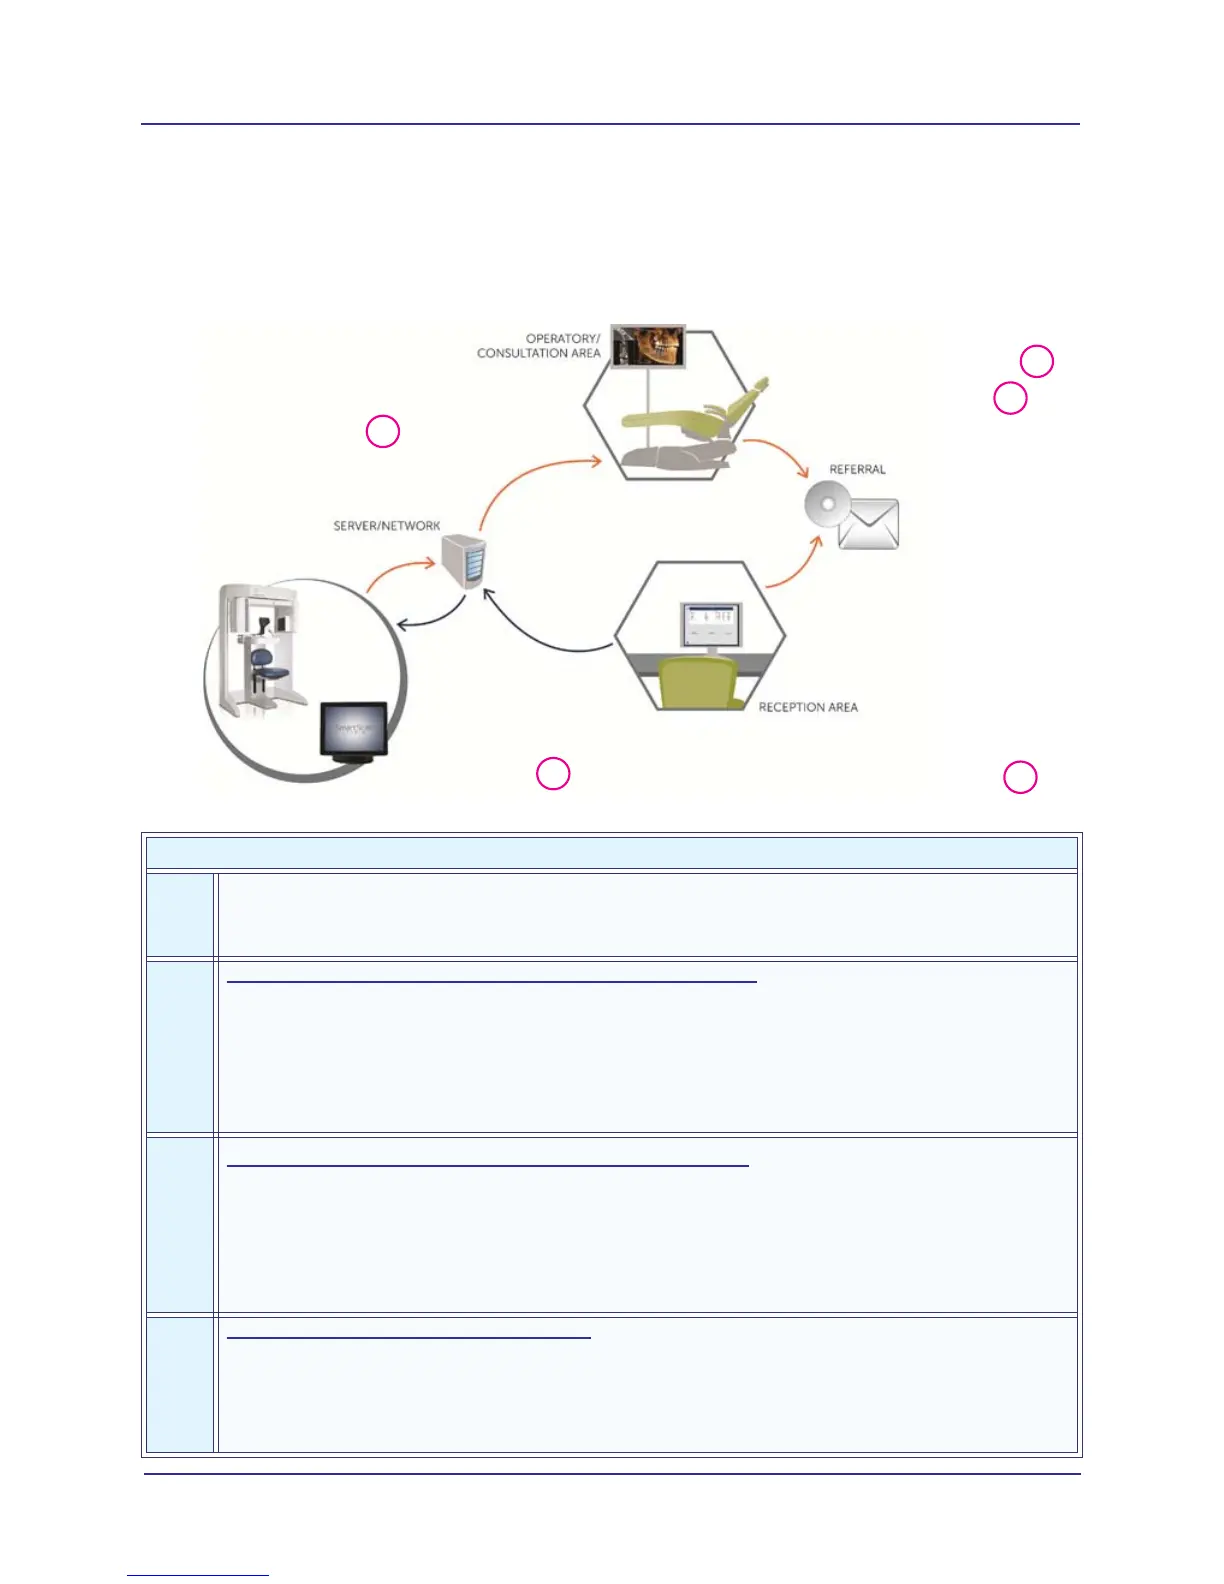
Below is the installation sequence of system software. The diagram shows a possible site configuration with
guidelines for the software that should be loaded on each workstation.
Scenario 1 - i-CAT FLX Installation
1
Install i-CAT FLX (Chapters 1 and 2)
Scanner and controller installed and networked with IP address.
SmartScan STUDIO is pre-installed at the factory.
2
Install SmartScan STUDIO Server Components (page 3-17) on long-term storage server.
• Integration Services (required by all sites)
• PACS Storage Service (sites using PACS)
• Data Utility (optional)
• Patient Data Utility (optional)
• Legacy Practice Management Interface (sites using PM system)
3
Install SmartScan STUDIO Client Components (page 3-21) on workstations in front office,
operatories, and consultation rooms.
• SmartScan STUDIO Manager (required by all sites)
• PACS QR (sites using a PACS for image storage)
• PACS MWL (sites using modality worklists for scheduling patients)
• Legacy Practice Management Viewer Launcher (sites using PM system)
4
Install InVivoDental Software (page 3-24) as required.
If not already loaded, load on the workstation where the site will be viewing QA Tests.
Load on workstations that will be using it to view patient images, as purchased by the site.
NOTE: Vision is not supported on the i-CAT FLX, only TxSTUDIO and Dolphin viewers are
supported.
Reception Area
• Approved PMS
• SmartScan STUDIO Manager
Site-Provided Server
• SmartScan STUDIO
Integration Services
• (Optional) 3 and 4 if
server is also a client
i-CAT FLX
• SmartScan STUDIO
(pre-installed)
Operatory/Consultation Room
• SmartScan STUDIO Manager
• TxSTUDIO
4
3
3
1
2