4-2
i-CAT FLX Installation Manual
032-0330-EN Rev K
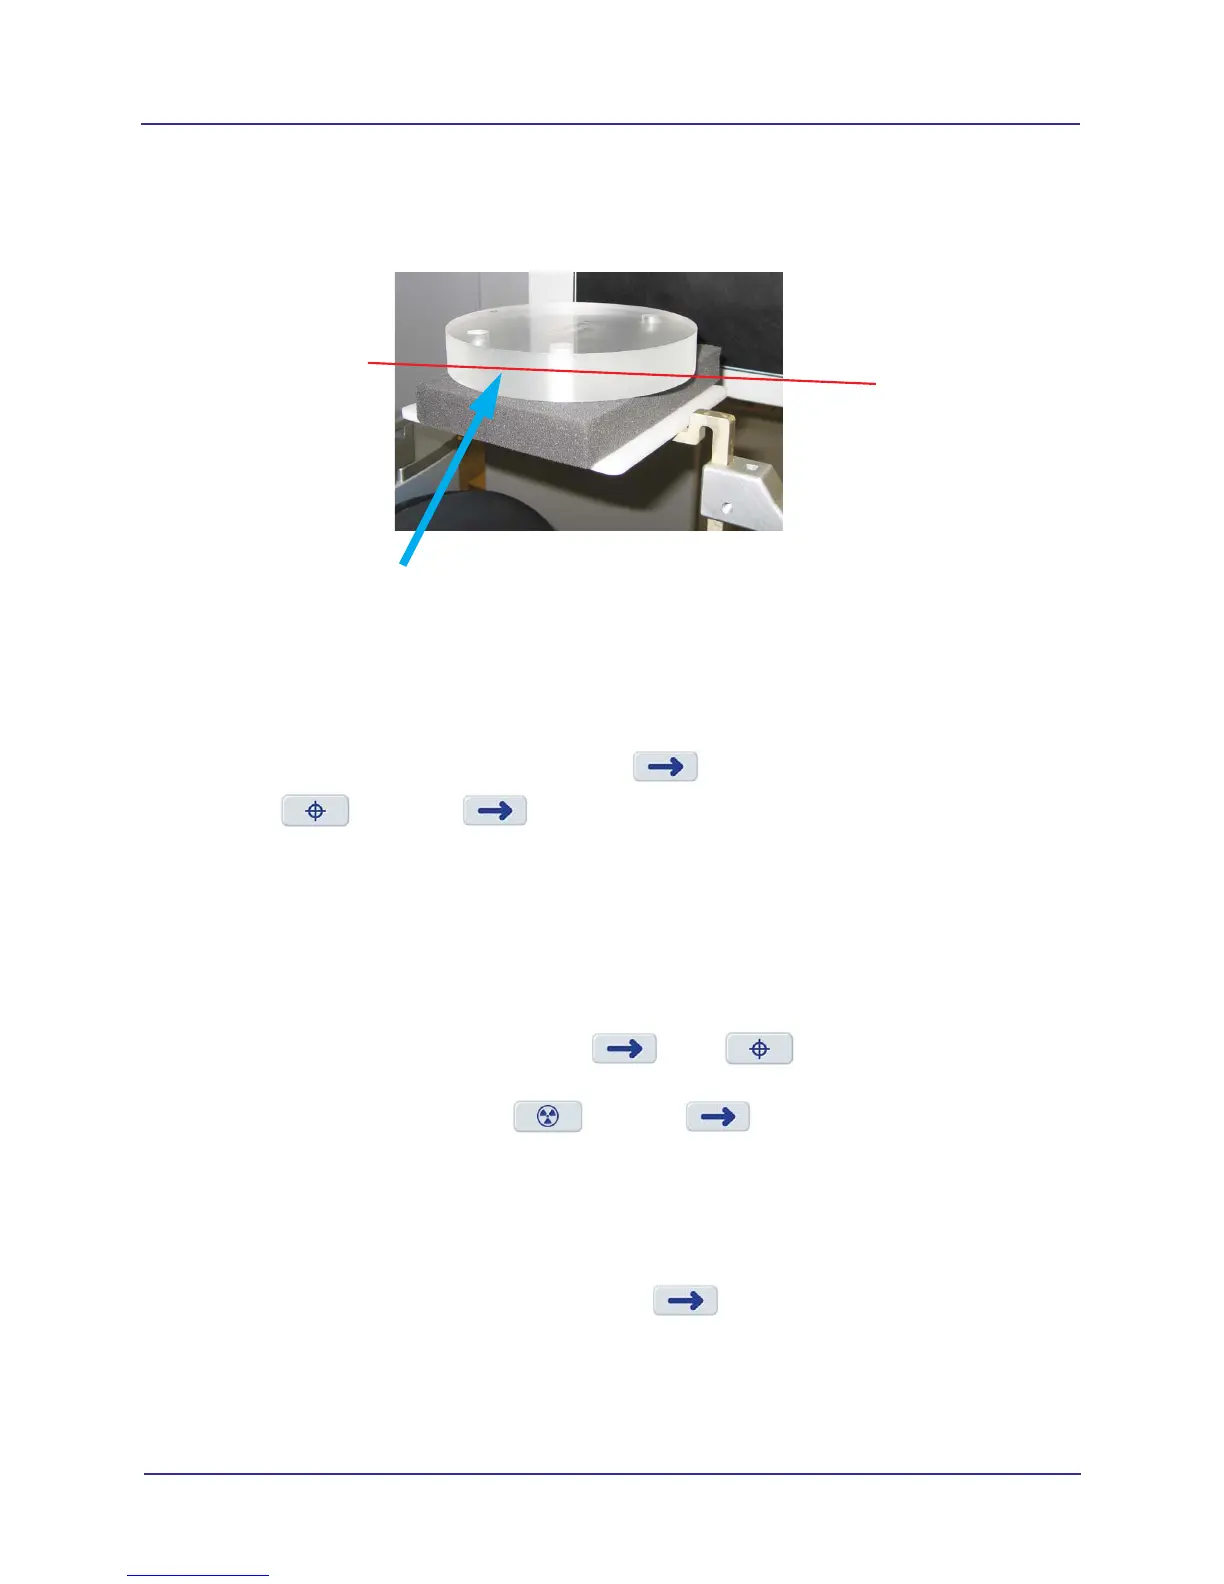
4. Using the Alignment Lasers, adjust the platform height so that the horizontal laser is positioned at
the center of the QA phantom.
Make sure the phantom is centered left to right and front to back. Use the lasers to confirm.
Run QA Line Pair Test
1. From Utilities menu, select QA Line Pair.
2. Ensure phantom is set up properly, then press .
3. Select , then press . The scanner initializes.
4. When prompted, press the Scan button on the operator control box. An audible alarm is sounded
and the X-ray ON light is illuminated during radiation exposure.
5. Review the scout image. The phantom must be centered and level. Adjust the phantom platform as
needed to achieve the proper height.
6. To move the phantom to the right or left, use the Front/Back slider control.
If required, make adjustments, then press to run again. Repeat as required until
phantom is properly aligned.
7. When phantom is aligned, select and press .
8. When prompted, press the Scan button on the operator control box. An audible alarm is sounded
and the X-ray ON light is illuminated during radiation exposure.
The scanner acquires data and a status indicator shows acquisition and image creation progress.
When image processing is complete, image is displayed.
9. Review image to ensure adequate quality. Press to display Complete screen and select
option to go Back to Utility.
Horizontal Laser Line
through Center of Phantom