4-5
QA Tests
032-0330-EN Rev K
3. Select , then press . The scanner initializes.
4. When prompted, press the Scan button on the operator control box. An audible alarm is sounded
and the X-ray ON light is illuminated during radiation exposure.
5. Review the scout image. The phantom must be centered and level. Adjust the phantom platform as
needed to achieve the proper height.
6. To move the phantom to the right or left, use the Front/Back slider control.
If required, make adjustments, then press to run again. Repeat as required until
phantom is properly aligned.
7. When phantom is aligned, select and press .
8. When prompted, press the Scan button on the operator control box. An audible alarm is sounded
and the X-ray ON light is illuminated during radiation exposure.
The scanner acquires data and a status indicator shows acquisition and image creation progress.
When image processing is complete, image is displayed.
9. Review image to ensure adequate quality. Press to display Complete screen and select
option to go Back to Utility.
QA Material Evaluation
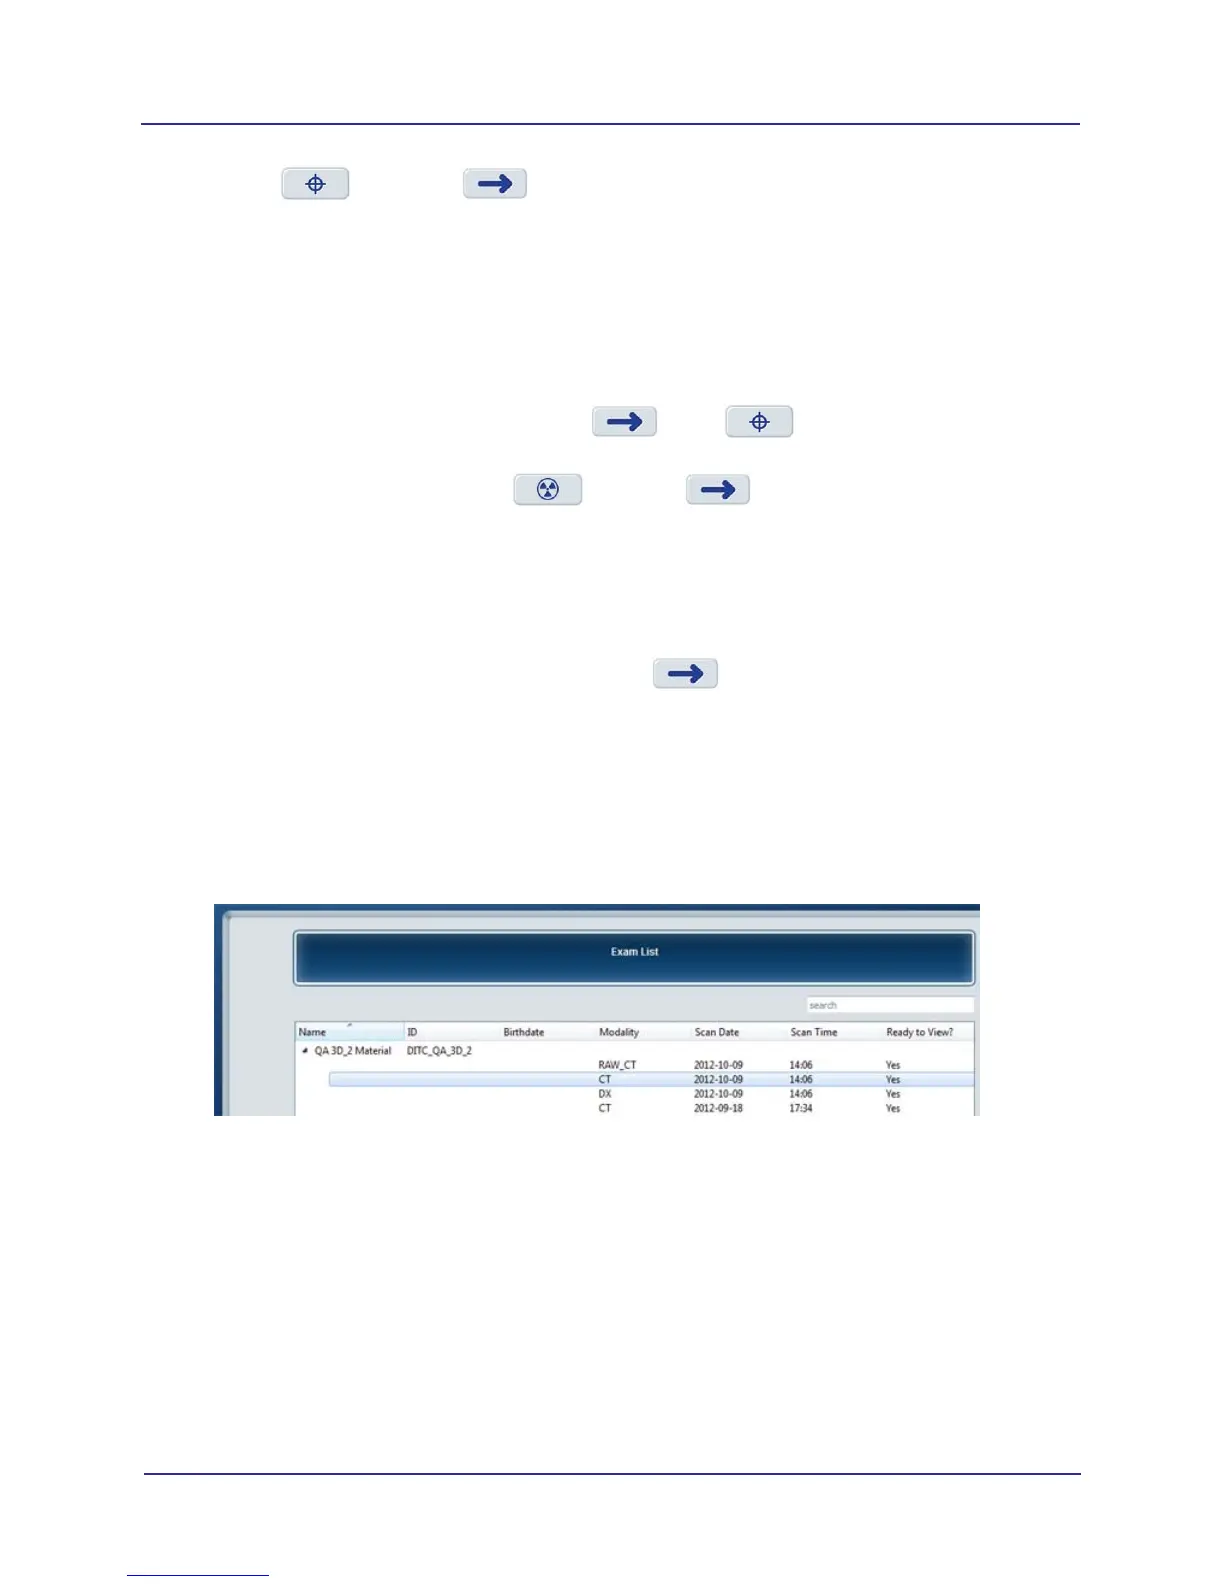
1. At a clinical workstation, start SmartScan STUDIO Manager and select Exam List.
2. On Exam List, locate QA 3D_2 Material exam with most current date. Double-click CT entry to load
study in TxSTUDIO.
NOTE: If a pop-up message displays stating “Tru-Pan failed to process”, click OK and continue.
3. When exam is loaded, select Section tab at top of display.
4. In the upper right corner view, click where the vertical and horizontal cursor lines cross and drag to
the center of the material plugs, as shown below.