4-6
i-CAT FLX Installation Manual
032-0330-EN Rev K
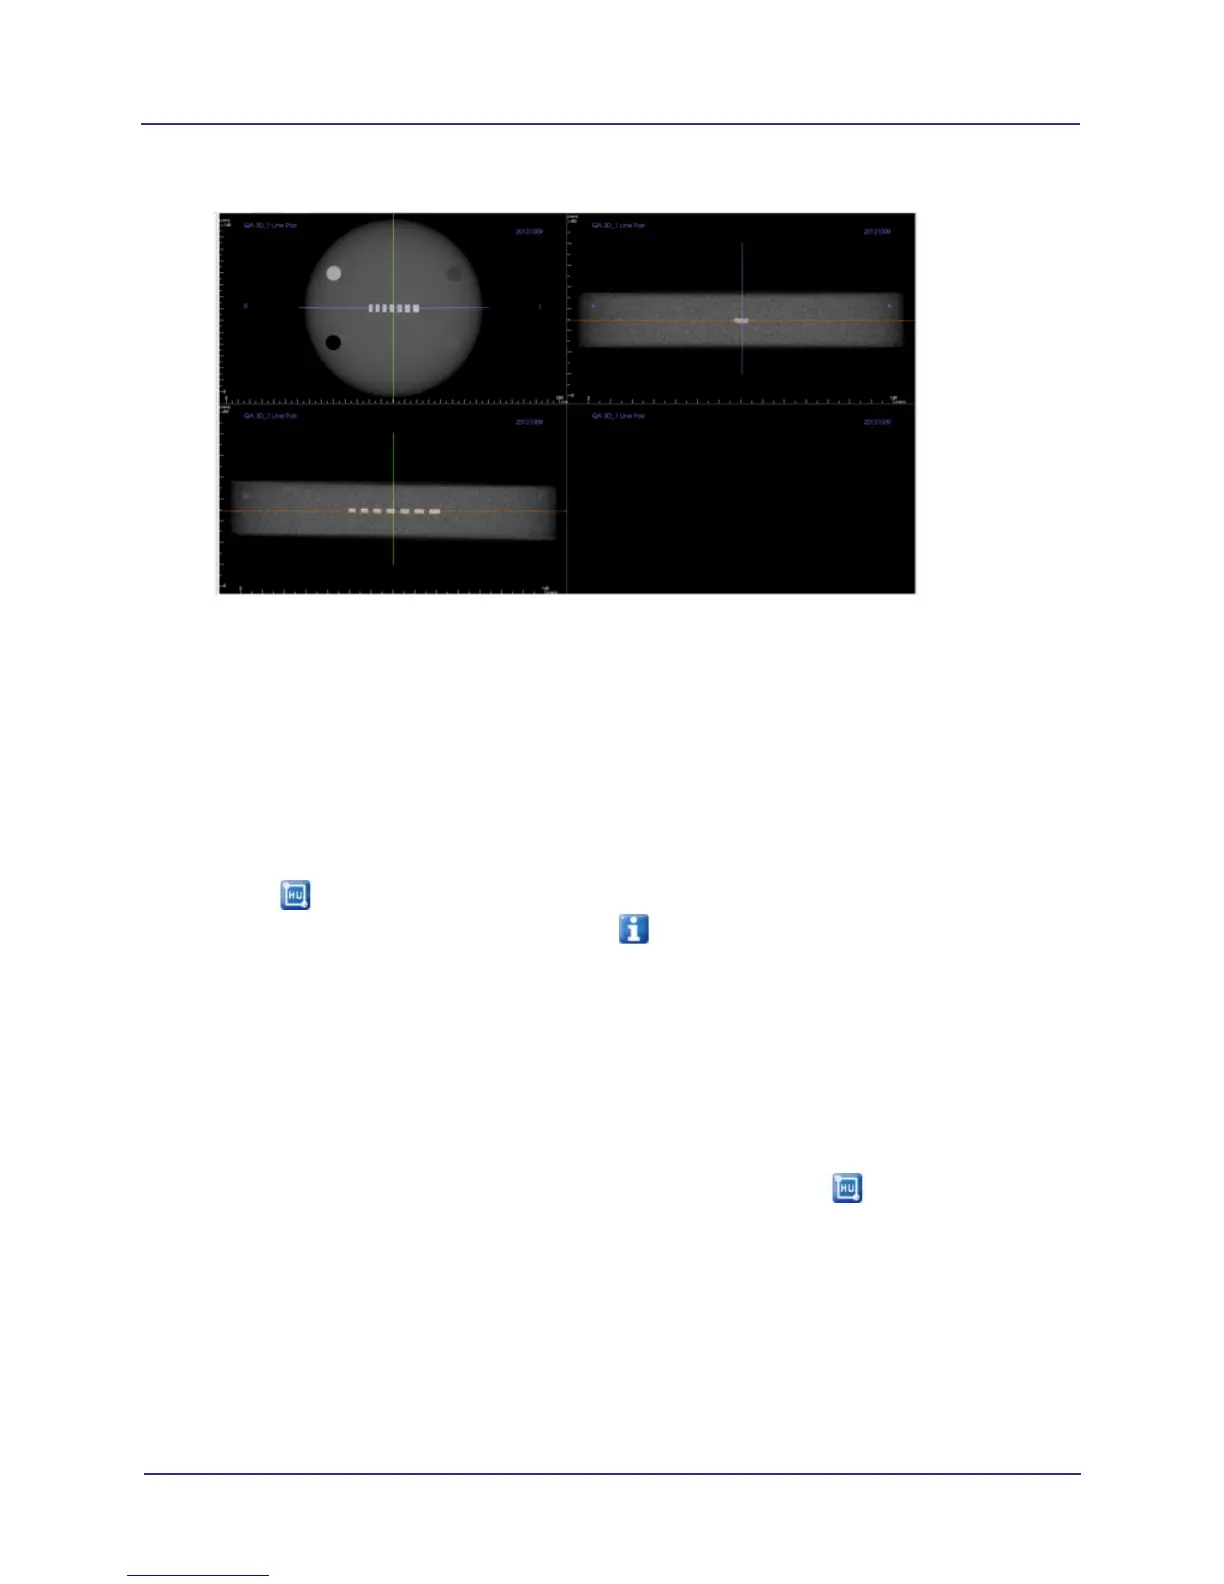
5. Zoom upper left image. To zoom, move the mouse cursor in the center of the image, hold down the
Control key and press the left mouse button. Move the cursor up or down to zoom in or out as
needed. To pan, move the mouse cursor in the center of the image, hold down the Shift key, press
left mouse button and drag the image.
6. Select Normal from drop-down menu.
7. In Slice Thickness, enter 0.4 (mm).
8. Adjust Brightness and Contrast levels for the best viewing of material areas.
9. Select to activate HU tool.
NOTE: To better view measurements, select to turn off display information.
10. Draw a box with an area of at least 40mm
2
but less than 46mm
2
in the center of each circle of the
four material areas in the phantom image.
a. Click and release at starting point. A red circle displays.
b. Move cursor to draw box.
c. When correct area is displayed (40mm
2
but less than 46mm
2
), click to set box and display HU
information.
NOTE: To remove a measurement, click the measurement to select it, the press Delete on the
keyboard. When measurements are removed, you will need to select to re-activate HU tool.
d. Repeat for remaining material areas. Try to make each box as close in size as possible.