3-25
Load Clinical Software and Configure System
032-0330-EN Rev K
3. Load TxSTUDIO on all workstations that will be used to view patient images:
NOTE: TxSTUDIO installations are limited to the number of licenses held by the site
(default of 6).
a. At clinical workstation, insert media in drive. Access the TxSTUDIO installer from the
AutoPlay dialog box. If AutoPlay does not display, navigate to the media drive and double-
click the TxSTUDIO installer. Installation files are extracted.
b. TxSTUDIO runs a check of the computer to look for required components. If all Results =
Pass, click Next. Otherwise, TxSTUDIO may not work properly on that workstation.
Workstations should meet minimum system requirements for TxSTUDIO. Refer to the
TxSTUDIO Reference Manual for more information.
c. When prompted, enter the authorization code listed on the media cover or obtained from
Technical Support. Click Next.
d. On Select Installation Folder screen, use the default location. Click Next.
e. On License Agreement screen, select accept and click Next.
f. On Ready to Install screen, click Install. Installation will start and a progress bar is
displayed.
g. Click Finish when installation is complete and close window. Check that the icon is on the
desktop and remove media.
NOTE: Exclusions should be added for TxSTUDIO in AVG or other internet security
software running on the workstation.
4. For sites that want to share workups among workstations, configure TxSTUDIO to use
TxSTUDIO Cases folder:
a. Start TxSTUDIO.
b. On the File Manager window, click Cancel.
c. Select File->Preference.
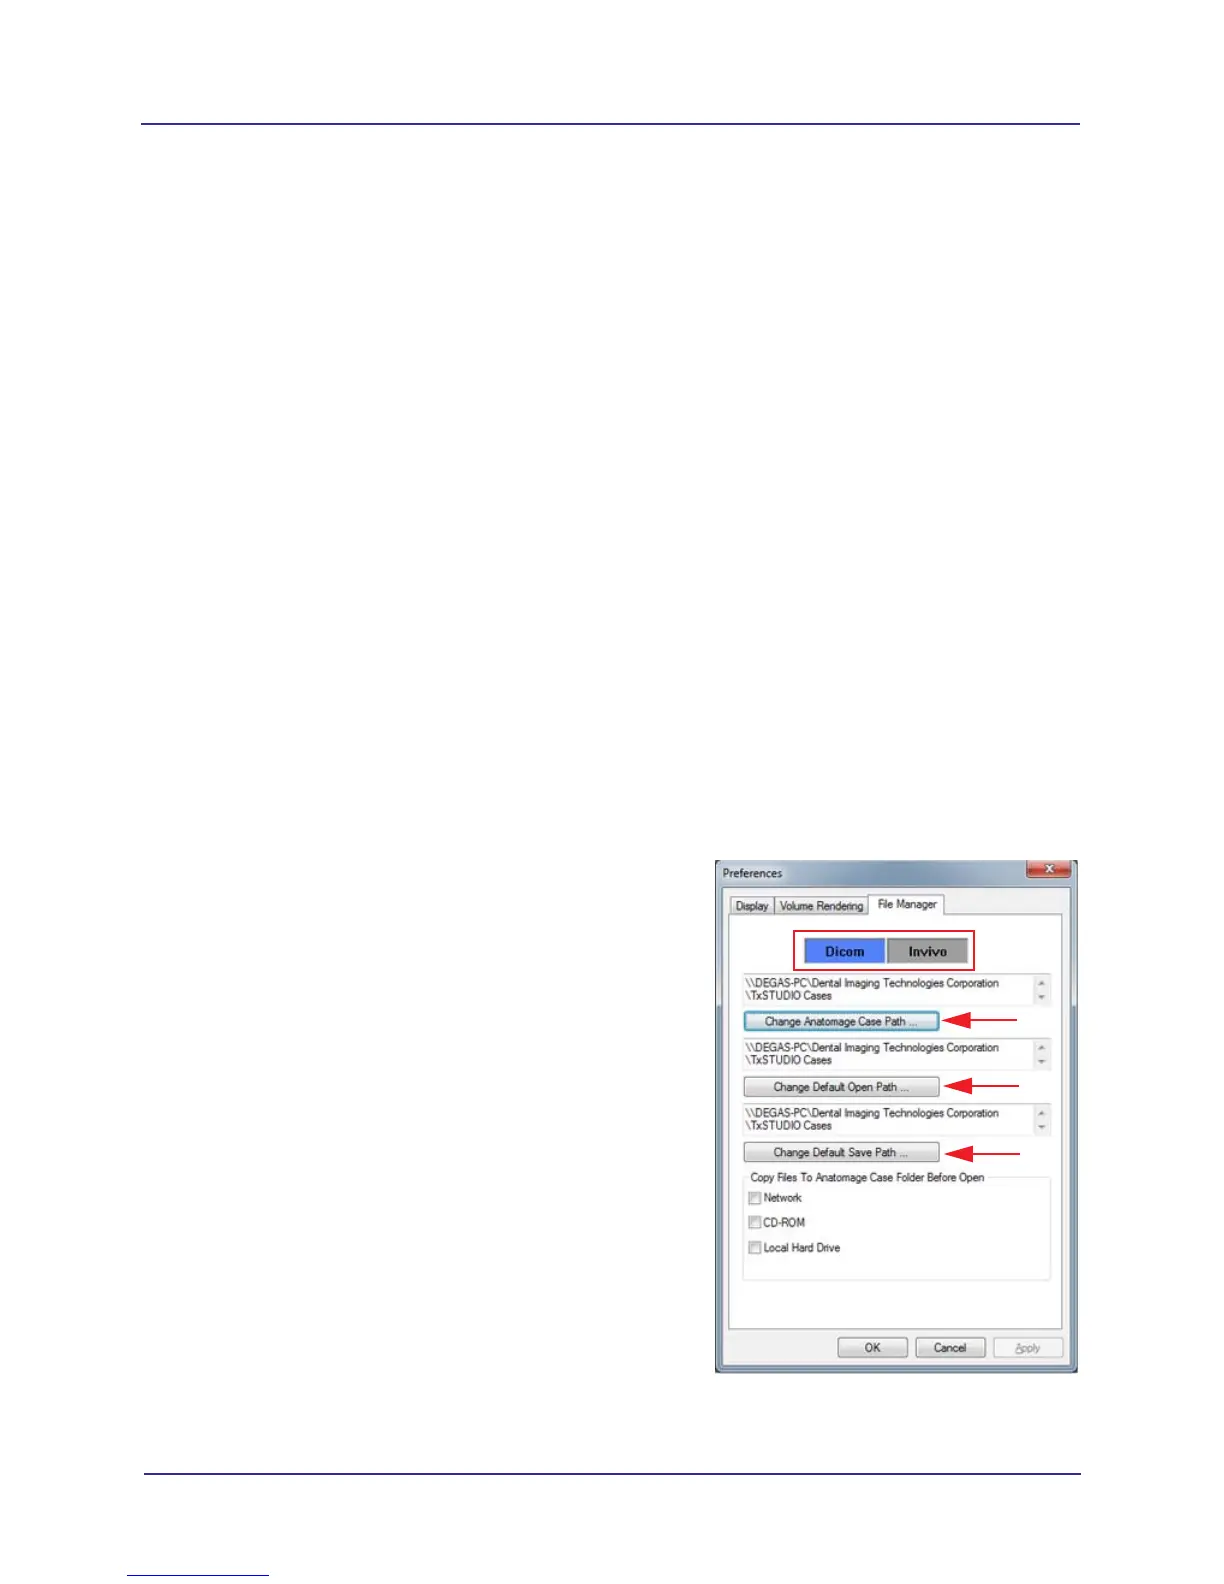
d. Click File Manager tab.
e. Select Dicom and click Change Anatomage
Case Path. Navigate to the location where
the TxSTUDIO Cases folder was created.
Repeat for the Change Default Open Path
and Change Default Save Path.
f. Click OK to apply the changes and close
Preferences.
g. Select File->Preference. Click File Manager
tab.
h. Select Invivo and repeat steps e and f.
NOTE: Make sure to keep the Invivo button
selected in File Manager preferences so files
will be saved in .inv format.
i. Close TxSTUDIO.
5. Repeat steps 3 and 4 for all workstations that
require TxSTUDIO.