C-5
Setup of Alternative Network Configurations
032-0330-EN Rev K
3. Use the following command to verify that the reservations exist:
netsh http show urlacl
Typical response should include the following entries:
Reserved URL :https//+:8585/VisionRoot/
User: NT AUTHORITY\NETWORK SERVICE
Listen: Yes
Delegate: No
SDDL:D:(A;;GX;;;NS)
Reserved URL :http//+:8484/VisionRoot/
User: NT AUTHORITY\NETWORK SERVICE
Listen: Yes
Delegate: No
SDDL:D:(A;;GX;;;NS)
4. Close the command prompt window.
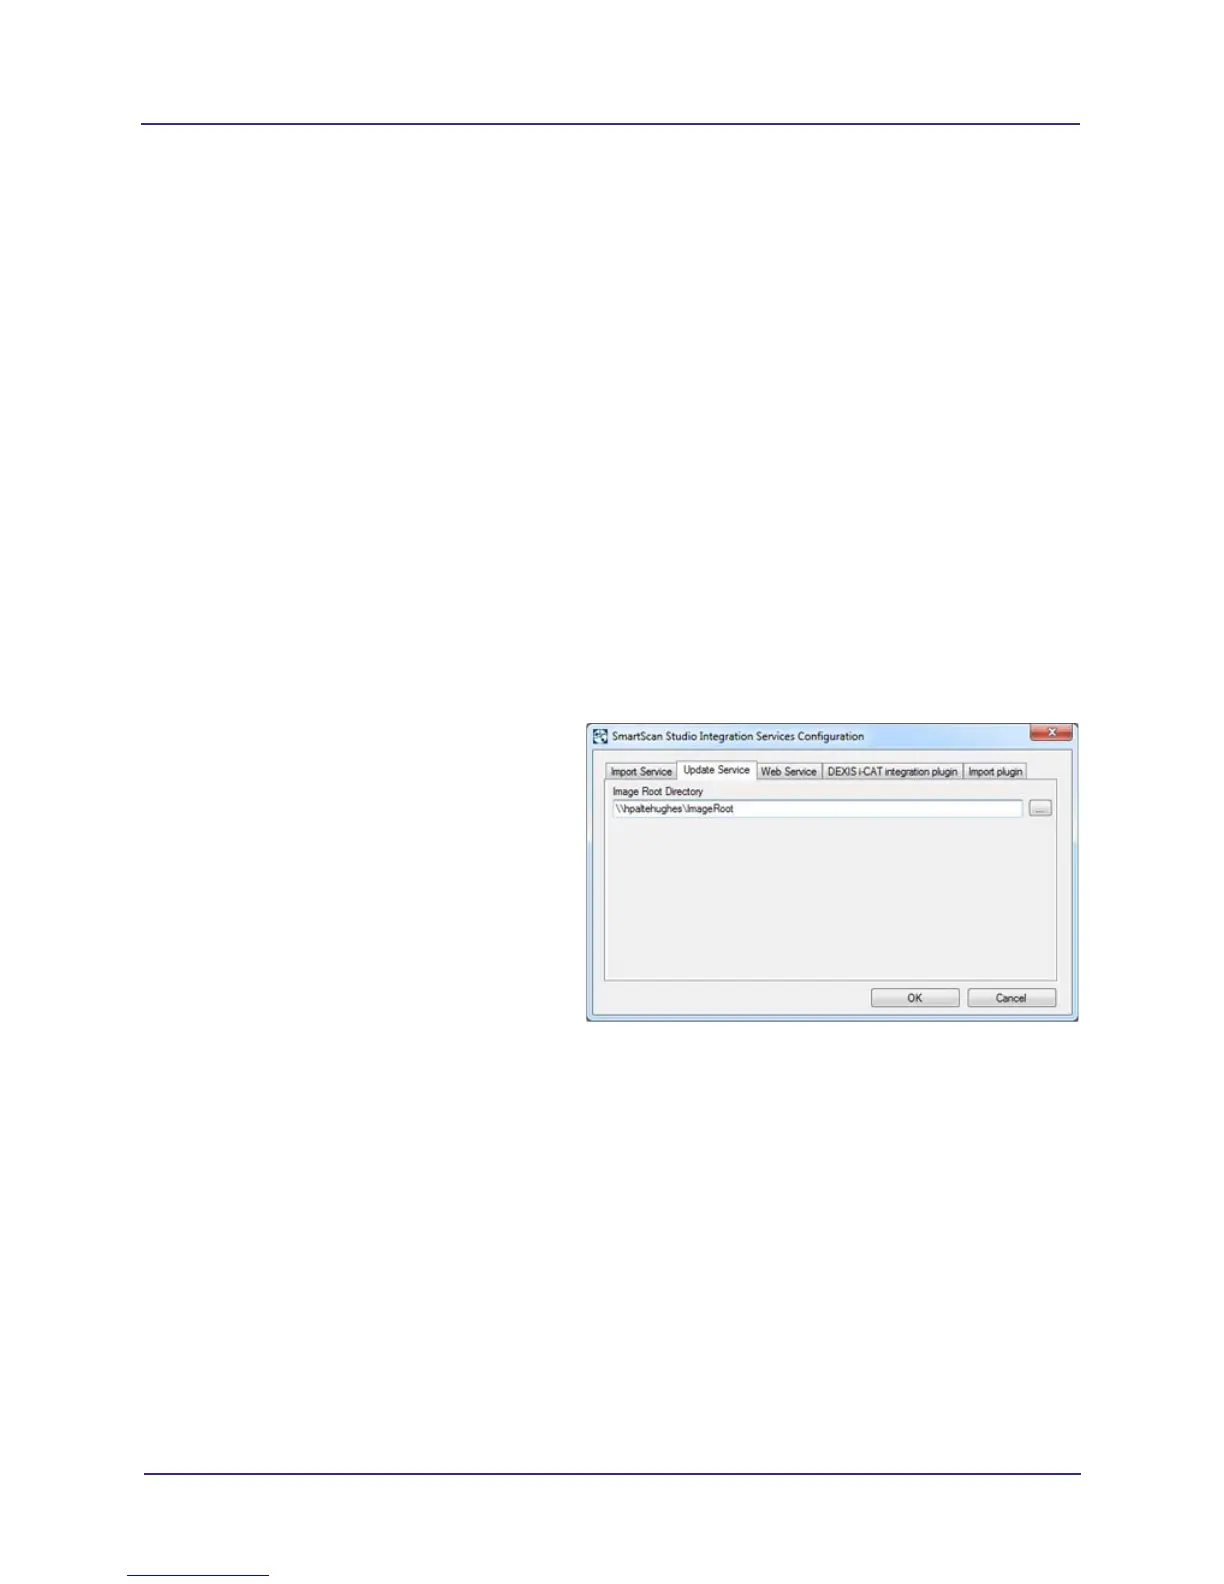
6. Change the Image Root to the Network Share
Update the image root to the image root server using the SmartScan STUDIO control panel.
1. Start Control Panel and double-click
SmartScan STUDIO Integration Services
control panel.
2. On Update Service tab, browse to the
remote Image Root directory and select it.
NOTE: If prompted, enter credentials
for the remote Image Root computer.
3. Click OK to apply changes and restart
services.
If the browse folder dialog will not allow
access to the network, the properties can be
manually updated.
Use regedit to update the following registry
value:
HKEY\SOFTWARE\Wow6432Node\Dental Imaging Technologies Corporation\SmartScan STUDIO
Integration Services\Importer\ImageRootDirectory
Update the configuration file:
C:\Program Files (x86)\Dental Imaging Technologies Corporation\SmartScan STUDIO Integration
Services\ImageRootWeb\vision.config
Example contents:
<?xml version=”1.0”?>
<visionDatastore visionroot=”\\hpadtehughes\ImageRoot” />