Media Drives (Diskette, CD-ROM, Tape, or Disk Drive)
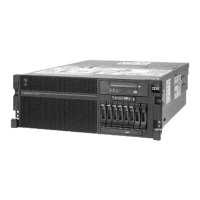
Note: The two media bays can be used to house an Integrated Drive Electronics (IDE)
CD-ROM, or a SCSI CD-ROM, diskette, tape drive or DVD. See the following
illustration for the location of the two media bays. However, if your system has
an IDE CD-ROM, it should be placed in media bay 1.
Before performing this procedure, read the following:
v “Safety Notices” on page vii
v “Laser Safety Information” on page ix
Media Drive Removal
To remove any of the media drives located in either media bay 1 or media bay 2, do the
following:
1. On a Model 6C4, open the front and rear rack doors and put the system into the
service position as described in “Placing the Model 6C4 into the Service Position”
on page 53.
On a Model 6E4, open the bezel door.
2. If you are servicing a Model 6E4, open the bezel door.
3. Shut down the system as described in “Stopping the System” on page 52.
4. Remove the service access cover as described in “Service Access Cover Removal
(Model 6C4)” on page 55 or “Service Access Cover Removal (Model 6E4)” on
page 57.
5. Remove the front bezel as described in “Front Bezel Removal (Model 6C4)” on
page 61 or “Front Bezel Removal (Model 6E4)” on page 63.
6. Disconnect the power and signal cables from the media device that you are
servicing.
7. Grasping the top front of the media device, depress the release tab located on the
bottom of the media drive and slide it out of the media bay.
8. Remove the 4 retaining screws holding the carrier tray assembly to the media drive.
9. Put the media drive and carrier tray assembly in a safe place.
100 Eserver
pSeries 630 Model 6C4 and Model 6E4 Installation Guide

 Loading...


