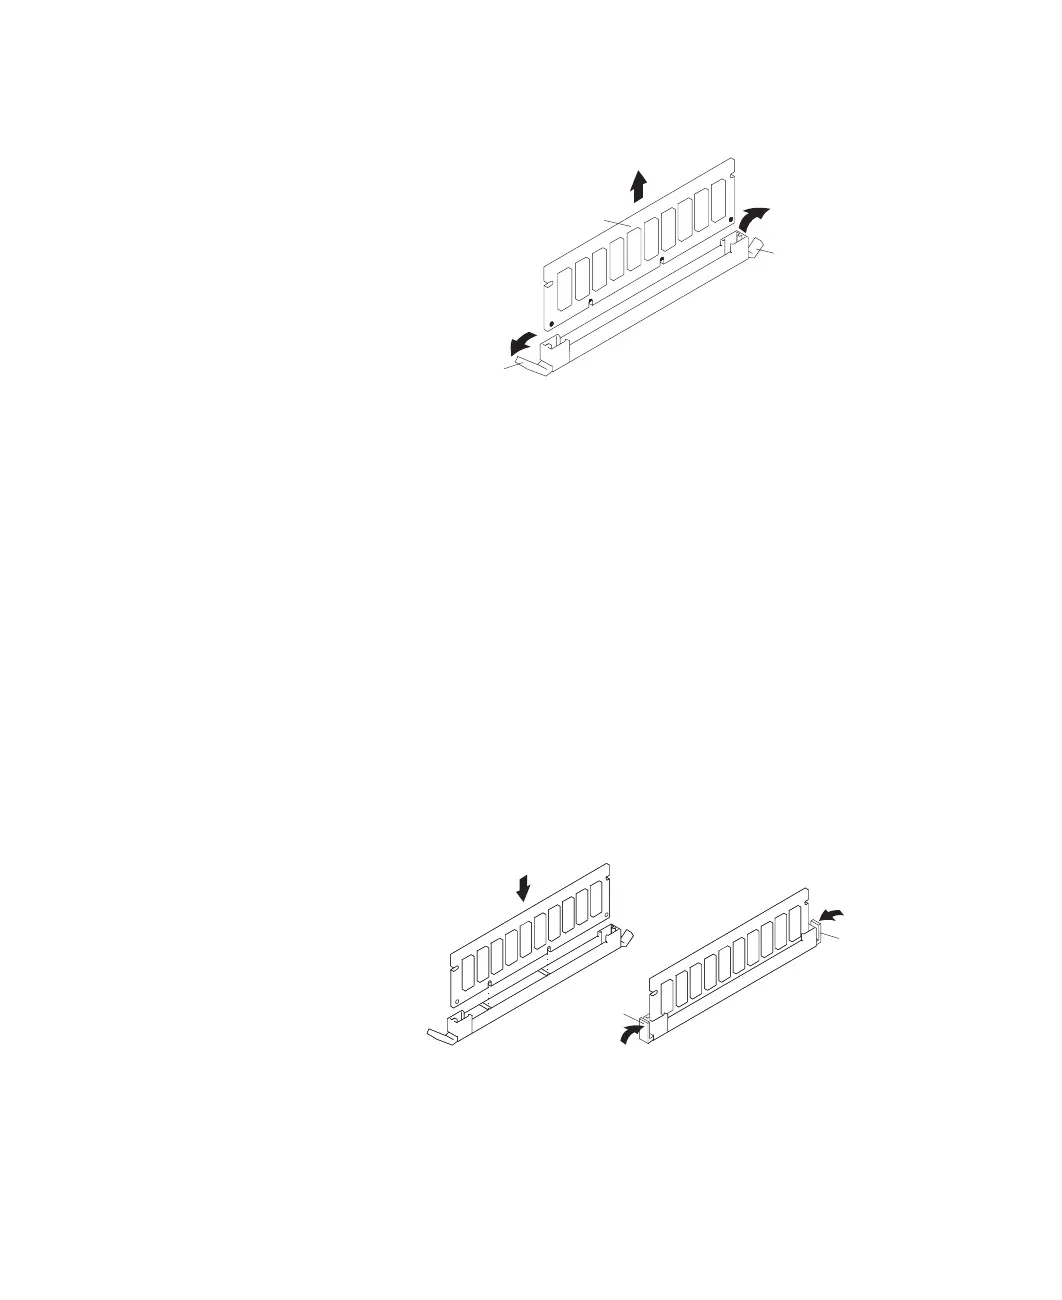
14. Pull the memory DIMM out of the connector, as shown in the following illustration.
1
2
1
1 Connector Tabs (unlocked position)
2 Memory DIMM
Memory DIMM Replacement
To replace a memory DIMM, do the following:
1. Before handling any card, board, or memory DIMM, touch any metal surface of the
chassis with one hand to minimize static electric discharge. Refer to “Handling
Static-Sensitive Devices” on page 50.
2. If necessary, remove the memory DIMM from its antistatic package.
3. Ensure that the connector locking tabs are pushed out in the unlocked position
before installing a new memory DIMM, as shown in the following illustration.
4. Carefully grasp the memory DIMM along two edges and align the connector.
5. Insert the memory card firmly into the connector.
6. Secure the memory DIMM with the locking tabs located at each end of the DIMM
connector, as shown in the following illustration.
Note: Memory DIMMs must be installed in groups of 4 (quads).
1
1
1 Locking Tabs (locked position)
7. Pivot the processor assembly cover back into the closed position.
Chapter 4. Installing Options 117
 Loading...