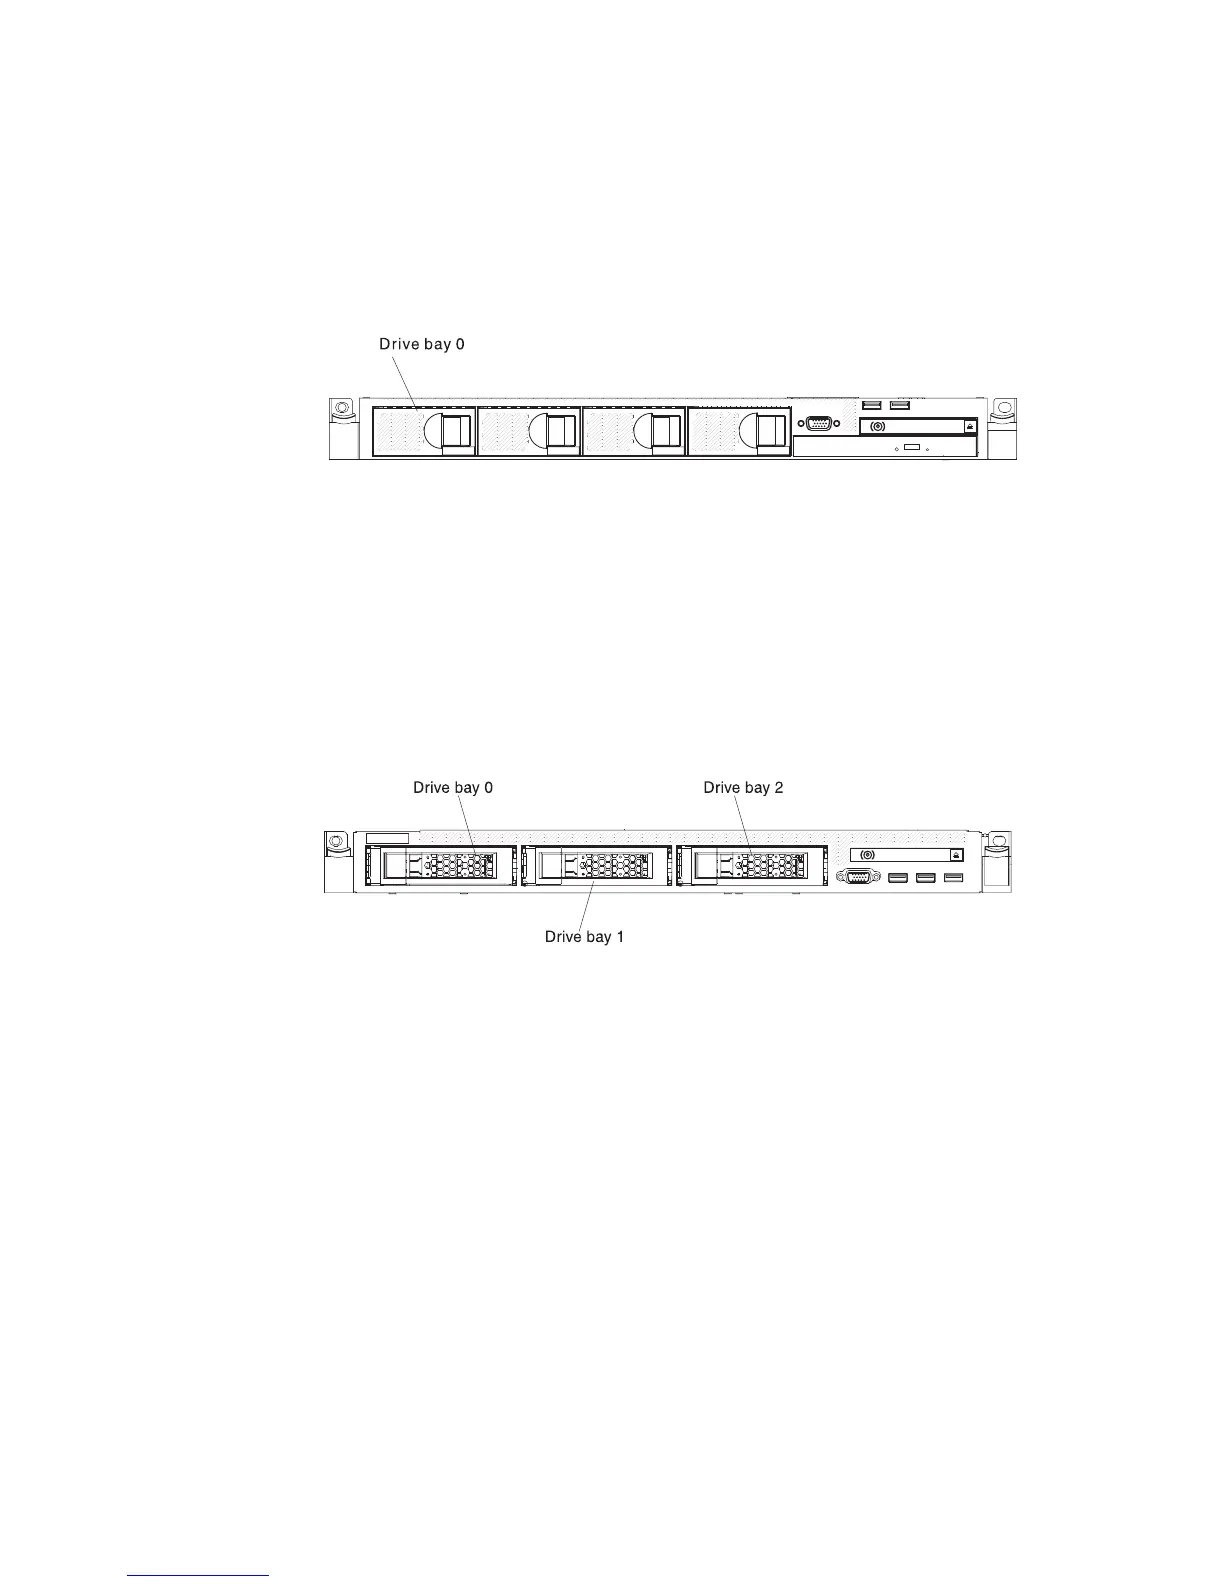
2.5-inch simple-swap hard disk drive IDs
The simple-swap-drive ID that is assigned to each drive is printed on the front of
the server.
The following illustration shows the location of the IDs of the hard disk drives.
The ID numbers and the drive bay numbers are the same.
3.5-inch simple-swap hard disk drive IDs
The simple-swap-drive ID that is assigned to each drive is printed on the front of
the server.
The following illustration shows the location of the IDs of the hard disk drives.
The ID numbers and the drive bay numbers are the same.
Installing hot-swap hard disk drives
Use this information to install hot-swap hard disk drives.
About this task
To install a hot-swap SAS or SATA hard disk drive, complete the following steps.
Note: If you have only one hard disk drive, you must install it in the bay 0
(upper-left).
Procedure
1. Read the safety information that begins on “Safety” on page vii and
“Installation guidelines” on page 33.
2. Remove the filler panel from the empty drive bay. Keep the filler panel in a
safe place.
3. Touch the static-protective package that contains the drive to any unpainted
metal surface on the server; then, remove the drive from the package and place
it on a static-protective surface.
Figure 24. 2.5-inch simple-swap hard disk drive IDs
Figure 25. 3.5-inch simple-swap hard disk drive IDs
40 IBM System x3550 M4 Type 7914: Installation and Service Guide

 Loading...


