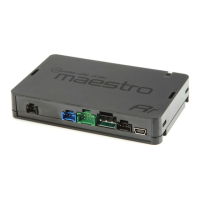
ADS-RR(SR)-VW01A-DS
Volkswagen gti 2010-2014
Automotive Data Solutions Inc. © 2018
3
INSTALLATION INSTRUCTIONS
STEP 1
• Unbox the aftermarket radio and locate its main harness.
• Connect the wires shown on the next page from
aftermarket radio main harness to the VW1 T-harness and
match the wire functions.
STEP 2
• Connect the factory harness to the VW1 T-harness.
STEP 3
• Plug the OBDII connector into the OBDII of the vehicle,
under driver dash.
STEP 4
• Plug the aftermarket radio harnesses into the aftermarket
radio.
• Plug the Data cable to the data port of the aftermarket
radio.
• Insert the Audio cable into the iDatalink 3.5 mm audio jack
of the aftermarket radio.
STEP 5
• Connect all the harnesses to the Maestro RR module then
test your installation.
Note: To retain the OEM backup camera, use a third party
RGB to composite adapter.
Note: On Pioneer and Alpine radios, the audio cable should
plug into the AUX port.
OEM BLUETOOTH SETUP
Only one Bluetooth system can be set for hands free calling.
This must be determined before installation. Both the factory
and aftermarket systems can be used for Bluetooth audio
streaming. If the aftermarket Bluetooth is chosen for hands
free calling, the aftermarket microphone must be installed
in the vehicle and the factory Bluetooth module must be
unplugged. In most vehicles, it is located under the passenger
seat. If the vehicle is equipped with Bluetooth but there is
no Bluetooth module under the passenger’s seat then the
Bluetooth system is built into the MDI module. Unplugging
the MDI module will disable both factory systems.
AIRBAG WARNING LIGHT
If an airbag warning light turns ON after starting the vehicle
without having the airbag light plugged in, select Clear
Airbag Warning to turn OFF that warning light.
Kenwood Radios:
Main Menu>>Setup>>Sources>>Volkswagen Setup>>Vehicle
Features>>Clear Airbag Warning
Alpine Radios:
Settings>>General>>Idatalink Setup>> Maestro
Module>>Volkswagen Setup>>Vehicle Features>>Clear
Airbag Warning
TROUBLESHOOTING TIPS:
• To reset the module back to its factory settings, turn the
key to the OFF position then disconnect all connectors
from the module. Press and hold the module’s
programming button and connect all the connectors
back to the module. Wait, the module’s LED will fl ash
RED rapidly (this may take up to 10 seconds). Release the
programming button. Wait, the LED will turn solid GREEN
for 2 seconds.
1

 Loading...