ADS-RR(SR)-FOC1-DS
FoRd Focus with 4.3" myFoRd scReen 2015-2018
Automotive Data Solutions Inc. © 2018
3
Fig. 1.7 Fig. 1.8
Fig. 1.3
Fig. 1.5
Fig. 1.4
Fig. 1.6
Fig. 1.1 Fig. 1.2
INSTALLATION INSTRUCTIONS
DASh DISASSEMBLy
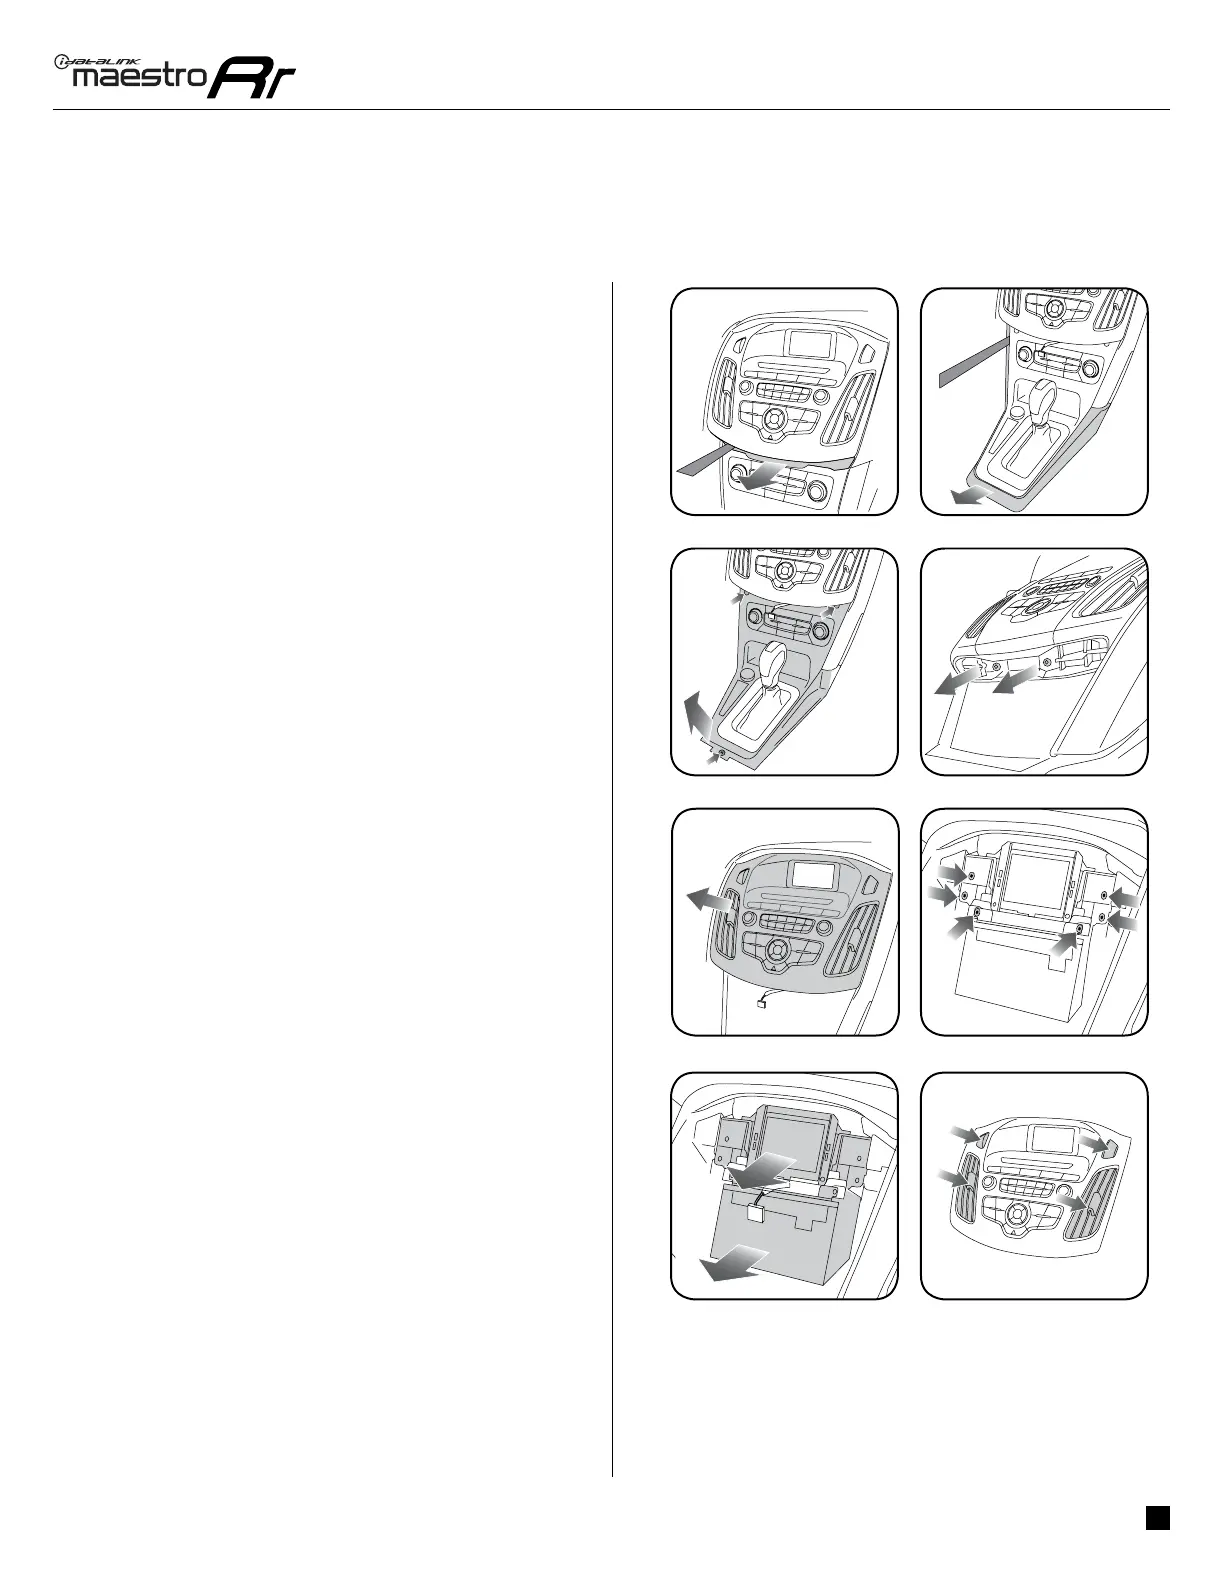
1. Unclip and remove the trim panel at the bottom of the
factory bezel (this panel contains the airbag light). (Fig. 1.1)
2. Remove the trim around the shifter console by prying it up
and unclipping it. (Fig. 1.2)
3. Remove three (3) phillips screws holding the shifter
surround and climate controls. (Fig. 1.3)
4. Remove two (2) Torx T25 screws at the bottom of the bezel.
(Fig. 1.4)
5. Starting at the bottom, pull the bezel forward and use a
panel removal tool to release the bezel from the dash.
Disconnect the plug on the back of the bezel and put it to
the side. (Fig. 1.5)
6. Remove four (4) Torx T25 screws holding the screen frame,
and two (2) Torx T25 holding the radio body. (Fig. 1.6)
7. Remove both the screen assembly and the radio body,
disconnecting the plugs in the process. (Fig. 1.7)
8. Remove the vents from the factory bezel. (Fig. 1.8)
4

 Loading...