ADS-RR(SR)-CHR01-DS
Jeep compass 2009-2016
Automotive Data Solutions Inc. © 2018
3
INSTALLATION INSTrUCTIONS
STEP 1
• Unbox the aftermarket radio and locate its main harness.
• Connect the wires shown on the next page from
aftermarket radio main harness to the CH1 T-harness and
match the wire functions.
STEP 2
• Remove the factory radio.
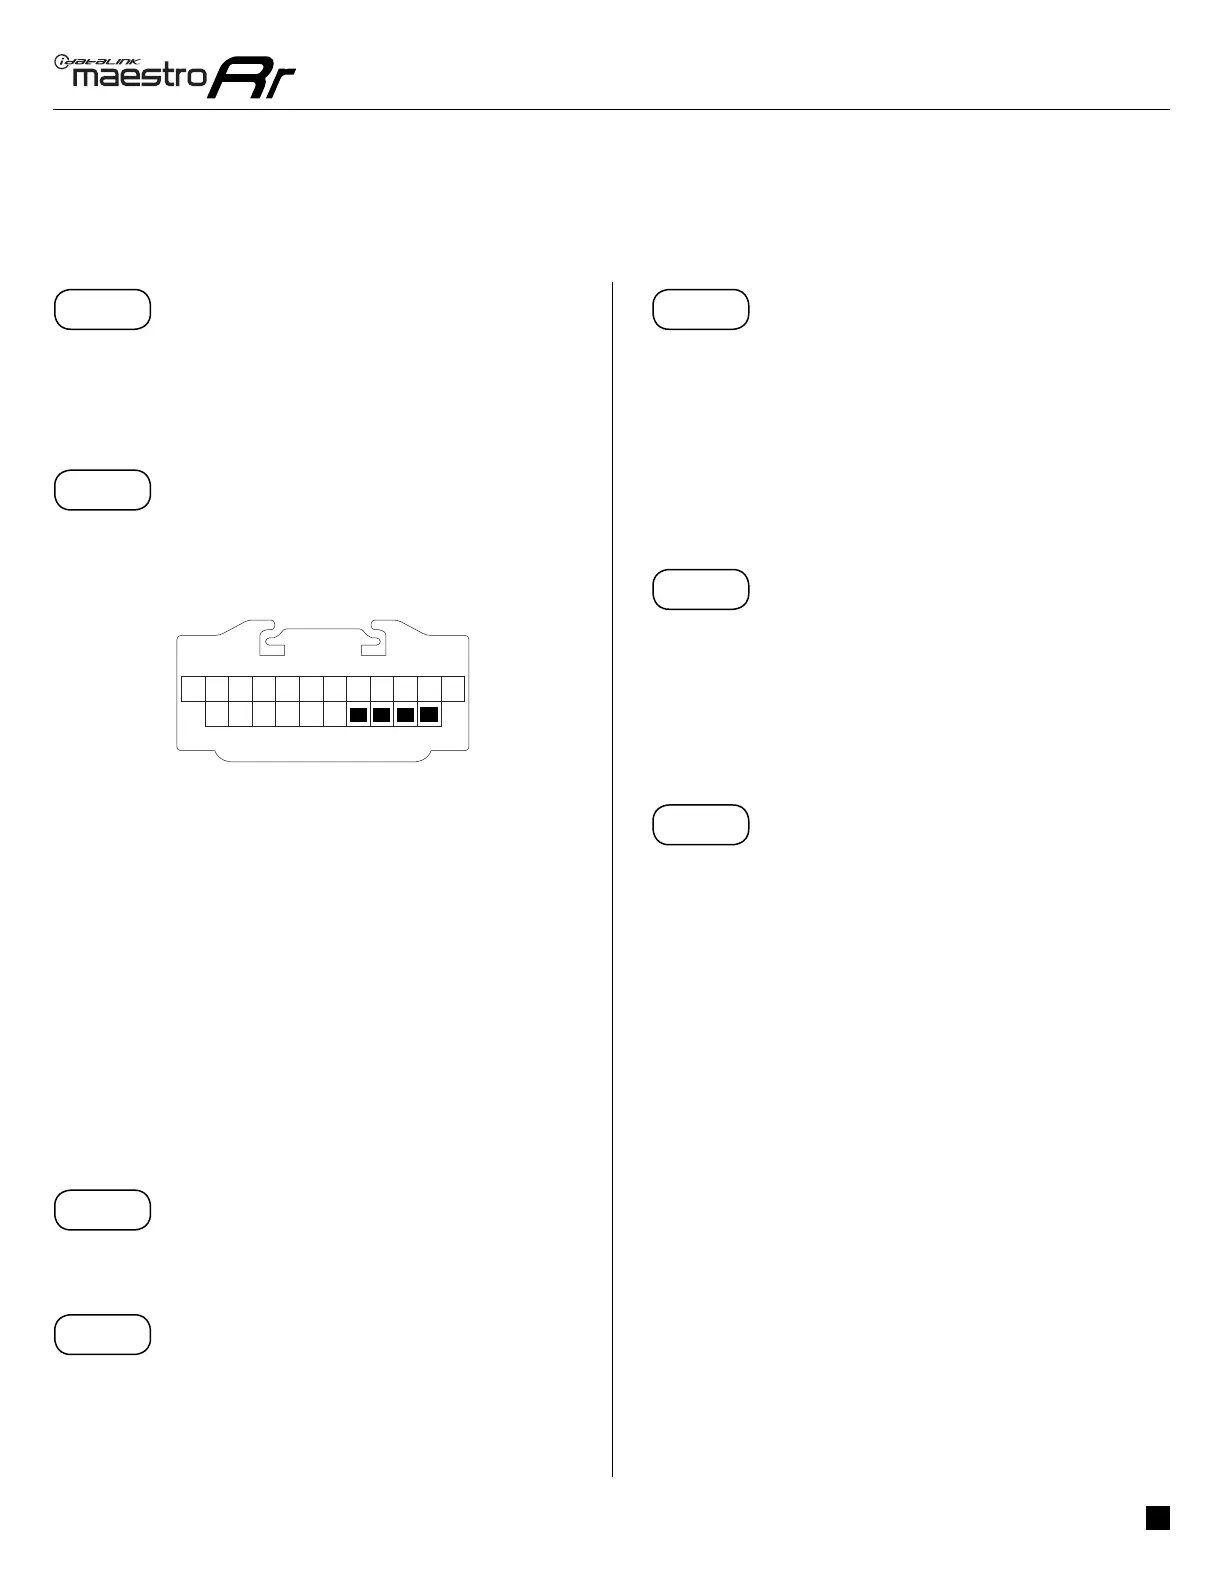
• Access the main 22 pin factory radio connector (2.1) and
determine if you have a factory amplifi er.
If you don’t have wires in PIN 19, 20, 21 and 22, you have a
factory amplifi er:
• Plug the female GREEN connector to the male GREEN
connector of your CH1 T-harness.
• Plug the female WHITE connector to the male WHITE
connector of your CH1 T-harness.
If you have wires in PIN 19, 20, 21 and 22, you don’t have a
factory amplifi er:
• Plug the female GREEN connector to the male WHITE
connector of your CH1 T-harness.
• Plug the female WHITE connector to the male GREEN
connector of your CH1 T-harness.
STEP 3
• Plug the female RED connector to the male BLACK
connector.
STEP 4
• Connect the factory harness to the CH1 T-harness.
STEP 5
• Access the OBDII connector located under the driver side
dashboard.
• Connect the RED/BROWN wire of the CH1 T-harness to
the wire located at pin 6 of the OBDII connector. (See the
vehicle wire chart reference for wire colors)
• Connect the YELLOW/BROWN wire of the CH1 T-harness
to the wire located at pin 14 of the OBDII connector. (See
the vehicle wire chart reference for wire colors)
STEP 6
• Plug the aftermarket radio harnesses into the aftermarket
radio.
• Plug the Data cable to the data port of the aftermarket
radio.
• Insert the Audio cable into the iDatalink 3.5 mm audio jack
of the aftermarket radio.
STEP 7
• Connect all the harnesses to the Maestro RR module then
proceed to module setup.
MODULE SETUP:
• Insert the key into the ignition and turn it to the ACC
position.
• The Radio will turn on and the setup screen will appear.
Choose one of the two Bluetooth OPTIONS below:
OPTION 1:
This option lets the factory Bluetooth system handle calls
and the Factory and the aftermarket Bluetooth system
stream Audio.
• To use the factory Bluetooth system: (The factory
Bluetooth system is OFF by default)
• Scroll down to Chrysler setup and press SET
• Go to the OEM Bluetooth and press ON
• Press the BACK button (circular shaped arrow)
• Scroll down then press FINISH
87651 109
19181716
432
15
14
13 21
11 12
2220

 Loading...