ADS-RR(SR)-CHR02-DS
dodge dakota Base 2005-2007
Automotive Data Solutions Inc. © 2018
3
INSTALLATION INSTrUCTIONS
STEP 1
• Remove the factory radio.
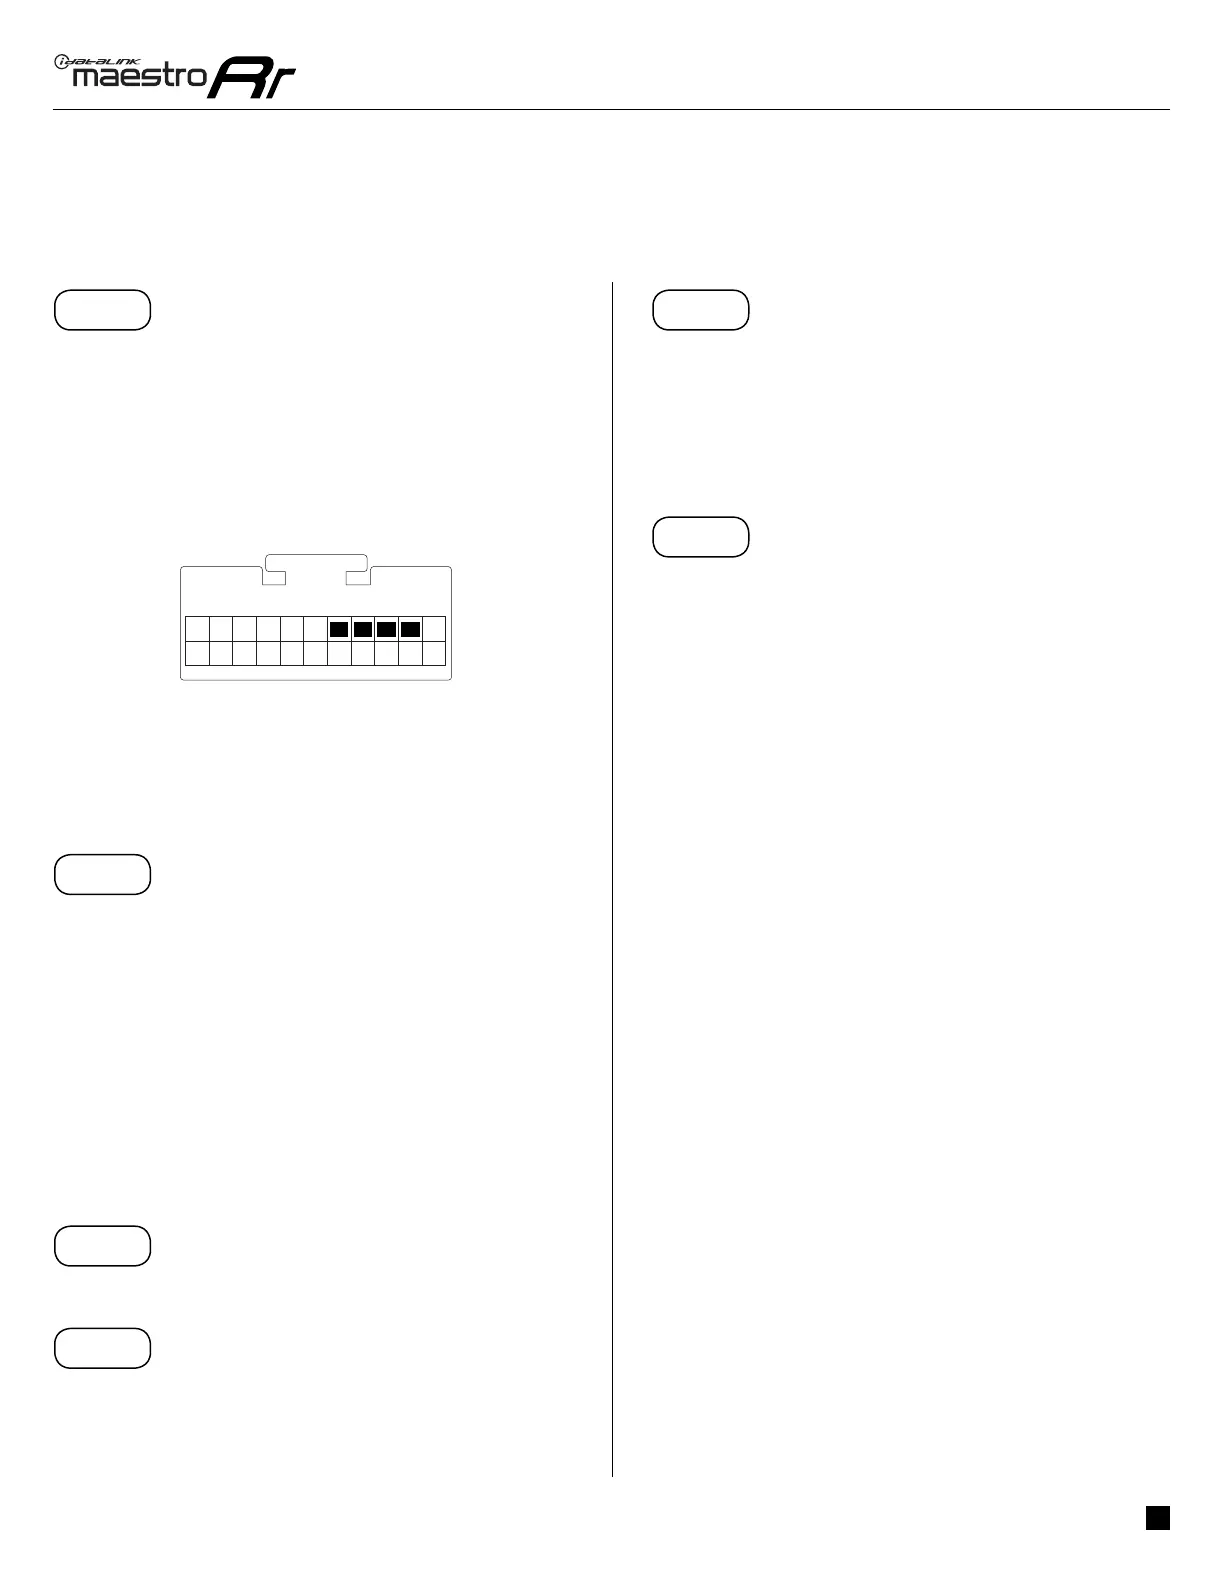
• Access the main 22 pin factory radio connector (2.1) and
determine if you have a factory amplifi er.
If you have wires in PIN 7, 8, 9 and 10, you don’t have a
factory amplifi er.
If you don’t have wires in PIN 7, 8, 9 and 10, you have a
factory amplifi er.
• Unbox the aftermarket radio and locate its main harness.
• Connect the wires shown on the next page from
aftermarket radio main harness to the CH2 T-harness and
match the wire functions.
STEP 2
If the vehicle DOES have a factory amplifi er:
• Plug the female BLACK connector to the male WHITE
connector of your CH2 T-harness.
• Plug the female WHITE connector to the male BLACK
connector of your CH2 T-harness.
If the vehicle DOES NOT have a factory amplifi er:
• Plug the female BLACK connector to the male BLACK
connector of your CH2 T-harness.
• Plug the female WHITE connector to the male WHITE
connector of your CH2 T-harness.
STEP 3
• Connect the factory harness to the CH2 T-harness.
STEP 4
• Plug the male BLACK 2 pin connector of your CH2
T-harness into the OBDII connector.
• Plug the OBDII connector into the OBDII of the vehicle.
STEP 5
• Plug the aftermarket radio harnesses into the aftermarket
radio.
• Plug the Data cable to the data port of the aftermarket
radio.
• Insert the Audio cable into the iDatalink 3.5 mm audio jack
of the aftermarket radio.
STEP 6
• Connect all the harnesses to the Maestro RR module then
proceed to module setup.
The module is now ready to be used.
Insert the aftermarket radio in the dashboard housing and
test all the functionalities.
Reassemble the dashboard carefully.
TROUBLESHOOTING TIPS:
• To reset the module back its factory settings, turn the key
to the OFF position then disconnect all connectors from
the module. Press and hold the module’s programming
button and connect all the connectors back to the module.
Wait, the module’s LED will fl ash RED rapidly (this may
take up to 10 seconds). Release the programming button.
Wait, the LED will turn solid GREEN for 2 seconds.
1
Fig. 2.1
4 5 6
7 1121 3
15 16 17 18
8 9 10
19 20 21 221312 14

 Loading...