32
5.5 Heating Circuit Conguration
Ifheatingcircuitswerelocatedandallocated
duringinitialsetupthentheywillnowappear
heretobecongured.Thereisamaximum
number of heating circuits for each boiler,
inthiscasetwocircuitsidentiedbyboiler
numberandHeatingCircuitnumber.
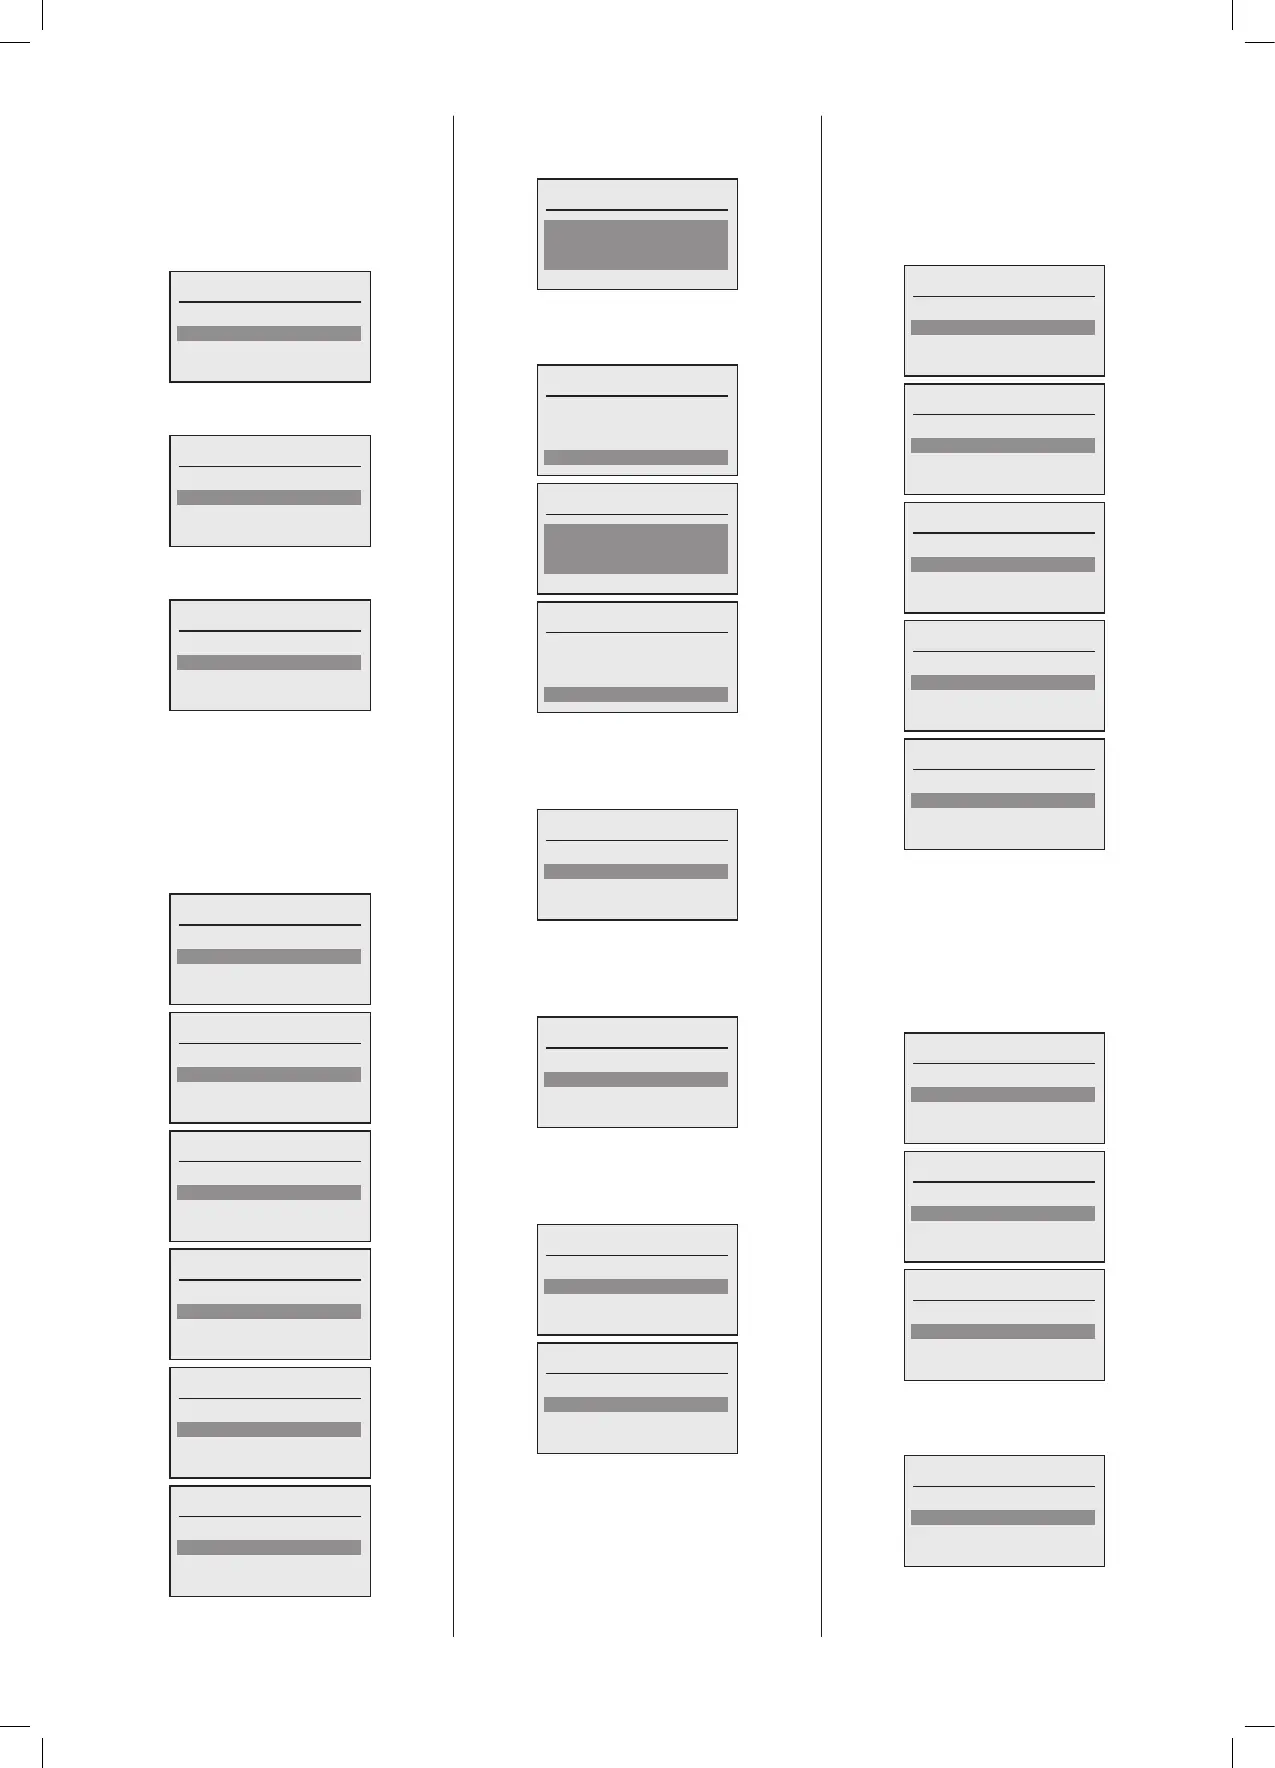
Select HC to congure
HC1 Boiler 1.1
HC2 Boiler 2.1
HC3 Boiler 2.2
At the end of the list of allocated Heating
Circuits‘Done’isdisplayed.
Select HC to congure
HC1 Boiler 1.1
HC1 Boiler 2.1
HC2 Boiler 2.2
Done
Firstly select the Heating Circuit you wish
tocongure:
Select HC to congure
HC1 Boiler 1.1
HC2 Boiler 2.1
HC3 Boiler 2.2
The next step is to congure the Heating
Cirucuitpumpcontrolsignalifithasitsown
uniquecirculationpump.Ifyouhavealready
conguredaSystempumpthismaynotbe
requiredso‘None’maybeselected.Oneof
theprogrammableoutputscanbeselected
for this function. The following screen will
be displayed.
Select location of HC pump
None
PWM/0-10V ()
MFR1 ()
Select location of HC pump
None
PWM/0-10V ()
MFR1 ()
MFR2 ()
Select location of HC pump
PWM/0-10V ()
MFR1 ()
MFR2 ()
MFR3 ()
Select location of HC pump
MFR1 ()
MFR2 ()
MFR3 ()
MFR4 ()
Select location of HC pump
MFR2 ()
MFR3 ()
MFR4 ()
Select location of HC pump
MFR3 ()
MFR4 ()
Oncecompletedthenextstepistosetthe
Maximum and Minimum ow temperature
fortheHeatingCircuit.
Set max ow temp
85ºC
Done
Select the temperature and adjust to the
desired setting, confirm and then select
‘Done’.
Set max ow temp
75ºC
Done
Set min ow temp
15ºC
Done
Set min ow temp
30ºC
Done
Oncecompletedthenextstepistoconrm
ifaRoomTemperaturesensorisconnected
andbeingusedcontroltheroomtemperature
forthisHeatingCircuit.
Room Sensor available?
No
Yes
The next step is to conrm is an Outside
Temperaturesensorisconnectedandbeing
used as an input to the Heating Circuit to
calculatetherequiredowtemperature.
Outside Sensor available?
No
Yes
Depending upon the two item selection
above the next screen will show what
optionsareavailableforcontroloftheow
temperatureforthatspecicHeatingCircuit.
Control variant
Flow
Weather
Room
Control variant
Flow
Weather
Room
Weather and Room
Thenextstepistoselectthefunctionforthe
SL1230Vswitchedliveinputinrelationto
thisHeatingCircuit,ifitisrequired.
ItcanbeusedasaHeatingCircuitenable
signal,anOverridesignal,aHolidaysignal
oraFrostprotectioninputfromanexternal
‘VoltsFree’contactforthatspecicHeating
Circuit.Ifthisinputisalreadycongured,you
willbequeried,orifnotrequiredthen‘None’
can be selected.
Congure SL1
None
HC enable
Override
Congure SL1
None
HC enable
Override
Holiday
Congure SL1
HC enable
Override
Holiday
Frost
Congure SL1
Override
Holiday
Frost
Congure SL1
Holiday
Frost
ThenextstepistoconguretheOpenTherm
inputifitistobeusedforthisspecicHeating
Circuit. The OpenTherm interface can be
operatedinanumberofmodes,On/Offasa
‘voltsfree’PELVsignal,Temperaturecontrol
from an OpenTherm master, or if already
congured you will be prompted, or if not
usedselect‘None’.
Congure OpenTherm
None
On/Off
Temperature control
Congure OpenTherm
None
On/Off
Temperature control
Congure OpenTherm
On/Off
Temperature control
IfOn/OfforTemperaturecontrolisselected
then the system needs to know of the
OpenThermMasterhasabuiltintimeclock.
OT Master with time clock?
No
Yes