Note: For a detailed description of the User Settings see the Operation Manual,
chapter Setup Menu.
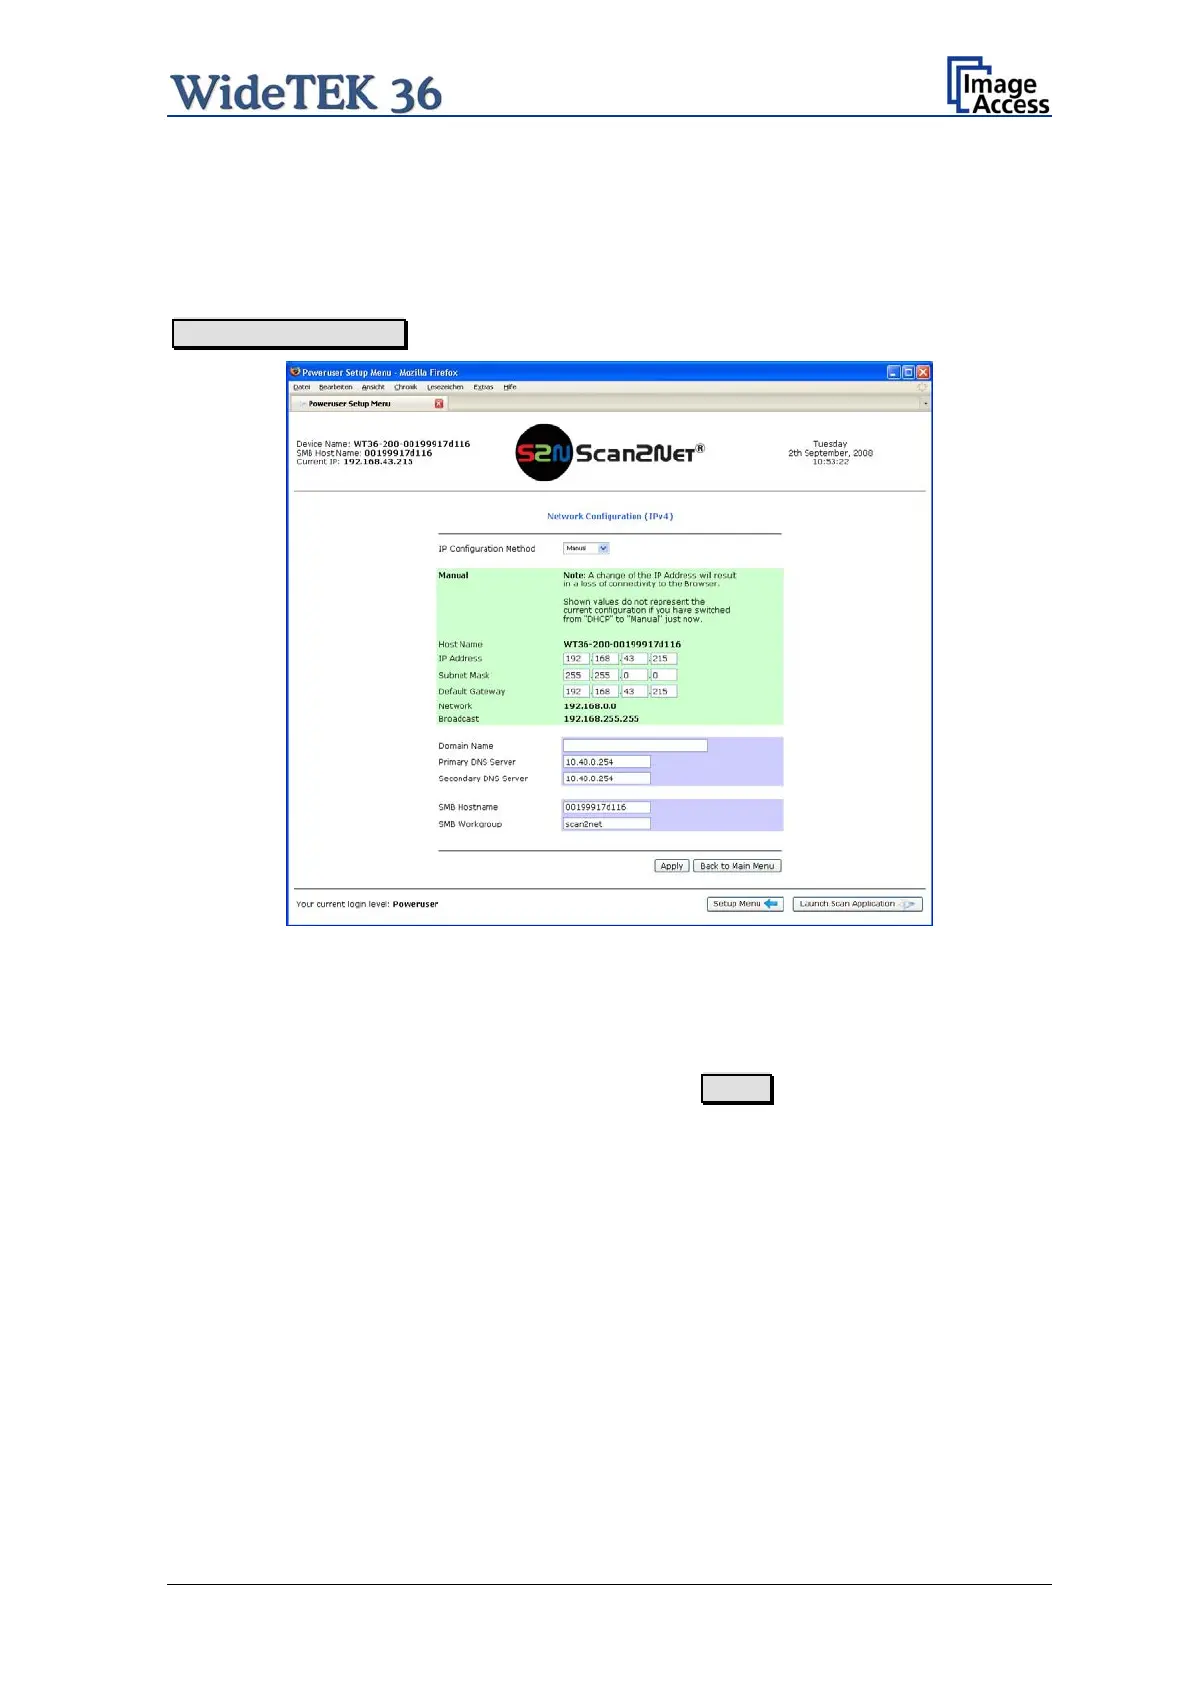
B.3.1 Setup Network IP Address
In the Poweruser main menu find the section Base Settings and click on the
Network Configuration button.
wt36_pwr-usr5xx_003.jpg
Picture 35: Network parameters of the scanner
Now change the IP address, subnet mask and gateway to a valid address in your network
or select DHCP to obtain an IP address automatically.
When the IP address has been changed, click on the Apply button. The new values will
be transferred and the scanner is accessible with its new IP address.
Note: Depending on the browser it is necessary to delete the browser cache before
the scanner is accessible.
Now enter the new IP address and open the login level Poweruser as described above
(chapter B.2 / B.3)
Setup and Assembly Manual Page 37

 Loading...