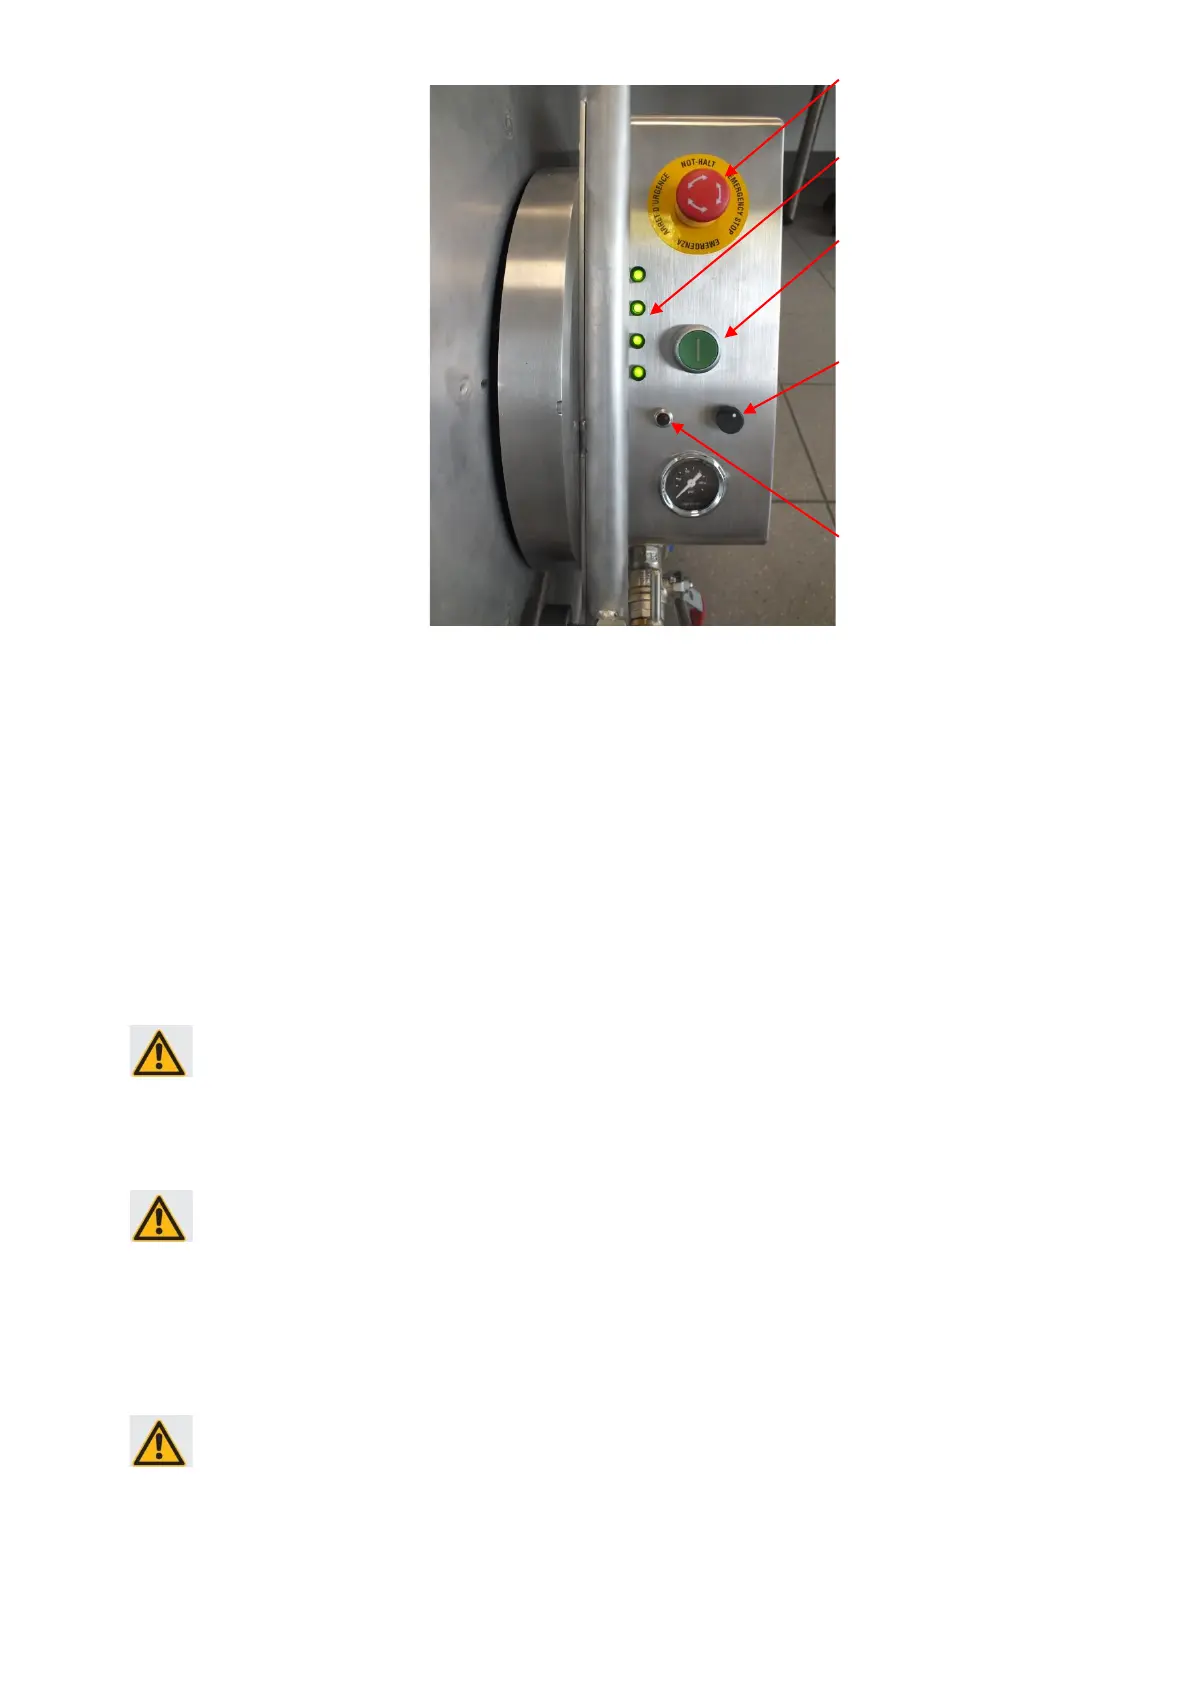
14
- The light on the cutter drive must switch on.
- After every disconnection of the cutter from the power supply, or activation of the
emergency stop button, the release button need to be pressed.
- Pressure monitoring of the cutter begins with connection of the power supply unit (After
approx. 10 seconds, the LED on the camera must flash 2 times. If the LED flash more
frequently and the flashing repeats every 30 seconds, then the nitrogen pressure is too
high or too low; maintenance is required.
- Pressure monitoring
- Connect the supply line from the compressor respectively the after cooler to the
coupling disc on the frame!
- Insert the cutter drive into an auxiliary pipe (approx. 1,5 m long)!
WARNING! Operating the device without an auxiliary pipe can cause injuries when
switching on compressed air, which in turn starts the cutter motor!
- Check that the shutoff valve on the drum is closed and the switch for the cutter motor
on the control unit is switched off!
- Switch the compressor on!
WARNING! Put on/insert ear protectors!
- Open the shutoff valve on the drum!
- Using the right joystick on the control unit to check the turning function (left and right
deflection) and stroke function (deflection away from and towards the operator)
- Using the left joystick on the control unit to check the driving function by steering up
and down.
WARNING! When driving backwards, hold the hose taut so as to activate the reverse
drive sensor. The reverse drive sensor can be fine-tuned at the eye bolt (see 4.2.2
Checking and fine-tuning of the reverse drive sensor)
- Check the light control, the potentiometer for the automatic hose drum (optional), the
switch for the pressure rail and the switch for the camera water flushing!