
R
Rachel RochaAug 18, 2025
What to do if I entered an invalid CODE on my INSYS CombiLock 200 simplex Locks?
- AAbigail JohnsonAug 18, 2025
If you've entered an invalid CODE for your INSYS Locks, simply re-enter both the PIN and the CODE.
What to do if I entered an invalid CODE on my INSYS CombiLock 200 simplex Locks?
If you've entered an invalid CODE for your INSYS Locks, simply re-enter both the PIN and the CODE.
How to replace low batteries in INSYS Locks?
If you receive a low battery warning for your INSYS Locks, replace the 2 x 1.5 volt MICRO batteries with Type AAA Alkaline batteries (non-rechargeable) as soon as possible. After the battery replacement, enter the PIN and code twice. Note that your codes will remain the same after you change the batteries.
What happens if I enter the wrong code too many times on my INSYS CombiLock 200 simplex?
If you incorrectly enter the code four times in a row on your INSYS Locks, a 10-second lockout period will be initiated. Each subsequent incorrect entry will extend the lockout by an additional 10 seconds. After the lockout concludes, enter the PIN and a valid code two times.
What should I do if the keypad on my INSYS Locks has been tampered with?
If the keypad of your INSYS Locks has been tampered with, the battery compartment has been opened, enter your PIN and CODE once again to open the electronic lock.
How to discontinue lockout time on INSYS CombiLock 200 simplex?
The lockout period for INSYS Locks cannot be interrupted or discontinued once it has started.
What to do if I made an invalid attempt to change settings on my INSYS CombiLock 200 simplex?
If a code change or the process of switching on or off an additional function was carried out incorrectly on your INSYS Locks, repeat the process.
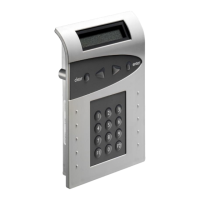
How to turn on INSYS CombiLock 200 simplex?
To switch on your INSYS Locks, press the power button for 2 seconds.
What to do if I enter the wrong code on my INSYS Locks?
If you enter the incorrect code four times in a row on your INSYS Locks, a 10-second lockout period will be activated. Each subsequent incorrect attempt will extend this lockout by an additional 10 seconds. After the lockout ends, enter your PIN and the correct code twice.
What to do if my INSYS Locks keypad has been tampered with?
If the keypad of your INSYS Locks has been tampered with, or the battery compartment has been opened, enter your PIN and code once again to open the electronic lock.
What to do if I get a low battery warning on my INSYS Locks?
If you receive a low battery warning on your INSYS Locks, replace the batteries soon with 2 x 1.5 volt MICRO batteries, Type AAA Alkaline (not rechargeable). After replacing the battery, enter your PIN and code twice. Your codes will remain the same after the battery change.
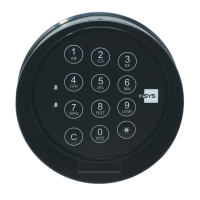
Enter 6-digit code to unlock the lock.
Lock opens within 10 seconds after code entry.
Close the door and turn the mechanism to the locked position.
Turn the panel counter-clockwise to the locked position.
High-level warnings about severe hazards and health risks.
Warning about the danger of locking people inside a container.
Risks associated with electric components and system damage.
Advice on changing default codes for enhanced security.
Caution against using guessable personal data for codes.
Step-by-step guide to unlock using a code.
Procedure for properly closing and securing the lock.
Steps to program or change the second user code.
Guide to modify the master code.
How to add or alter user codes.
How to disable the lock and its consequences.
How to re-enable a previously disabled lock.
Overview of RFID functionality in the lock.
Steps for opening the lock using an RFID tag.
How to program an RFID tag for a specific user.
Explains signals, their reasons, and comments.
Important precautions before beginning assembly.
How to calculate and shorten spindle A.
How to calculate and shorten spindle B.
Steps for drilling holes for the attachment ring.
Diagram showing dimensions for lock mounting holes.
Verifying and drilling bores for spindle variant A.
Mounting and securing the electronic lock to the spindle.
Step-by-step instructions for installing CombiXT.
Critical notes on using stabilized DC current and polarity.