VIAFLO 96/384 – Operating instructions V11 Operation
www.integra-biosciences.com 23
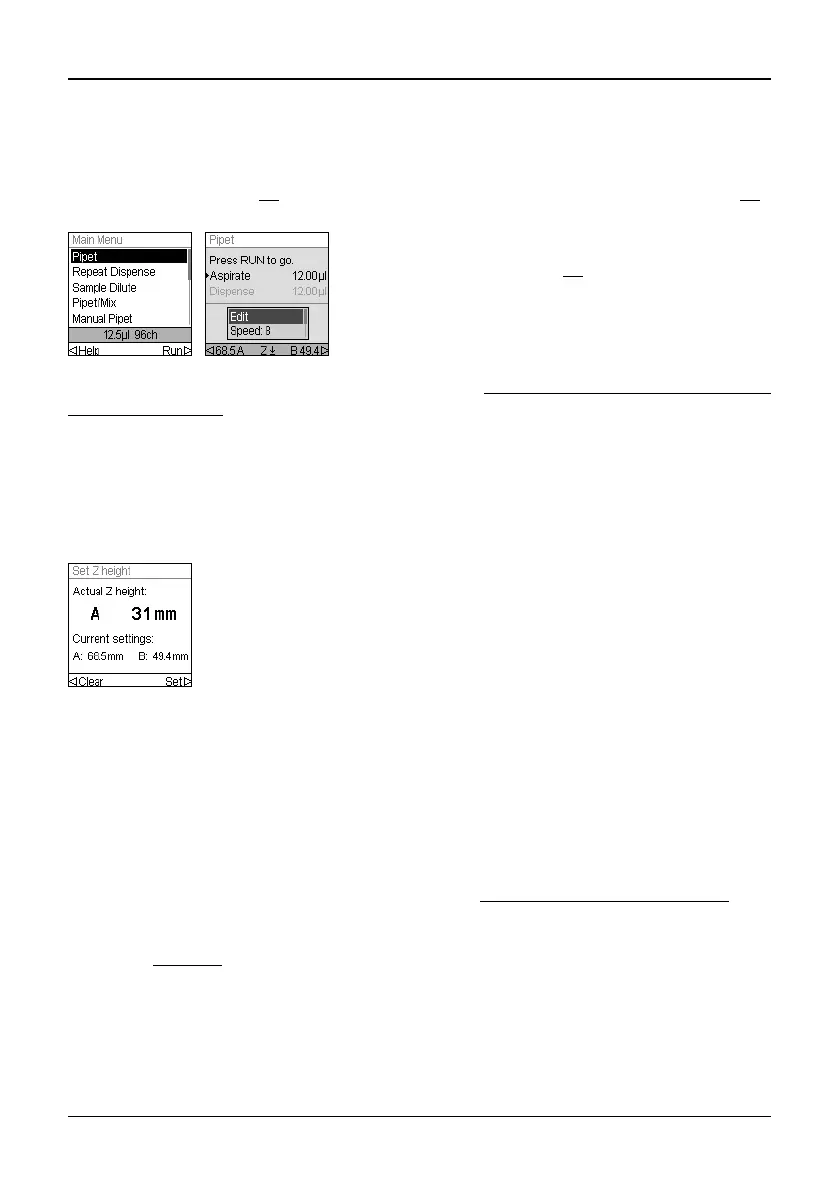
4.3 Start pipetting
4.3.1 Pipetting
Use the Touch wheel (13
) to scroll to your desired pipetting mode and press OK (14).
Actions you are about to perform will be displayed on the Run screen.
For a detailed description of all pipetting modes see “5.2
Detailed description of pipetting
modes” on page 32. You can change the parameters of your pipetting mode at any time,
see the following sections.
4.3.2 Set Z-Position
To define the optimal tip immersion depth, press or to access the Z-position
screen.Then move the pipetting unit to the target position (A, B) until the actual Z-height
and the current setting are displayed.
4.3.3 Blowout modes
During the last dispense of a program, a blowout is performed automatically to ensure
efficient liquid delivery. Liquid may be aspirated back into the tips when the pistons move
back to the home position, a process called blowin. There are two ways to perform the
blowin:
• Automatic blowout: Pressing (and releasing) the RUN key starts the dispense with
automatic blowout and blowin. You can choose a timed delay between the blowout and
the blowin, see “Pipetting - Delayed blowin” under “3.4.4
Preferences” on page 16.
• Two-step automatic blowout: Perform a two-step blowout to manually delay the
blowin:
- Press and hold
the RUN key to start dispense with blowout.
- Remove the tips from the target vessel.
- Release the RUN key to start blowin.
Insert the tips into the liquid to be transferred. Press
and release the RUN key (17) to aspirate the volume
selected in the first step of your protocol (shown on
the Run screen).
To execute subsequent steps, press the RUN key.
• Move the unit down to the desired dispensing height, e.g. 31 mm.
Select Set to enter this position and save your setting.
• Repeat this procedure with position B.