33 Conguring Salt Chlorine Generator Options
Chapter 7:
Configuring Salt Chlorine Generator Options
You must have an AutoPilot Salt Chlorine Generator and the manufacturer’s manual available to
complete this procedure.
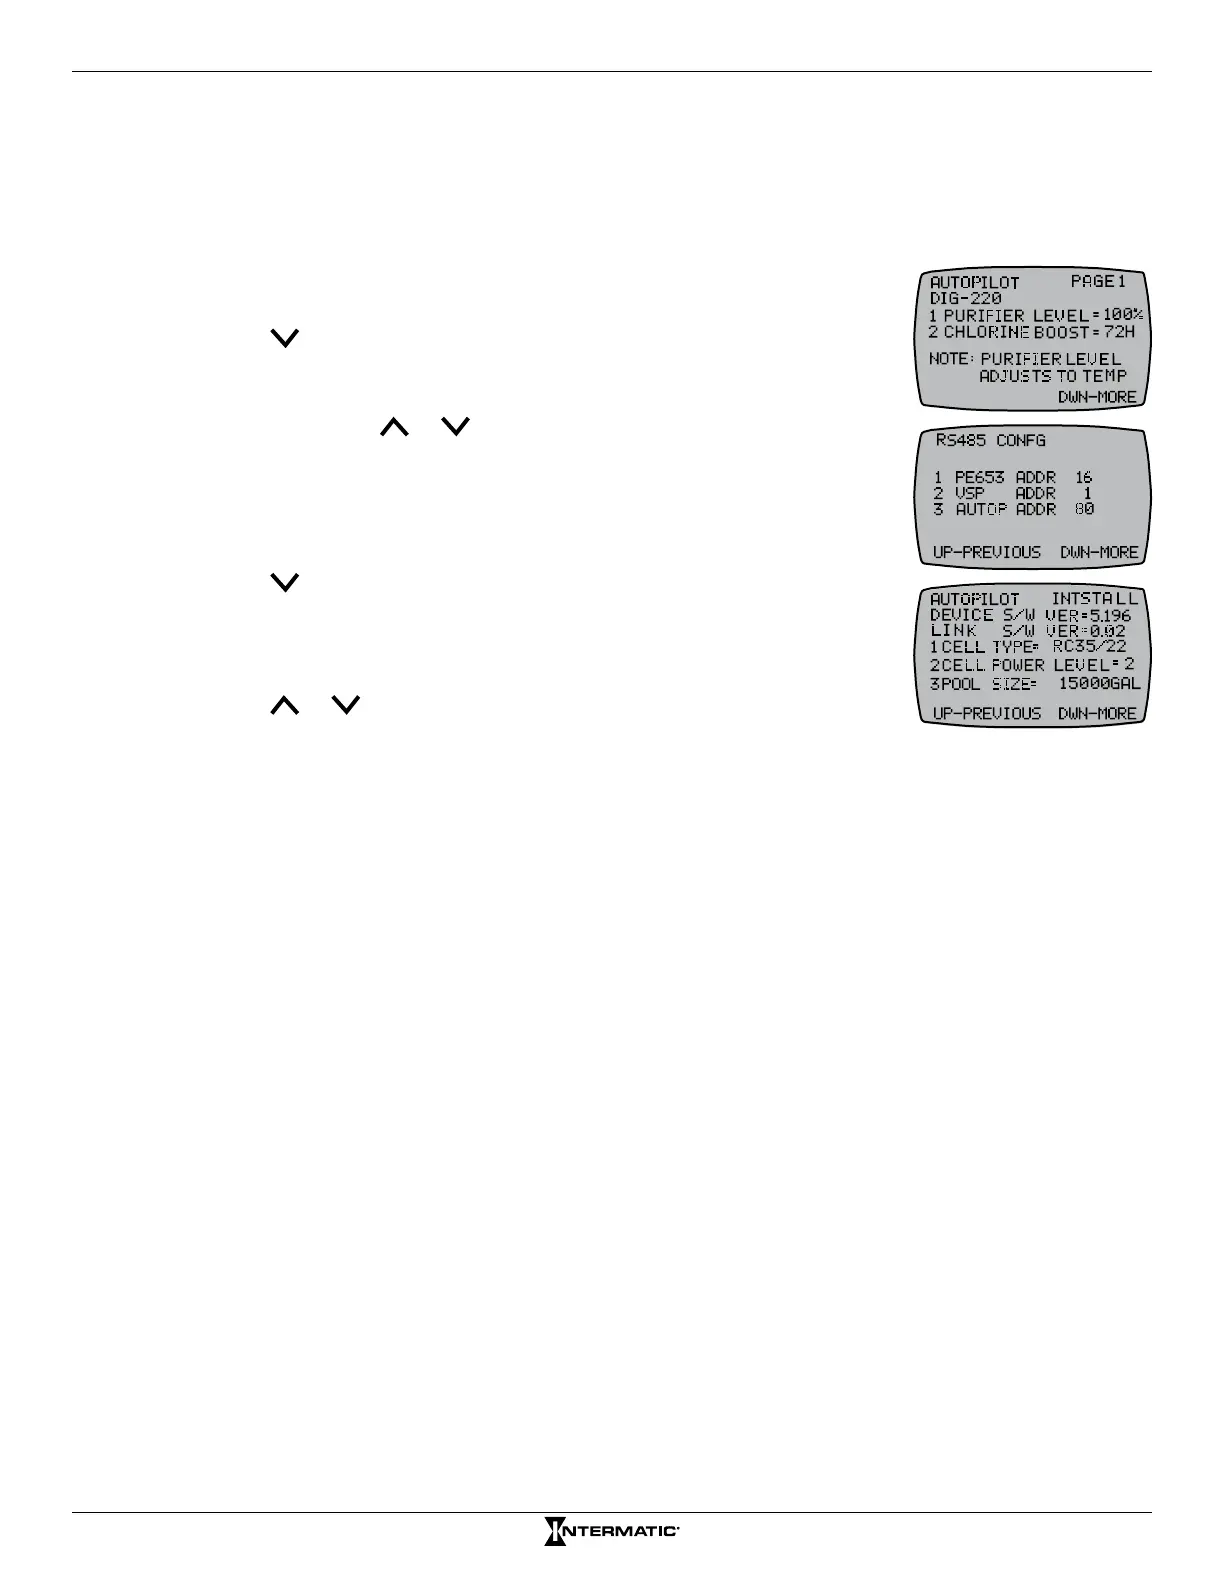
1. Press P/S and ENTER simultaneously to access LEARN MODE.
2. Press to scroll to the RS485 CONFIG screen.
3. From the RS485 screen, make sure 3 AUTOP ADDR (AutoPilot Salt
Chlorine Generator) is set to 80. If the generator is not set to 80, press
3 and then press or to adjust to 80.
4. Press ENTER to save address setting (Make sure the address
matches ADDR on SCG).
5. On the controller, press ENTER to scroll to the AUTOPILOT PAGE 1
screen.
6. Press to scroll to the AUTOPILOT INSTALL screen.
7. Determine the AutoPilot conguration (1 CELL TYPE, 2 CELL POWER
LEVEL, 3 POOL SIZE) that you want to adjust and press the button on
the controller to access the setting.
8. Press or to adjust the setting and then press ENTER. The
screen displays SUCCESSFUL and returns to the AUTOPILOT
INSTALL screen.
NOTE: Refer to the AutoPilot manufacturer’s manual for further information on adjusting
settings.
9. Repeat steps 7 and 8 as necessary to congure additional settings.
10. When you have made the desired adjustments, press ENTER to scroll to the main screen.