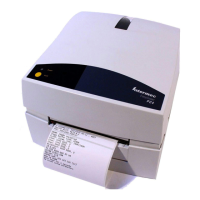
Intermec EasyCoder PC4—Service Manual 19
Chapter 4 —Print Fram
4.2 LED and Feed Switch
Description
e LED control lamp and Feed switch are fitted on the same Feed Switch
PCB inside a housing on the left side of the print frame. e board is con
-
nected to JP9 on the main board via a four cables that run inside the left
side hinge of the print frame. e control lamp shines through a transpar
-
ent window and the Feed switch is activated via a dome, both in the name
plate on the top cover.
Replacement
e Feed Switch PCB can be accessed for replacement by removing the
cable cover, which is held in place by a Phillips screw and a snap lock. e
Feed Switch PCB is inserted between two rails in the moulding and is cov
-
ered by an isolation sheet.
Green (solid) Media loaded
Ribbon loaded (TTR only)
Green (flashing) Receiving data
(T
est Mode only)
Red (solid) Out of media
Out of ribbon (TTR only)
Printer reset
Red (short flashes) Upgrading firmware
Ov
ertemperature
Red (long flashes) Media jam in cutter
Ov
erheated printhead or
stepper moto
r
Orange
Error condition detecte
d
Dark
Po
wer off
Color Meaning