24 Intermec EasyCoder PC4—Service Manual
Chapter 4—Print Frame
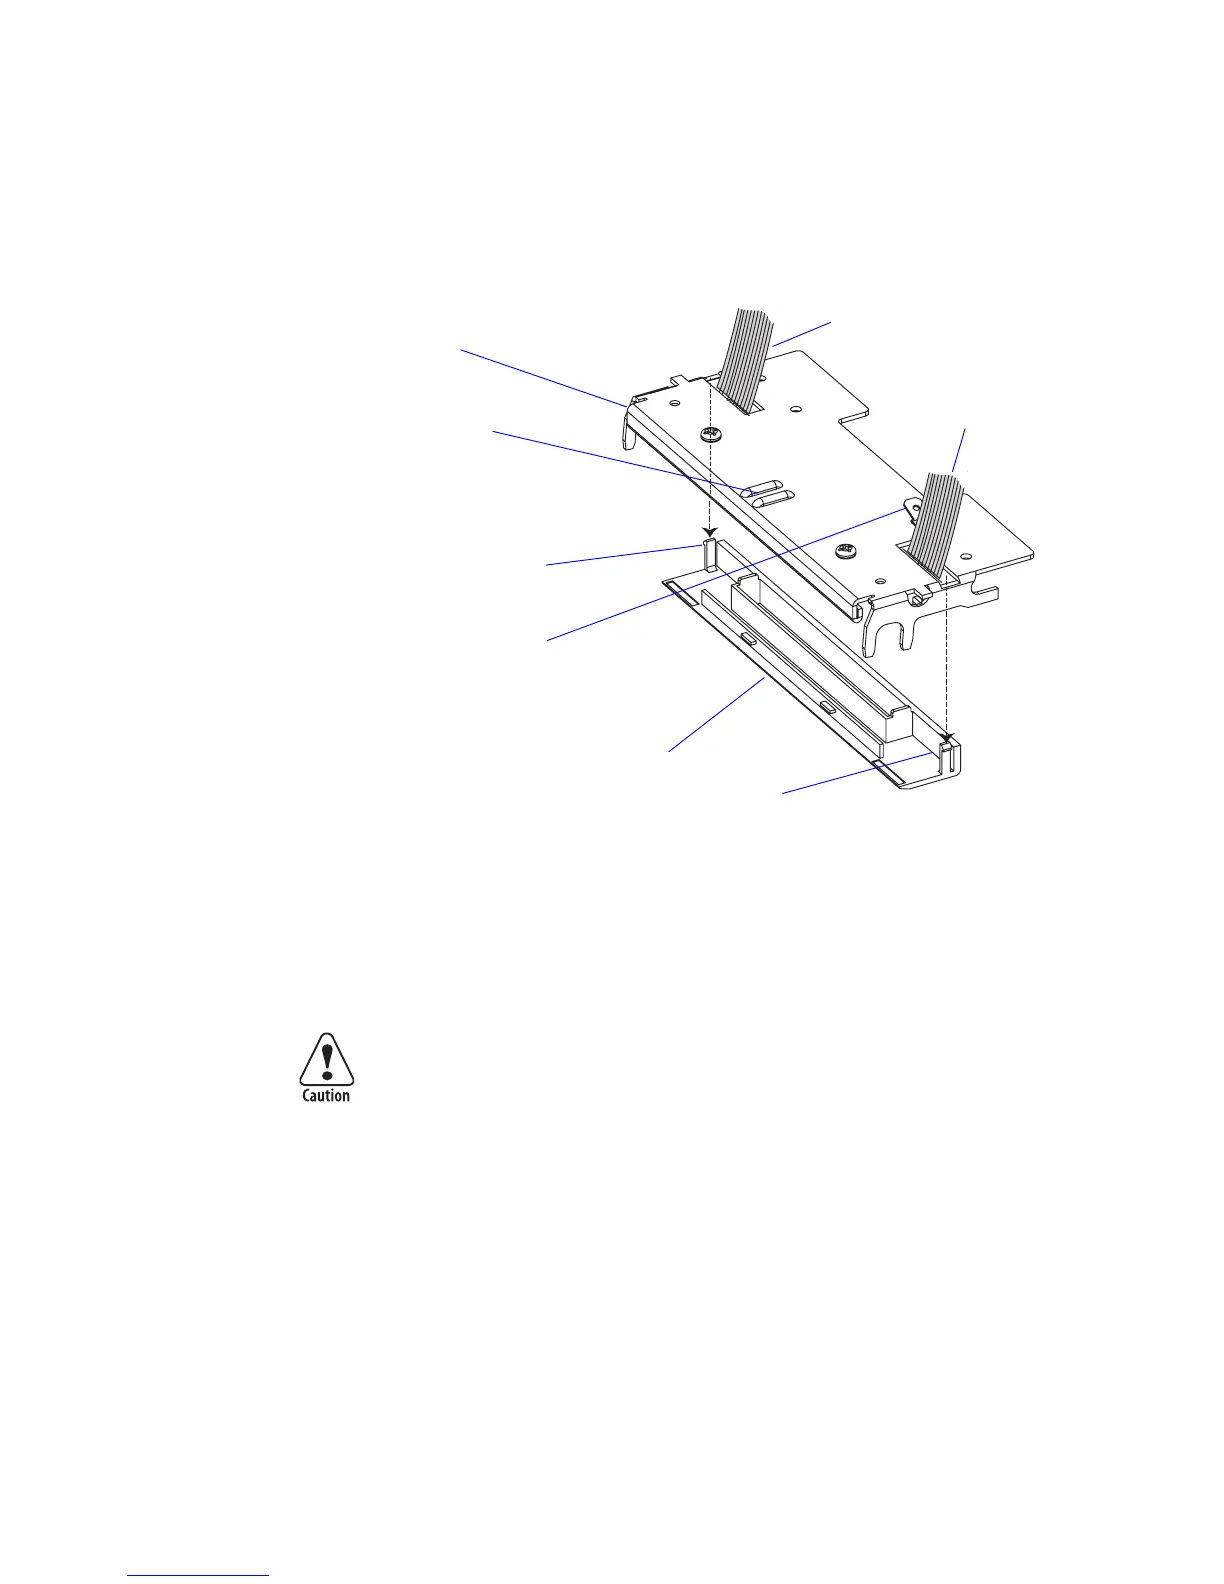
• Now the printhead assy is free but still connected by three sets of cables.
Disconnect the grounding cable.
• Carefully disengage the snap-locks that hold the printhead cover to the
printhead bracket and remove the cover.
• Disconnect the two remaining cables.
• Remove the V-spring.
• Now you can install the printhead assy in reverse order. e printhead
kit comes as a complete unit including printhead, bracket, cover plate,
ground terminal, screws, and V-spring.
Be careful not to touch the dots on the printhead and make sure that the
tip of the V-spring runs between the two guiding ridges on the printhead
bracket.
• Test that the printhead can move slightly up against the pressure force
of the V-spring. Finally, check that the printhead is working properly by
printing a test label as described in Chapter 10.2.
Printhead bracket
Cable to CNB
on Main Board
Printhead cover
V-Spring guides
Snap-lock
Snap-lock
Cable to CNA
on Main Board
Ground cable teminal