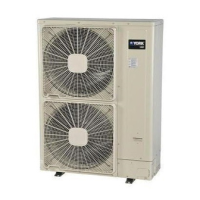
This document is a service manual for Inverter-Driven Multi-Split System Heat Pump and Heat Recovery Air Conditioners, specifically for Water Source Units. It covers models operating at 208/230V and 460V, including (H,Y)VWH(P,R)072B32S through (H,Y)VWH(P,R)216B32S for 208/230V, and (H,Y)VWH(P,R)072B42S through (H,Y)VWH(P,R)216B42S for 460V.
Function Description
The device is an inverter-driven multi-split system designed for both heat pump and heat recovery air conditioning applications. It utilizes water as a source for heat exchange, making it a water source unit. The system is designed to provide heating and cooling for various indoor environments.
Important Technical Specifications
Temperature Ranges:
- Indoor Unit Inlet Air Temperature:
- Cooling Operation Range: 59 (15) ~ 73 (23) °F WB (°C WB)
- Heating Operation Range: 59 (15) ~ 80 (27) °F DB (°C DB)
- Water Source Unit Entering Water Temperature: 50 (10) ~ 113 (45) °F (°C)
Electrical Characteristics and Recommended Wiring Size (208/230V):
- Models (H,Y)VWH(P,R)072B32S to (H,Y)VWH(P,R)216B32S:
- Frequency: 60 Hz
- Voltage Range: 208/230V (Min 188V, Max 253V)
- MCA (Minimum Circuit Ampacity): Ranges from 20/18A to 71/64A
- MOP (Maximum Overcurrent Protective Device): Ranges from 30/30A to 90/80A
- MOC (Maximum Operating Current): Ranges from 15.4/14.0A to 31.2/28.3A
- FRA (Fan Motor Running Ampacity): 0.08A for all models
- LRA (Locked Rotor Ampacity): 54A for single compressor models, 50A for
(H,Y)VWH(P,R)120B32S, and 54A for dual compressor models
- Recommended Wiring (Power Supply/Ground/Communication Cable AWG): Ranges from 14/14/18 to 4/4/18
Electrical Characteristics and Recommended Wiring Size (460V):
- Models (H,Y)VWH(P,R)072B42S to (H,Y)VWH(P,R)216B42S:
- Frequency: 60 Hz
- Voltage Range: 460V (Min 414V, Max 506V)
- MCA: Ranges from 11A to 37A
- MOP: Ranges from 15A to 50A
- MOC: Ranges from 8.0A to 16.3A
- FRA: 0.08A for all models
- LRA: 47A for all models
- Recommended Wiring (Power Supply/Ground/Communication Cable AWG): Ranges from 18/18/18 to 8/8/18
Refrigerant:
- Uses R410A refrigerant.
- Design pressure: 601 psi (4.15MPa).
- R410A pressure is 1.4 times higher than R22, requiring thicker refrigerant piping.
Compressor Type:
- Scroll Compressor.
- Models
(H,Y)VWH(P,R)072, 096B32S and (H,Y)VWH(P,R)072, 096B42S use one inverter compressor (DB65PHD-A2YC2 or DB65PHD-D2YC2 respectively).
- Models
(H,Y)VWH(P,R)120B32S and (H,Y)VWH(P,R)120B42S use one inverter compressor (DC80PHD-A2YC2 or DC80PHD-D2YC2 respectively).
- Models
(H,Y)VWH(P,R)144-216B32S and (H,Y)VWH(P,R)144-216B42S use two inverter compressors (DB65PHD-A2YC2 or DB65PHD-D2YC2 respectively).
Compressor Motor Resistance:
- DB65PHD-A2YC2: 0.094Ω at 167°F (75°C)
- DC80PHD-A2YC2: 0.089Ω at 167°F (75°C)
- DB65PHD-D2YC2: 0.343Ω at 167°F (75°C)
- DC80PHD-D2YC2: 0.346Ω at 167°F (75°C)
Electronic Expansion Valve (MV1 and MV4):
- Model: PAM-BBOYGHS-1
- Working Temperature Range: -22°F to 158°F (-30°C to 70°C)
- Refrigerant Used: R410A
- Coil Resistance: 100Ω (at 68°F (20°C))
Electronic Expansion Valve (MV3):
- Model: UKV-U029E or UKV-A027
- Working Temperature Range: -22°F to 158°F (-30°C to 70°C)
- Refrigerant Used: R410A
- Coil Resistance: 46±3Ω (at 68°F (20°C))
Electronic Expansion Valve (MVB):
- Model: UKV-U040E or UKV-A035
- Working Temperature Range: -22°F to 158°F (-30°C to 70°C)
- Refrigerant Used: R410A
- Coil Resistance: 46±3Ω (at 68°F (20°C))
Solenoid Valve:
- Coil Model: FQ-A0522G-000624
- Resistance: 2150Ω at 68°F (20°C)
Reversing Valve:
- Coil Model: STF-H01AQ23004UAA1
- Resistance: 1604Ω at 68°F (20°C)
Noise Filter (NF151Q for 208/230V):
- Rated Voltage: AC 208/230V
- Rated Current: 40A
Noise Filter (NF161Q for 460V):
- Rated Voltage: AC 460V
- Rated Current: 25A
Reactor (DCL1, DCL2 for 208/230V):
- Character: 0.7mH±15%, -10% (1KHz)
- Rated Current: 55A
- Direct Current Resistance: 20mΩ (68°F (20°C))
Reactor (DCL1, DCL2 for 460V):
- Character: 1.0mH±15%, -10% (1KHz)
- Rated Current: 35A
- Direct Current Resistance: 28mΩ (68°F (20°C))
Transformer (TF for 460V):
- Primary Rated Voltage: AC 460V 60Hz
- Secondary Rated Voltage: 230V
- Rated Power: 322VA
Usage Features
Interchangeability:
- Generation 2 change-over boxes are compatible with Generation 2 water source units.
Safety Precautions:
- Installation must be performed by Johnson Controls Inc. certified personnel, adhering to local codes and regulations.
- Use appropriate Personal Protective Equipment (PPE).
- Do not touch or adjust safety devices inside the units.
- Avoid moisture, dust, or variant refrigerant compounds in the refrigerant cycle.
- Install units at least 10 ft (3m) away from medical/electronic devices to prevent electromagnetic interference.
- Ensure proper condensate drainage to prevent leaks.
- Do not install units in areas with oil, corrosive gases, salt-laden airflow, or high acidity.
- Use nitrogen gas for airtight tests; avoid oxygen, acetylene, or fluorocarbon gases.
- Refrigerant R410A requires specific piping thickness.
- Never loosen threaded joints or open pressurized system parts while under pressure.
- Ventilate the room immediately if refrigerant gas leaks.
- Tighten flare nuts with a torque wrench to prevent leakage.
- Turn OFF main power switches before servicing electrical parts.
- Wait at least five minutes after ceasing operation before turning off the main power switch to allow residual voltage to dissipate.
- Communication cabling should be a minimum of AWG18 (0.82mm²), 2-Conductor, Stranded Copper, and shielded cable should be considered in high EMI areas.
- Install appropriate circuit breakers/fuses/overcurrent protection switches.
Operation Modes:
- Emergency Operation Mode: If a compressor fails, the wired controller can activate emergency operation, allowing continuous air conditioning with remaining compressors until troubleshooting is performed. This mode is available for specific alarm codes (06, 23, 48, 51, 53). Do not operate in emergency mode for more than eight hours.
- Forced Open Valve Mode: Used to simplify refrigerant recovery, evacuation, and airtight tests by fully opening expansion valves and solenoid valves. This mode is activated by setting DIP4-#4 on the main water source unit and pressing PSW4 for 3 seconds.
Controller Features (Wired Controller CIW01):
- Check Menu: Provides access to sensor conditions, alarm history, model information, PCB checks, and self-checking functions.
- Alarm History Display: Shows previous alarm records including date, time, and alarm code.
- I.U./W.S. PCB Check: Displays results of PCB checks for indoor and water source units.
- Self-Checking: Checks the wired controller and clears EEPROM. Includes LCD test, backlight test, contrast test, run indicator test, button input test, communication circuit test, thermistor test, date/time test, and EEPROM test/clear.
- Contact Information Registration: Allows registration of contact information.
7-Segment Display Features:
- Simple Checking: Displays expansion valve opening, temperature readings from thermistors, and number of indoor units connected.
- Alarm Code Indication: Flashes alarm codes and indoor unit numbers for malfunctions.
- Checking Mode: Allows checking of various operating conditions and system parts.
- Connecting Information: Displays total capacity of connected water source units and indoor units, connected unit numbers, refrigerant cycle number, and total compressor frequency/accumulated operation time.
- Water Source Unit Information: Displays water source unit number, capacity, input/output state, running frequency of compressors, expansion valve openings, pressures (Pd, Ps), various temperatures (entering water, discharge gas, plate heat exchanger liquid/gas, liquid stop valve, subcooler inlet, inverter, electrical box), compressor currents, and inverter stoppage cause codes.
- Indoor Unit Information: Displays indoor unit number, capacity, expansion valve opening, various temperatures (liquid pipe, gas pipe, inlet air, outlet air), and cause code of indoor unit stoppage.
- Alarm Code History Information: Displays up to 15 instances of alarm history in chronological order, including unit accumulated operation time, cause of stoppage, alarm code, and abnormal data indication.
External Input/Output and Function Setting:
- Input Functions:
- Fixing Heating/Cooling Operation Mode (Control Function No.1, 2)
- Demand Stoppage (Control Function No.3)
- Flow Switch Signal (Control Function No.4)
- Forced Stoppage (Control Function No.5)
- Demand Current Control (40%, 60%, 70%, 80%, 100%) (Control Function No.6-10)
- Low Noise Setting (1, 2, 3) (Control Function No.11-13)
- External Abnormality Detection (Control Function No.14)
- Output Functions:
- Operation Signal (Control Function No.1)
- Alarm Signal (Control Function No.2)
- Compressor ON Signal (Control Function No.3)
- Defrost Signal (Control Function No.4)
- Temperature and Pressure Unit Setting: Allows switching between °F/psi and °C/MPa.
Power Saving Functions (from Wired Controller):
- Power Saving Guide: Provides guidance for power saving settings.
- Water Source Unit Capacity Control: Reduces power consumption by controlling compressor frequency.
- Peak Cut Control: Reduces power consumption when it exceeds a set value.
- Moderate Control: Adjusts air conditioning capacity to not exceed a set power saving value.
- Rotation Control Function: Switches multiple indoor units to FAN mode in rotation.
- Intermittent Control Function: Repeats Cooling/Heating and Fan (Thermo-OFF) modes in fixed intervals (LOW, MED, HIGH power saving settings).
- Power Saving Schedule Function: Sets power saving schedules for capacity control and intermittent control.
- Operation Noise Reduction Schedule Function: Sets schedules for operation noise reduction.
- Power Consumption Display Function: Displays power consumption of the water source unit compressor in Graph/List format (day, week, year).
Maintenance Features
Product Inspection upon Arrival:
- Inspect for transit damage.
- Verify model number, electrical characteristics, and accessories.
- Contact local agent/contractor for installation, performance, or maintenance issues. Unauthorized modifications void warranty.
Water Piping Maintenance:
- Select piping according to local/national regulations.
- Use clean tap water or industrial water.
- Install condensate piping to proper drainage.
- Prevent water from dripping on service panels.
- Use with closed-type cooling towers.
- Install water strainer at the water inlet side of the product and clean it regularly.
- Perform thermal insulation on water inlet/outlet and piping to prevent sweating and freezing.
- Ensure correct connection of inlet and outlet pipes.
- Support piping and joints with extra bracing.
- Perform thorough leak inspection.
- Drain water from piping when shutting down the unit for long periods, especially in winter to prevent freezing.
Refrigerant Maintenance:
- Use only Johnson Controls approved refrigerants (R410A).
- Prevent moisture, dust, or different refrigerants from entering the refrigerant cycle.
- Use R410A approved pipes and joints.
- Perform refrigerant leak tests before installation is complete.
- Keep piping runs as short as possible.
- Dismantle refrigerant piping after the compressor stops for maintenance/relocation/disposal.
- Cover gaps between piping cover and pipes after insulation.
Electrical Maintenance:
- Refer to wiring diagrams and instructions carefully.
- Perform all electrical work according to manuals and regulatory standards.
- Open and tag all disconnect switches before servicing.
- Use specified cables between units.
- Check field regulations and standards for power supply protection.
- Communication cable: AWG18 (0.82mm²), 2-Conductor, Stranded Copper, shielded in high EMI areas.
- Use an exclusive power supply at the unit’s rated voltage.
- Install circuit breakers with specified capacity and tighten terminals securely.
- Clamp electrical wires securely.
- Do not apply tension to power lines.
- Ensure terminals do not contact the electrical box surface.
- Turn OFF main power supply before handling service connectors or opening service access covers.
- Do not clean or pour water into the controller.
- Check ground wire connection; do not connect to gas/water piping, lighting conductor, or telephone ground wiring.
- If circuit breaker/fuse trips frequently, shut down and contact service contractor.
- Check for residual voltage after disconnecting power supply.
- Equipment can be installed with a Ground Fault Circuit Interrupter (GFCI).
Component Removal and Replacement Procedures:
- Covers: Detailed steps for removing and attaching service cover, front cover, upper cover, rear cover, pipe cover, side covers, and electrical box cover.
- Electrical Box: Procedures for removing radiation plate from inverter PCB, wiring, disconnect connectors, and the entire electrical box.
- Compressor: Steps for recovering refrigerant, removing Td thermistor, soundproof cover, retaining nut for terminal box cover, compressor power wiring, crankcase heater, discharge pipe, s-pipe, oil discharge pipe, and the compressor itself. Includes instructions for measuring oil quantity and brazing.
- Plate Heat Exchanger: Steps for removing covers, Ta thermistor, MV4, HEX plates, and disconnecting HEX refrigerant inlet/outlet pipes.
- Refrigerant Oil: Procedures for replacing refrigerant oil, including collecting refrigerant, charging nitrogen, vacuuming, and adding new oil.
- Expansion Valve and Solenoid Valve Coils: Steps for removing covers and then the coils for MV1, MV3, MV4, MVB, SVA, SVB, SVC, SVG, RVR1, RVR2.
- Solenoid Valve Body: Procedures for removing covers, collecting refrigerant, removing coils, brazing, and reassembling.
- Stop Valve: Steps for removing covers, collecting refrigerant, brazing, and removing stop valves.
- High Pressure Switch, Pressure Sensor, Low Pressure Sensor, Thermistors: Procedures for removing covers, collecting refrigerant (for pressure switch), disconnecting wiring, and removing components. Includes torque specifications for pressure sensors.
- Other Electrical Components: Steps for removing control PCB, inverter PCB, noise filter, reactor, terminal blocks, main power PCB, and cooling fan. Includes warnings about electrical discharge and matching terminal numbers during reassembly.
- Change-Over Box Components: Procedures for removing service cover for electrical box and electronic expansion valve, and electrical components (PCBs, terminal blocks).
Test Run Procedures:
- General Checks: Inspect for damage, correct fan installation, secure fasteners, no refrigerant leaks, correct DSW settings, and insulation resistance.
- Water Piping Test Run: Ensure proper water piping, clean strainer, no air in system, correct water flow rate, and check for leaks.
- Wired Controller Test Run (CIW01): Initiates test run mode, checks for connected units, and performs various checks.
- Water Source Unit Side Test Run: Initiates test run mode from the water source unit, checks for automatic indoor unit operation, and continues for two hours without Thermo-OFF.
- Checking the Test Run: Verifies indoor and water source fan rotation, power supply voltage, normal operating pressure, and high pressure switch activation.
- Checklist for Refrigerant System: Detailed checklist for verifying expansion valve opening, operating frequency, and various temperatures and pressures.
- Reset for Accumulated Operation Time of Compressor: Procedure to reset compressor operation time after maintenance.
- Setting of Forced Open Valve Mode: Procedure to open valves for refrigerant recovery/evacuation/airtight test.
Service and Maintenance Record:
- Templates for recording information from 7-segment display and wired controller, including operation mode, alarm codes, temperatures, pressures, currents, and accumulated operation time.
Refrigerant Curves:
- Saturation Curve for R410A.
- Mollier Chart for R410A.