SM-18006
4-41
MAINTENANCE
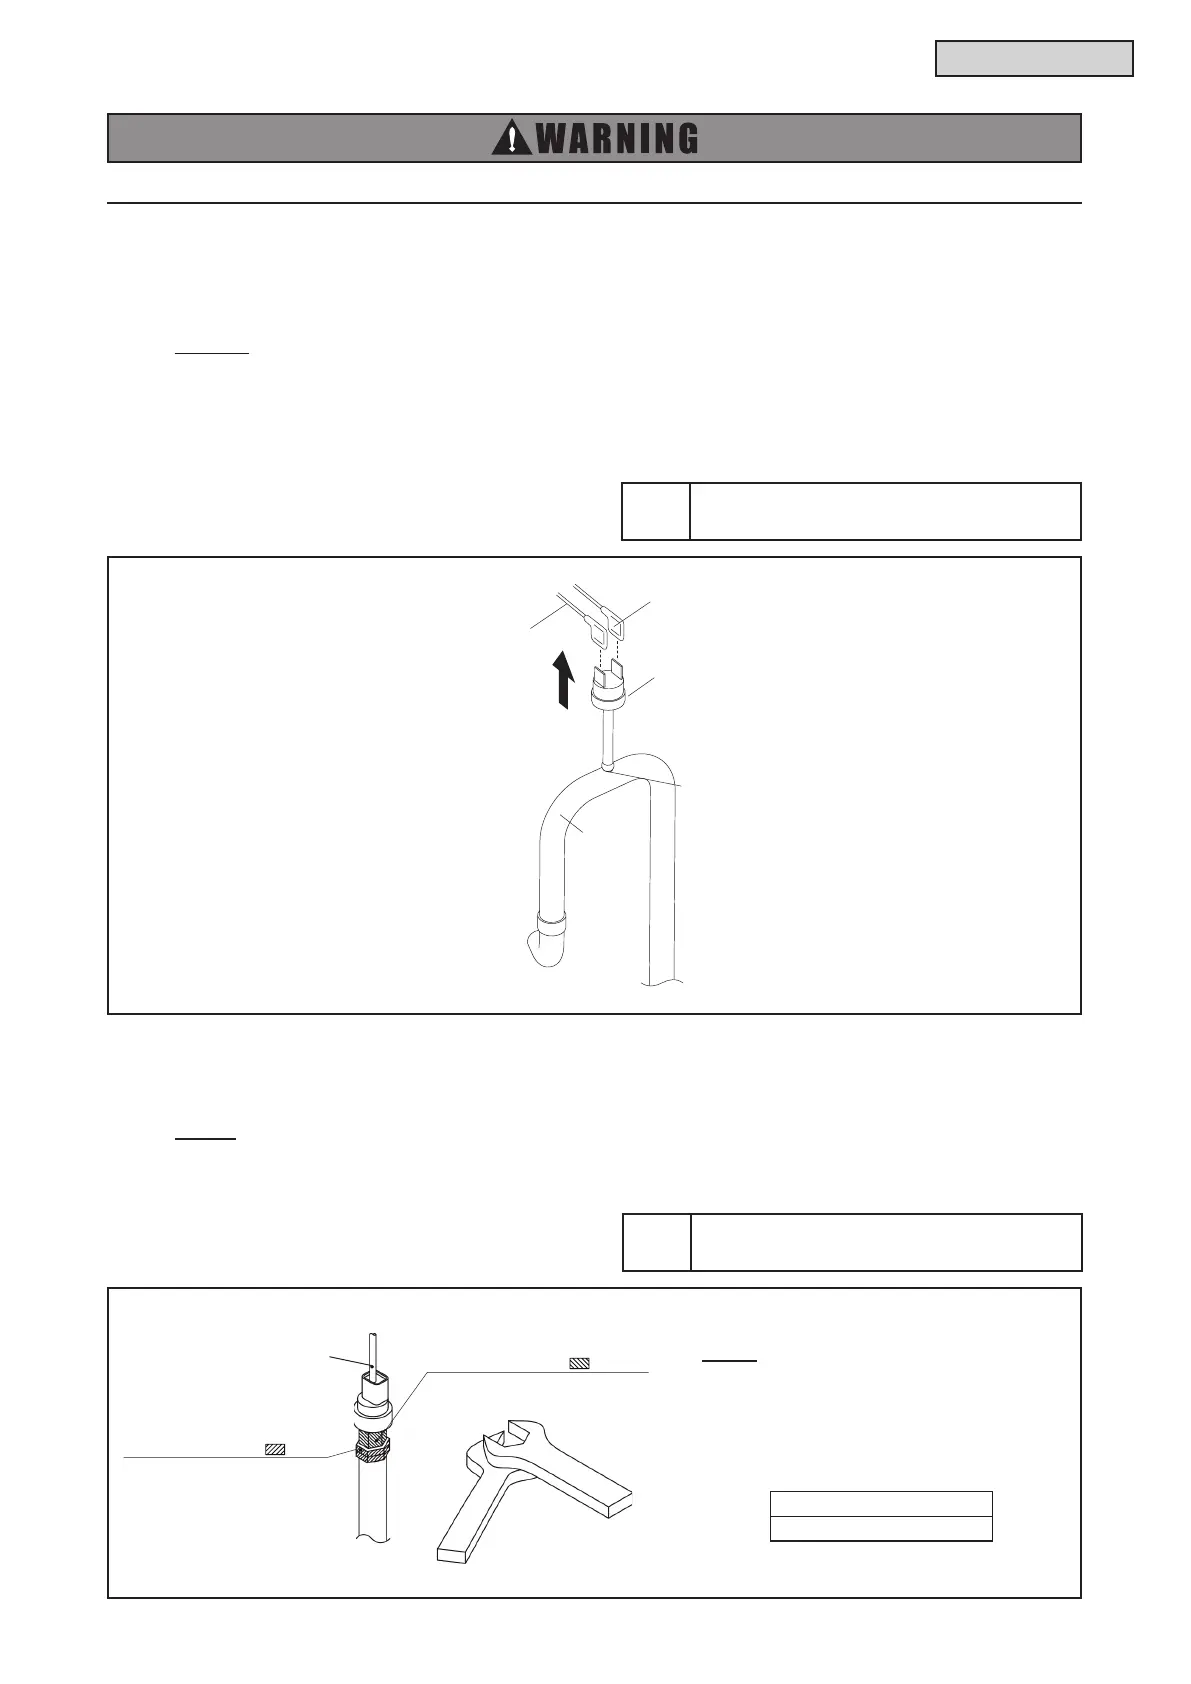
4.1.14.1 Removing High Pressure Switch (PSH1 and PSH2)
(1) Collect the refrigerant.
(2) Disconnect wiring for the high pressure switch from high pressure switch.
(3) Remove the high pressure switch from the brazing part of the discharge pipe with a torch.
NOTES:
● To prevent water and foreign particles from entering the refrigerant cycle, mount the new high
pressure switch immediately after removing the old one. If it is not possible, seal the hole with tape.
● Check that wiring for the high pressure switch do not contact with the piping and sheet metal.
● Make sure to secure the insulating sleeve of the faston terminals as shown in the gure below.
TURN OFF all POWER supply switches.
4.1.14.2 Removing High Pressure Sensor (Pd) and Low Pressure Sensor (Ps)
(1) Remove the connectors for the pressure sensor wiring from control PCB.
NOTE:
First, remove the connectors. If not, the wiring may be damaged.
(2) Remove the refrigerant piping for the high pressure sensor or low pressure sensor using two
wrenches.
Tool
Torch, Adjustable Wrench or Ratchet,
Phillips Screwdriver, Pliers
be within 3 times.
Tightening Position ( )
Wrench Size: 1/2 inch (12mm)
Tightening Position ( )
Wrench Size: 9/16 inch (14mm)
Tool
Adjustable Wrench or Ratchet,
Phillips Screwdriver, Pliers
Faston Terminal
(PSH1, PSH2)
Wiring for High
Pressure Switch
Brazing Part
Discharge
Pipe
Compressor
NOTE:
Tightening torque differs depending on the
model of the pressure sensor to be used.
Make sure to check the order number and the
recommended tightening torque for the model
when connecting the refrigerant piping.
Torque for Tightening
11.1 lbf.ft (15N.m)



 To Next Page