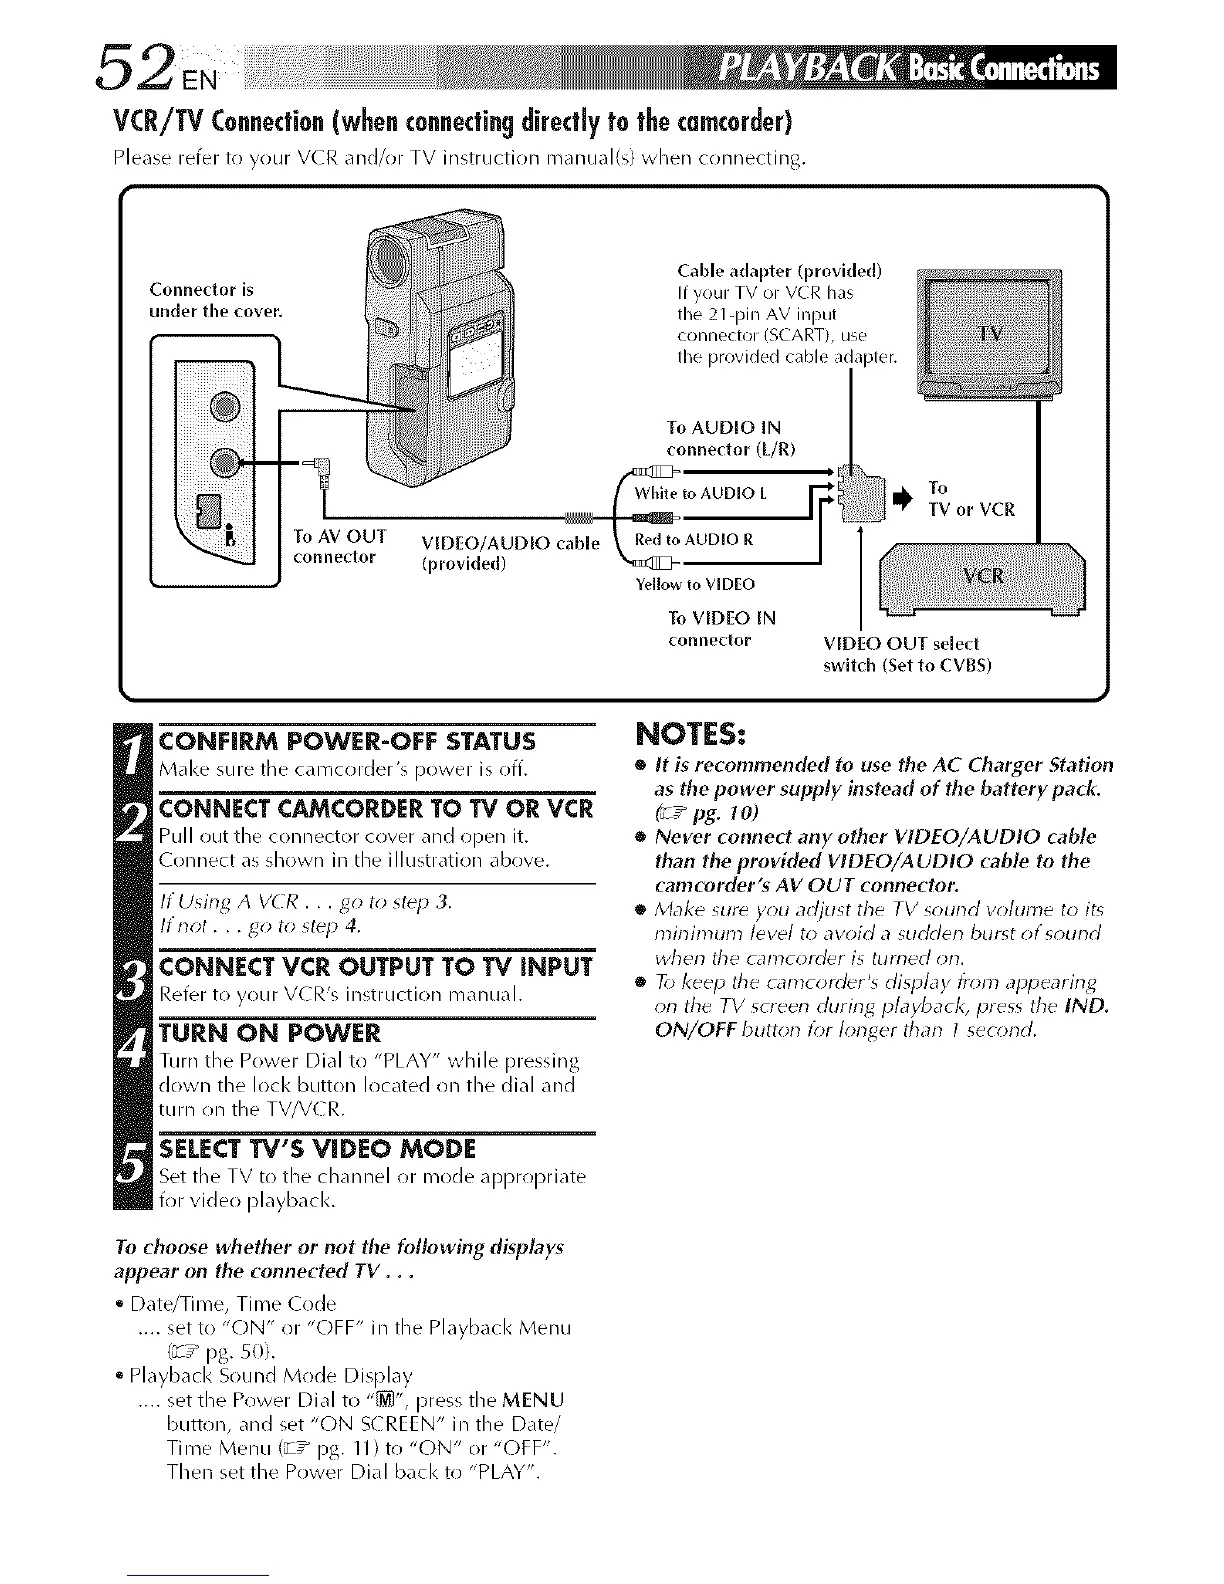
VCR/TVConnection(whenconnectingdirectlyto the cmcorder}
Please refer to _our V(R and/or TV instruction manual(s) when connecting.
Cable adapter (provided)
If your TV or VCR has
the 21-pin AV input
connector (SCART), use
tile provided cable adapter.
To AUDIO IN
connector (L/R)
White to AUDIO L -I, To
"F TV or VCR
ViDEO/AUDIO _ AUDIO R 1
(provided)
/
Yellow to VIDEO
To VIDEO IN
connector VIDEO OUT select
switch (set to cVBS)
CONFIRM POWER-OFF STATUS
Make SLIre the camcolder_s po'_ver is o((.
CONNECTCAMCORDERTO TV ORVCR
Pull out the connector cover _./d open it,
Connect as shown in tile illustration above.
If LJsing A VCR . . . go to step 3.
If not.., go to step 4.
CONNECT VCR OUTPUT TO TV iNPUT
Refer to your VCR's instruction manual.
TURN ON POWER
Turn the Power Dial to "PLAY" while pressing
down :he locl< button located on the dial and
turn on the TV/V( R.
SELECT TV'S VIDEO MODE
Set tile TV to the channel or rhode appropriate
for video playbacl<.
To choose whether or not the following displays
appear on the connected TV. . .
• Date/Time, Time (ode
.... set to "(-)N" or "OFF" in the Playback Menu
(_7 _ pg. 50).
• Playback Sound Mode Display
.... set the Power Dial to "_", press the MENU
button, and set "ON S( REEN" in the Date/
Time Menu (_-T_ pg. 11) to "ON" or "(-)FF".
Then set the Power Dial back to "PLAY".
NOTES:
• It is recommended to use the AC Charger Station
as the power supply instead of the battery pack.
(_ / pg. 1 O)
• Never connect any other VIDEO/AUDIO cable
than the provided VIDEO/AUDIO cable to the
camcorder's AV OUT connector.
• Make sure you adjust the TV sourld w>lume to it_
cninin_um level to avoid a sudderl burst of sourld
whorl tile camcorder is turned orr
• To keep the _alTtcorder's display from alJpearing
on the TV screen during playback, press the IND.
ON/OFF buttorl tbr Iorlger tharl 1 seo;rld.