10.4.6.1 Changing the Oil Separator Cartridge
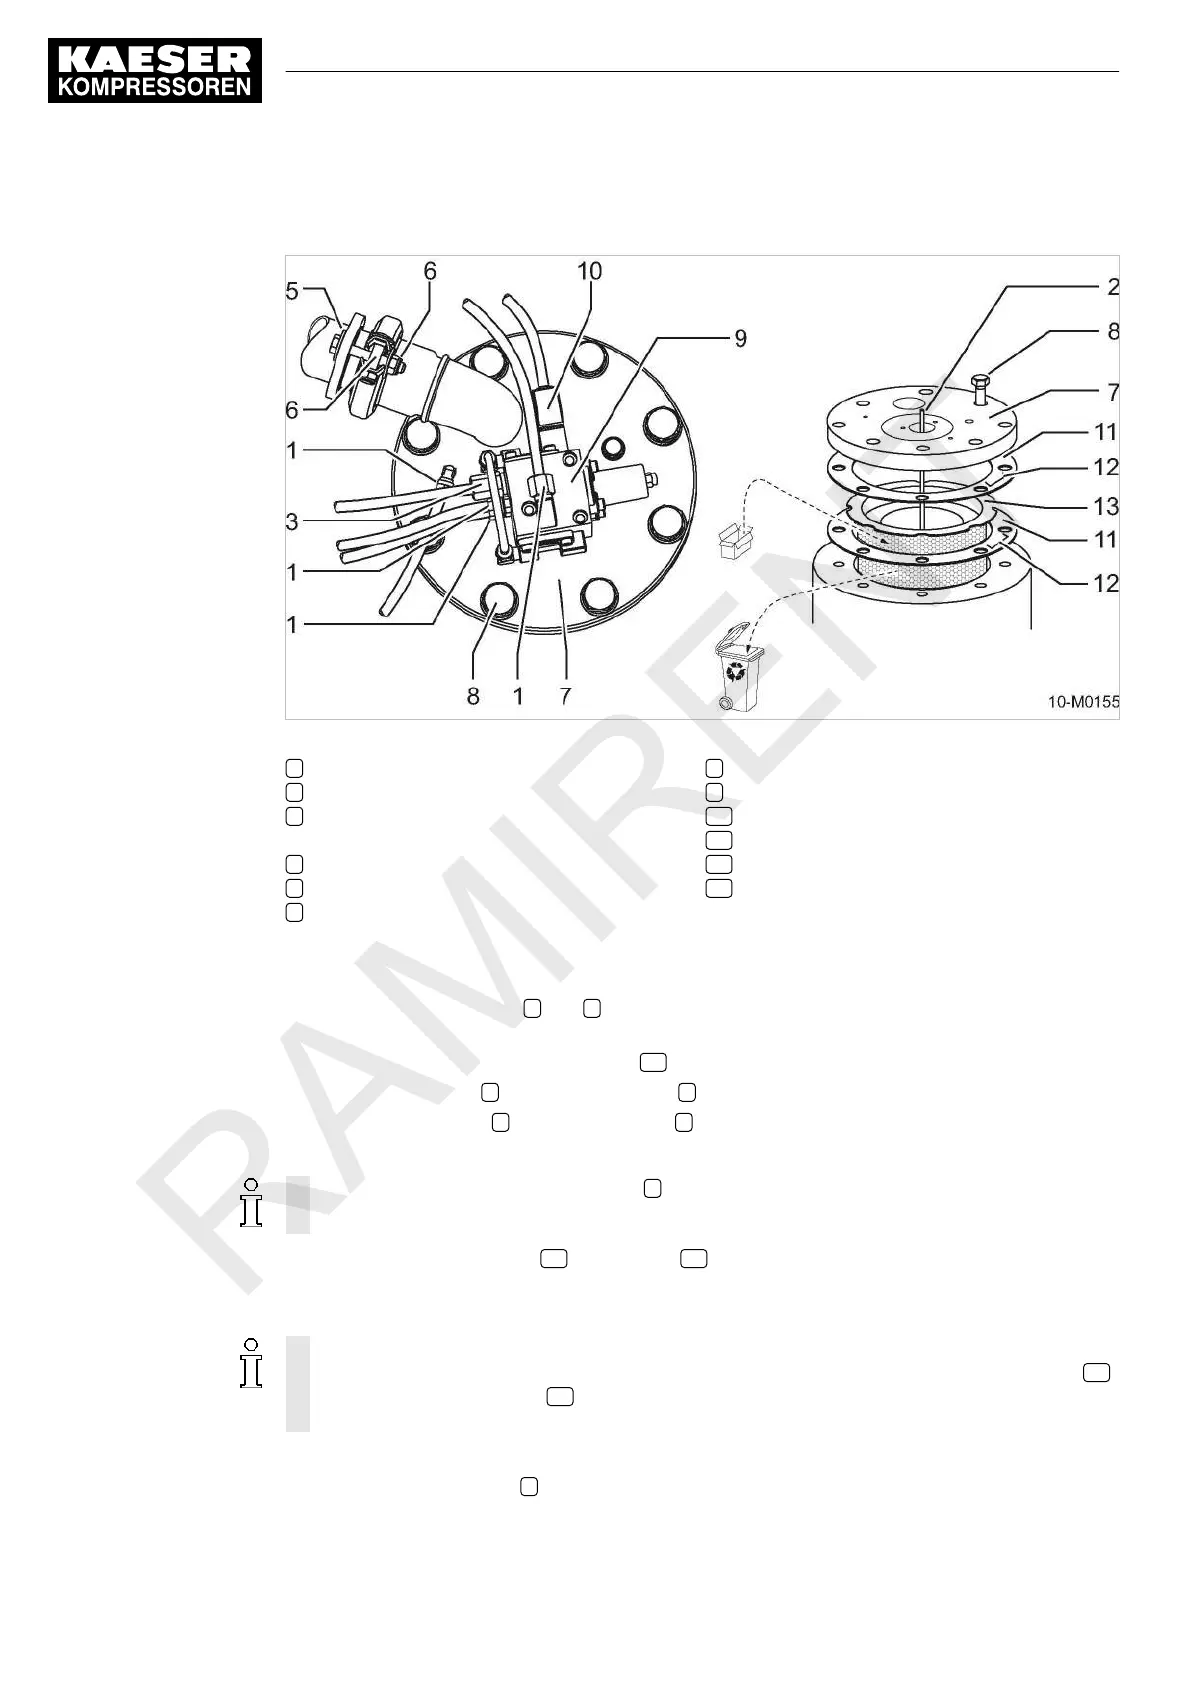
Fig. 57 Changing the Oil Separator Cartridge
1 Control air line union nut
2 Oil scavenge pipe (screwed to the cover)
3 Oil scavenge pipe union nut (screwed to
the dirt trap)
5 Air pipe
6 Pipe fitting
7 Cover
8 Fixing screw
9 Control valve
10 Solenoid valve plug
11 seal
12 Metal clip
13 Oil separator cartridge
Changing the oil separator cartridge
1. Unscrew the union nuts 1 and 3 and place the components with connections carefully to one
side.
2. Pull out the plug to the solenoid valve 10 and withdraw the cable.
3. Unscrew the fitting 6 and turn the air pipe 5 to one side.
4. Remove the screws 8 securing the cover 7 to the tank.
5. Carefully lift the cover and put to one side.
Take care that the oil scavenge pipe 2 screwed to the underside of the cover is not bent in
the process.
6. Take out the old cartridge 13 and gaskets 11 .
7. Clean all sealing surfaces, taking care that no foreign bodies (dirt particles) fall into the oil sep‐
arator tank.
Do not remove the metal clips!
The metal parts of the oil separator cartridge are electrically interconnected. The gaskets 11
are fitted with metal clips 12 that fulfil this requirement and provide an electrical path to the
oil separator tank and to the frame of the machine.
8. Insert the new oil separator cartridge with gaskets and screw down the cover.
9. Re-position the air pipe 5 .
10 Maintenance
10.4 Compressor Maintenance
130
Operator manual Portable compressor
M 64
No.: 9_5898 26 E
 Loading...